
Tools and Materials
Tools
- Drill Driver & Bits
- Circular Saw
- Jigsaw
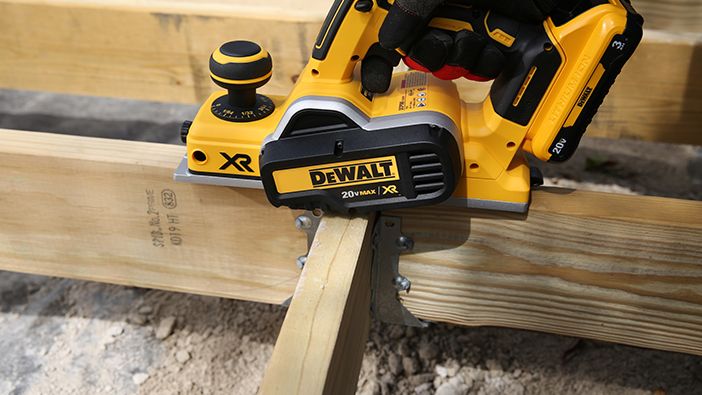
- Handheld Planer
- Miter Saw
- Hammer
- Staple Gun
- Tin Snips
- Utility Knife
- Tape Measure
- Speed Square
- Framing or Carpenter's Square
- Torpedo Level
- 48-in Level
- Clamps
- Saw Horses
- Round-Point Shovel
- Transfer Shovel
- Tamper
- Garden Rake
- Wheelbarrow
- Work Gloves
- Eye Protection
- Hearing Protection
- Dust Mask
- Pneumatic Palm Nailer (Optional)
- Portable Air Compressor
- Pneumatic Stapler
Materials
- 2-in x 6-in Pressure-Treated Lumber (Actual: 1-1/2-in x 5-1/2-in)
- 2-in x 8-in Pressure Treated Lumber Rated for Ground Contact (Actual: 1-1/2-in x 7-1/4-in)
- Concrete Deck Blocks
- Concrete Cap Blocks
- Paver Base
- Joist Hangers
- Double Joist Hangers
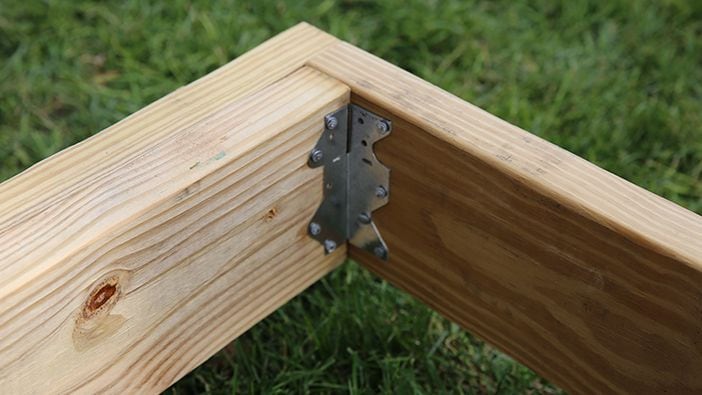
- Corner Brackets/Framing Angles
- 1-1/2-in Hot-Dipped Galvanized Joist Hanger Nails
- Structural Wood Screws
- 3-1/2-in Hot-Dipped Galvanized Nails
- Joist Hanger Screws Rated for Pressure-Treated Lumber (Optional)
- Coated Deck Screws
- Shed Anchor Kit
- Eye-Head Exterior Lag Screw
- Roll Flashing/Waterproof Tape
- Welded Wire Fencing/Hardware Cloth
- Landscape Fabric & Pins
- Black Spray Paint
Product costs, availability and item numbers may vary online or by market.
About the Deck Frame

The deck frame will be made with pressure-treated lumber to resist decay along with zinc-coated hardware and galvanized fasteners to resist corrosion and rust. Make sure your hardware is intended for use with pressure-treated lumber.
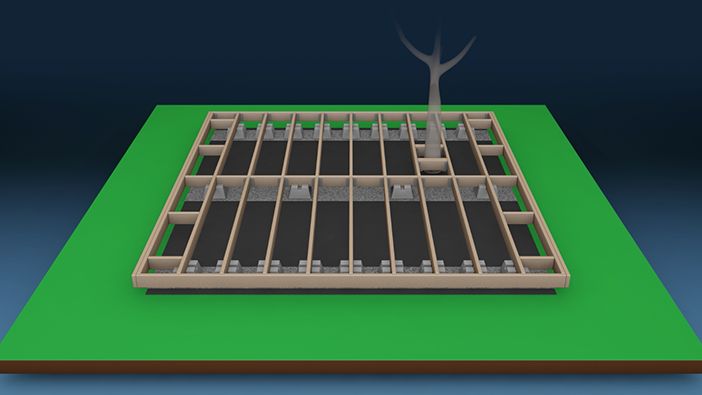
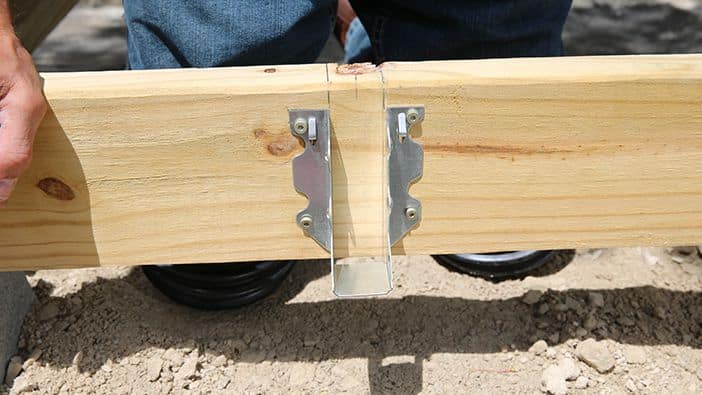
For this deck, there’s one long joist at each side resting on the blocks. The rim joists will run perpendicular to these boards, supported by the perimeter blocks you set in place earlier. There’s also a center beam running between these boards and supported by a few blocks. Our floor joists will sit on blocks set near the rim joist and will be attached at the rim joist and beam with joist hangers.
On the sides, we’ll secure double-end joists running between the ends of the rim joists and use sleepers along each side. The sleepers are short pieces of lumber that'll connect the side joists to the double-end joists, adding support.
Wear eye protection, hearing protection and a dust mask when cutting lumber or composite material. Follow the tool manufacturer's instructions for use and safety.
This is the second part of our How to Build a Floating Deck series. To watch the framing process, take a look at the framing portion of our floating deck video. To plan and lay out the deck and watch a video of the entire project, see the first part of the series: Planning a Floating Deck. If you've finished the frame, it's time to add the decking. See the third and final part of the series: Installing Decking for a Floating Deck.
Measuring and Cutting the Lumber
Begin by cutting the frame elements to size and laying out the floor joists.
Building a floating deck involves working with heavy, unwieldy materials. Enlist a helper.
Instructions


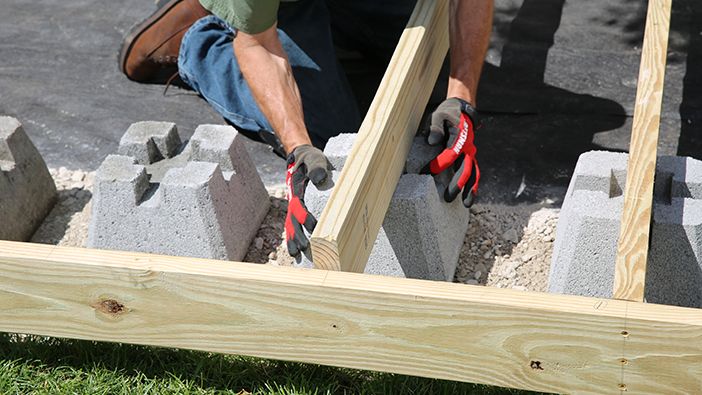
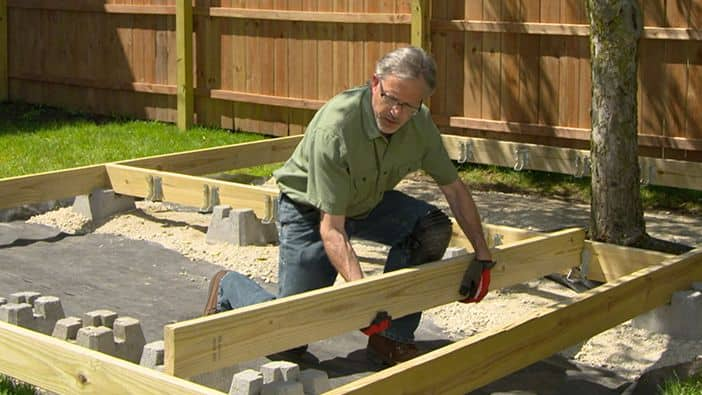
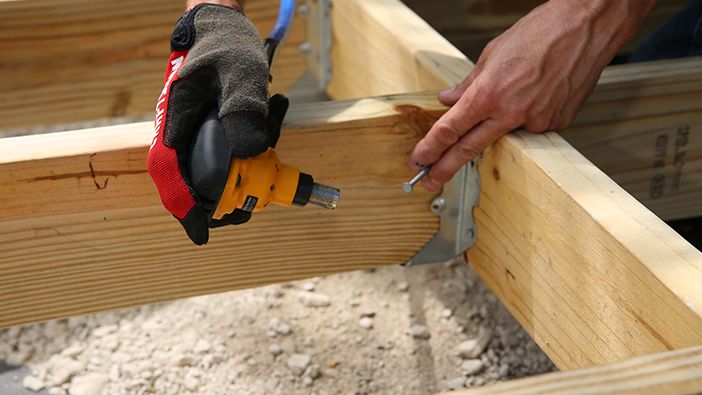
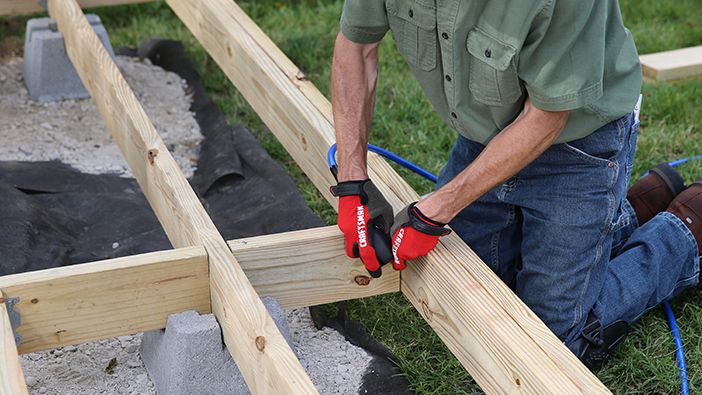
Assembling the Frame
Begin fitting and assembling the frame elements.
Instructions
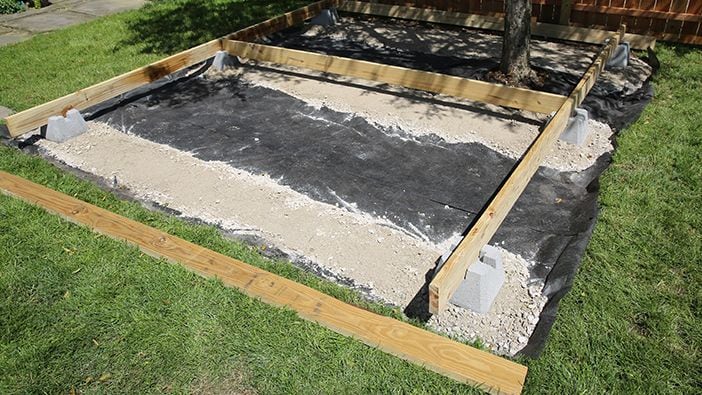


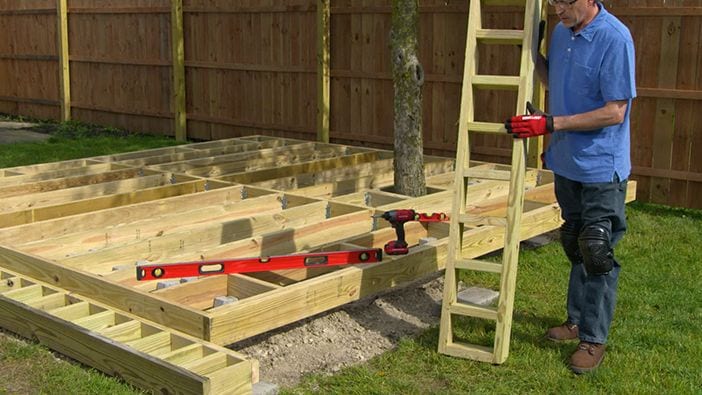
Installing the Floor Joists
With the frame squared, you can begin installing the floor joists.
Instructions

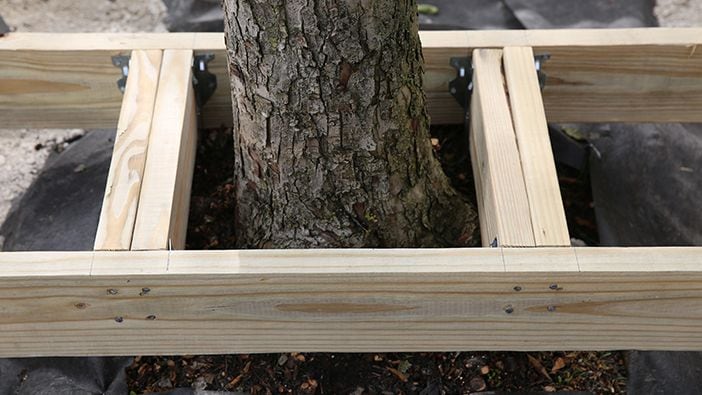
Framing Around a Tree
We’re building this deck around a small tree, and we planned our framing so the floor joists would go around the tree. Now we need to complete the framing around the tree.
Instructions


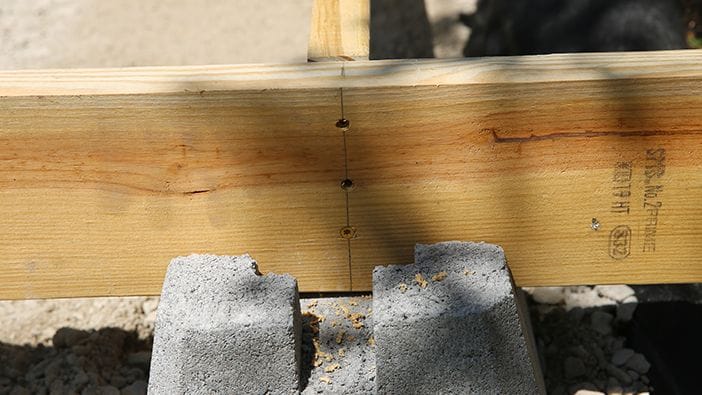
Installing the End Joists
Next, install end joists that'll run parallel to the floor joists, connecting the two rim joists. For this deck, we’re doubling up the end joists for a stronger frame.
Instructions

Installing the Deck Steps
This deck will have steps that run along the front and the sides.
Instructions


Final Framing Steps
With the frame for the deck in place and the step frames attached, there are few things you need to do before you install the decking.
Instructions


Next Steps: Installing the Decking

The frame is complete and ready for the steps and decking boards. The next part of our How to Install a Floating Deck series shows you how. The deck will have composite deck boards and composite fascia boards covering the framing. See Installing Decking for a Floating Deck.