
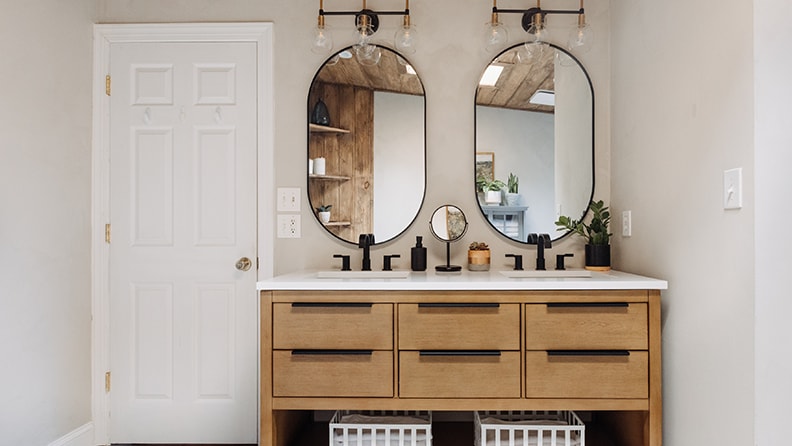
Tools and Materials
Product costs, availability and item numbers may vary online or by market.
How to Replace a Bathroom Vanity and Sink
We’ve got general steps for removing the existing vanity and installing a new bathroom vanity with a sink below but always follow the installation instructions for your vanity.
In most cases you can install a new bathroom vanity using the existing plumbing. If you need to reroute any plumbing, it’s best to hire a professional, licensed plumber to do the work. Then you can continue installing your new vanity.
Don’t have time to do this project yourself? Check out our professional vanity installation service.
Choose Your New Bathroom Vanity and Sink
Choosing a new bathroom vanity starts with measuring your existing vanity. Bathroom vanities come in standard sizes, so find the correct size before you get too attached to a certain style of vanity.
If you haven’t selected a new bathroom vanity yet, read our shopping guide to see how a small vanity can make a big impact on a bathroom refresh. Consider a bathroom vanity set or shop collections of vanities plus a matching mirror, lights and faucets.


Remove the Existing Vanity and Install the New One
Step 1: Disconnect the Bathroom Sink

Start by turning off the water supply valves to the existing bathroom sink and opening the faucet to confirm the water is off and relieve any remaining pressure. Under the sink, there’s a drainpipe that goes into a curved section, called the P-trap. Place a pan or small container under the P-trap to catch water. Loosen the nut at the top of the P-trap and pull the trap down off the sink’s drainpipe. You may need to loosen the nut connecting the P-trap to the house drain and remove the trap completely.

Disconnect the water lines from the valves. You’ll need to catch some water when you disconnect the lines. If the nut connecting a supply line to a shutoff valve doesn't loosen easily, use a second wrench to hold valve steady as you turn the nut.
Step 2: Remove the Vanity and Repair the Wall

Use a utility knife to cut the caulk or sealant that connects the sink’s backsplash to the wall. Remove the screws that hold the bathroom vanity to the wall and pull it out. Scrape away any sealant residue to ensure a good fit with the new vanity. If you need to repair drywall or repaint any sections of the wall that were damaged when you removed the vanity, this is the time to pick up a putty knife or paint brush and touch up the wall.
Step 3: Measure and Mark the Wall for the New Vanity

Measure and mark the width and height of the new bathroom vanity on the wall. Use a stud finder to locate and mark the studs within this outline of the vanity. If your new bathroom vanity has a solid back, measure out the position of the pipes on the wall and translate those measurements to the back of the vanity. Cut pipe holes with the correct size hole saw.
Step 4: Install the New Bathroom Vanity

Slide your bathroom vanity cabinet into position, lining it up with the marks you made earlier. You can remove the doors from your new vanity to make installation easier, if needed. Make sure it’s level and use shims to adjust the height if necessary.
Once the bathroom vanity is level, drill pilot holes through the vanity and into the nearest studs. Attach the vanity to the studs with screws. If you don’t have studs to drill into, you’ll need wall anchors to secure the vanity. Use the correct anchor for your wall. You can find anchors that work for drywall, plaster and walls with tile.
Wear eye protection when drilling or cutting into the vanity.
Step 5: Install the Vanity Top

If the bathroom vanity doesn’t come with an attached counter, you can secure the vanity top to the cabinet with a thin bead of silicone or an adhesive specified by the manufacturer. If you removed the vanity doors, reinstall them now.
Apply a bead of silicone along the edge where the backsplash meets the wall. Use a caulk finishing tool or a rubber-gloved or nitrile-gloved finger dipped in water to push the silicone into the gap between the bathroom vanity and the wall.
Step 6: Install the New Bathroom Faucet and Connect the Plumbing
Install your bathroom faucet according to the manufacturer’s instructions. Our article about how to replace a bathroom faucet gives you general steps for installing the new fixture. Be sure to put down a rope of plumber’s putty underneath the sink drain ring, if specified by the drain assembly manufacturer.
Attach the P-trap to the new sink drain line. Attach the faucet water lines to the supply valves. Apply plumber’s tape to the threaded connections only if specified by the faucet instructions. Attach and tighten your bathroom faucet connections and turn the water valves back on. Test your bathroom faucet and check all the connections under the sink for leaks.
From sink compatibility and valve type to handle style and finish, there are many factors that make a bathroom faucet the perfect fit. Our bathroom sink faucet guide will help you make the best choice.


Finish the Bathroom Vanity Install

With a new bathroom vanity and sink installed, you might want to consider some additional upgrades. This is a great time to update your mirror and bathroom vanity lighting. Whether you want a traditional look or prefer a modern bathroom, shop for the latest in bathroom fixtures, accessories and décor on Lowes.com or at your local Lowe’s.