
A Bathroom Update
A great bathroom fits both your home’s style and your lifestyle. If your bath falls short on either count, this light and bright space will inspire you. We changed the floor plan of the outdated bath (at one time a bedroom) to boost storage and privacy, and updated the style with a fresh, clean look that honors the home’s past. You can do the same thing in your bath without gutting the space. The key is breaking the redo into three stages: the tub area, vanity, and shower.
If you’re not comfortable doing bathroom renovations yourself, let Lowe’s do the work for you. Learn more about our bathroom installation services.
Before: The Tub Area


We took out the 1980s-look built-in whirlpool tub in one corner and replaced it with a freestanding soaking tub.
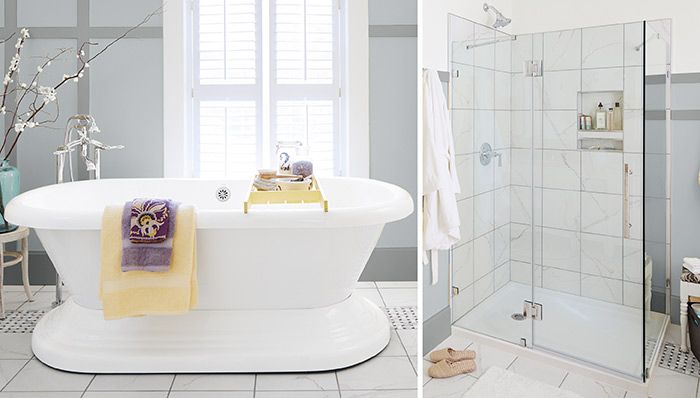
After: Inviting Tub

Set in front of the window, the focal-point tub is bathed in natural light. Plantation shutters provide privacy when needed. The tub comes with a floor-mount faucet that adds vintage flair.
After: Add a Caddy

Make a catchall wooden tray that spans the width of your tub to hold bath basics. The project requires only intermediate skills, a weekend to complete, and about $26 in supplies.
Before: Dated Sinks

The old vanity area included two pedestal sinks with improvised storage in between. Colors and surfaces gave off an outdated vibe.
After: Vanity Flair

We anchored the new look with a pair of allen + roth® vanities joined by a center storage unit. The vanities feature stone-look tops and undermount sinks.
Before: Not Showered With Space

Relocating the toilet let this corner shower morph into a larger enclosure.
After: Open Shower

A clear-glass enclosure rests on a base pan. The shower welcomes natural light and makes the bath feel spacious. The spa-style showerhead is easy on the eyes and the budget. Beside the shower, simple mouldings provide a spot for robe hooks. Save money by repeating the floor tile on the shower walls. Then add built-in storage with a tile-ready niche.
Floor Plan

Originally a bedroom, the bath in the "before" drawing was spacious, but the awkward layout lacked privacy, storage, and a focal point. We set the tub in front of the window, replaced pedestal sinks with vanities, moved the shower, and enclosed the toilet.