
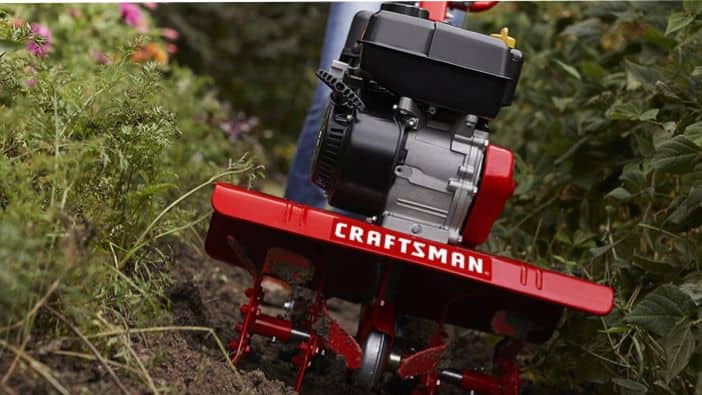
What’s Garden Tilling?
Tilling or cultivating a garden is the process of working or turning the soil before planting. When you till, you prepare the soil to grow productive, healthy plants. Plants will struggle to collect oxygen, water and nutrients in soil that’s too hard. Tilling your garden soil before planting gives plants the best chance for success.
As you till, you’re
- Breaking up hard, compacted ground to allow oxygen and water to flow through it better
- Blending oxygen into soil so it can begin to help break down organic matter
- Loosening the soil so roots can grow more easily
- Cutting up the roots of established weeds
- Making it easier to plant seeds or seedlings
Tilling is also a perfect way to mix in organic material such as compost or to add other amendments that improve the texture and quality of the soil.
Tools You Need for Tilling Soil
There are several ways to till a garden. For small garden plots, you can use a hand tiller to turn the soil, but a powered cultivator or tiller makes a tough job a lot more manageable.
Cultivators and tillers use an engine or electric motor to turn blades (known as tines) that dig into the ground. Choose one machine or the other depending on the size and type of planting area you need to prepare.
Garden Cultivators


Cultivators are smaller, lighter machines. They work well in existing planting areas to prepare the ground for new plants. Cultivators are good for general weeding, loosening the soil and working in amendments.
Garden Tillers

Tillers are usually larger, more powerful machines that are better for larger areas. In addition to loosening soil and blending in amendments, tillers can break new ground to turn an area, such as a portion of your lawn, into a planting bed.
For more tips on choosing the right machine for your planting project, see our guide to tillers and cultivators.
When Should You Till a Garden?
You can till a garden at the end of the growing season in the fall or in the spring to give your garden a good start.
Whenever you till, the ground needs to be somewhat dry. Tilling soil with too much moisture will damage the soil structure and can make it more difficult for plants to grow. If a handful of soil crumbles when you squeeze it, it should be dry enough.
Tilling in the Fall
In the fall, till amendments into an existing garden bed to improve the quality of the soil. Tilling at this time allows the amendments to settle in and break down over the winter. When spring arrives, the garden soil will be richer and ready for a new crop.
Tilling in the Spring
In the spring, till the soil for a new garden or new plantings in an existing garden after the ground warms up. Soil needs to reach a temperature of about 60 degrees Fahrenheit before you work it. In many parts of the country, the ground is ready between March and May. In addition to breaking up the ground, tilling can help the sub-surface soil warm more quickly to be ready for planting.
You can remove sod before tilling or work it into the soil. Working the sod in during the fall will provide nitrogen to the soil. However, tilling sod under in the spring may only cause the grass to resurface as the temperature warms.
Make sure that the selected garden area doesn't have underground utility lines that you can damage with a cultivator or tiller. Before digging, cultivating or tilling a new garden, call 811 to check for underground utilities.
What Are the Advantages and Disadvantages of Tilling a Garden?
Tilling a garden or tilling new ground to start a new garden gives your plants the best chance to grow well. There are several benefits to tilling, but there are also some things to think about before you decide to take on the work.
Advantages to Tilling
- Loose soil makes planting easier.
- Tilled soil readily accepts oxygen and water.
- Tilled soil lets roots grow and collect water, oxygen and nutrients easily.
- Sub-surface soil can warm faster.
- Organic material can begin breaking down sooner in tilled soil.
- Tilling can be an effective way to get rid of weeds without using chemicals.
- You can easily improve the quality of the soil by working in amendments.
Disadvantages to Tilling
- The work can be strenuous and time-consuming.
- Weeds and grass can return quickly if not tilled thoroughly.
- Tilling can create new weed growth from sub-surface weed seeds.
- Breaking up the ground can disrupt some beneficial soil life.
- Over-tilling the soil can create runoff problems and compact the soil.
Evaluating and Amending the Soil
Good soil must have nutrients and must allow water to reach plant roots. Good soil also allows excess water to drain away. A cultivator or tiller is a great way to work needed amendments into the soil.
Inspect the soil and feel it with your hands to determine whether water can permeate it. If the soil is excessively damp or has high clay content, consider adding sand or gypsum. These amendments will help break it up and allow moisture and nutrients to move through the soil. In addition to improving aeration, drainage and water retention, prepackaged garden soil can also be worked into your existing soil to add nutrients. Organic material, such as compost, can improve most soil. However, some soil conditions require extra attention. If the soil is extremely wet or thin, consider constructing a raised garden bed instead.
Test the soil to check the levels of nitrogen, phosphorus, potassium and the pH level. Make the necessary adjustments based on the type of plants you plan to grow.
For more information on soil tests, see Test and Improve Your Soil. To learn about amending soil, see our Soil and Soil Amendments Guide.
Vegetable gardens in particular need rich soil to produce crops. These plants only have a few months to bloom and produce.
Tilling a Garden

For best results when tilling, wait a day or so after it rains so the dirt is semi-dry. A little moisture will make the soil easier to till. Soil that is too wet will clump and eventually dry into hard clods that will be difficult to break up.
Read the cultivator or tiller manufacturer's instructions to become familiar with the controls and for information on use, maintenance and safety. Wear eye protection, sturdy work shoes or boots and any other safety gear and clothing specified by the manufacturer.
Instructions may vary by the machine and the type of work you're doing, but here are some general steps for tilling a garden.
It’s a good idea to mark off the area you plan to till before you begin.
Instructions
Tilling Tips
For best results, keep these tips in mind when using a garden cultivator or tiller:
- Remove any rocks or other debris as you till them up to avoid damage to the tines.
- Don’t overwork the soil; this can cause compaction and make the soil less suitable.
- Clean the tines regularly while tilling and after you are finished to remove entangled plant material.
For ideas on choosing plants and planting once the soil is ready, take a look at our article on designing and planting a garden.
Frequently Asked Tilling Questions
Tilling or cultivating your garden correctly helps you grow healthy, productive plants. Tilling the wrong way can damage the soil, making it more difficult for your plants to grow. Use the answers to these common tilling questions to prepare your garden the right way.
How Do You Start Tilling a Garden?
Mark and clear the area of debris. For a new garden, set the tines to a shallow depth. In an existing bed, use a medium depth. Move slowly to let the tines work. For a new garden, set the tines to an 8- to 12 -inch depth and make passes perpendicular to the first ones. Make more passes to blend in amendments. Till again in a few days to spread the nutrients.
What Should I Put On My Garden Before Tilling?
Compost is a good addition to most gardens, but test your soil and plan to apply whatever components are missing in addition to the compost. Break up the soil with the tiller before adding anything. Then you can apply the amendments and till again to work them in. Aerating the soil before adding amendments will give your garden the maximum benefits.
Can You Till a Garden and Plant the Same Day?
Planting immediately after tilling is not usually a good idea. Its best to let the soil settle for a day or two, especially if you’re planting seedlings. This can allow the seedling roots to take hold better and firmly establish the plants. If you’ve worked in amendments, allow a few weeks for the organic matter to break down and enrich the soil fully.
What Month Should I Till My Garden?
Plan on tilling between March and May, but timing varies by location. Soil should be thawed and relatively dry. Test it by squeezing some in your hand. If it crumbles easily, it’s ready for tilling. Tilling too early or when the soil is too wet compacts the soil instead of loosening it. You can also till amendments in during the fall for rich soil in the spring.