
Tape Measure Markings


- On every tape measure, there are both small and large tick marks and numbers. The biggest tick mark usually represents inches. The second biggest mark represents 1/2-inch, the third biggest represents 1/4-inch, the second smallest denotes 1/8-inch, and the smallest denotes 1/16-inch. It helps to remember that the 1/16-inch mark is the first mark you'll see after or before a whole-inch mark.
- The largest numbers on the tape measure correspond to inches, with fractions of inches being in between each of the largest numbers. Read measuring tape inches just like a book — from left to right.
- Some tape measures have both metric (centimeters and millimeters) and imperial (inches and feet) markings, usually with one on the top and the other on the bottom. This can be helpful when you're trying to do conversions.
- Foot markers are usually black squares every 12 inches.
- Stud markers are the little red diamonds on the spool of your tape measure. Most framing studs are at a standard distance of 16 or 24 inches center to center.
Use a Tape Measure Correctly

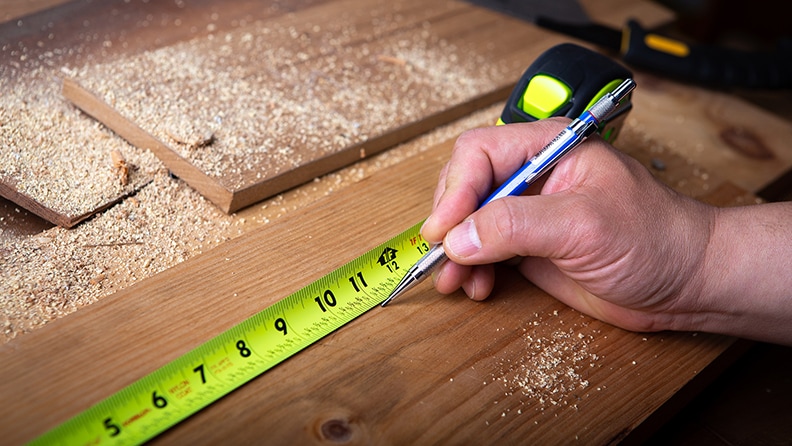
The flat metal hook attached at the end of the tape measure is there so that you can grab the end of an item and extend the tape outward. When you've extended your tape to the desired length, push down on the thumb lock to keep the tape from sliding back in automatically. The action of pushing down on the thumb lock will lock the blade in place, while pushing it back up releases the spring, causing the tape to return to the housing.
Taking an accurate measurement isn't as easy as it seems. Remember the carpenter's adage to "measure twice and cut once." Always double-check your measurements so you can avoid wasting time and material.
Of course, there are times when using a tape measuring tape isn't ideal, and you need to use another instrument to take your measurements. When locating the correct depth to plant your garden seeds, you might push a wooden ruler into the soil to your desired depth. When trying to find the exact thickness or diameter of an object, you might want to use a caliper. Regardless of which instrument you use to take your measurements, knowing how to read it is crucial to the success of your project.
Always be careful when releasing the thumb lock. The tape will move quickly and could snap back on your hand or face.
The hook on the end of your tape measure is made of a strong, often serrated, metal. That's there so you can mark the material you're measuring if you've misplaced your carpenter pencil.
Using a Laser Distance Measurer

Laser distance measurers are a valuable addition to both Pro and DIY toolboxes. The ability to get accurate measurements of distances great and small with just a point and click makes any project simpler.
Using a laser tape measurer is an easy process:
- Place the measurer at the edge or base of what you want to measure. For example, you would place it on the floor next to a wall to measure the ceiling height, or at the edge of a countertop to measure the linear feet.
- Power the device on and press the arrow button to begin measuring.
- Your result will appear on the display window.
Laser measurers also allow you to point and shoot across large areas to quickly calculate square footage. Some models have real time measuring, adjusting calculations as you move across the space.
The accuracy of lasers is an advantage over a regular tape measure, especially when dealing with sizable distances. Many models are accurate to within 1/16th of an inch at up to 400 feet. For most DIYers, an indoor laser will be a good choice with the ability to measure up to 165 feet. For pros, there are outdoor laser versions that can compute distances of 400 feet or more.
Ready to Get Started?
Planning for your next DIY project? We’ve got lots of helpful measuring tools to ensure success. Here are some of the most popular product categories Lowe’s customers depend on.


Frequently Asked Questions
Here are some common questions DIYers have on using a tape measure.
1. How Do You Read a Tape Measure Accurately?
To accurately read a tape measure, identify the longest marked lines for inches and note that shorter lines represent fractions. Each inch is divided into halves, quarters, eighths, and sixteenths. For example, the halfway point between inches is the 1/2-inch mark, while smaller lines indicate measurements like 1/4, 1/8 or 1⁄16 of an inch.
2. What Do the Different Tape Measure Lines Represent?
On a tape measure, each line length corresponds to specific increments. The longest lines indicate whole inches, shorter lines indicate fractions such as 1/2 inch, 1/4 inch and 1/8 inch, and the smallest lines typically indicate 1⁄16 of an inch. These markings help you achieve precise measurements for home improvement projects.
3. How Accurate Are Laser Measurers Compared to Standard Tape Measures?
Laser measurers typically offer high accuracy, often within plus or minus 1/8 inch or better. Traditional tape measures can achieve similar accuracy but are more prone to user error, particularly over longer distances, while laser devices minimize such errors significantly.
4. How Can Beginners Practice Reading a Tape Measure Effectively?
Beginners can practice reading a tape measure by measuring common household items and recording lengths to the nearest 1⁄16 inch. Regular practice with incremental fractions—such as 1/4 inch, 1/8 inch and 1/2 inch—will significantly improve measurement accuracy and familiarity.
5. What Is the Red Marking on a Tape Measure Used For?
Red markings on a tape measure typically represent 16-inch intervals, useful for spacing wall studs during framing projects. These special markings allow DIYers and professionals to quickly locate standard construction measurements without extra calculations.
6. What's the Difference Between Reading a Tape Measure and a Laser Measurer?
A traditional tape measure provides readings manually with incremental lines marking inches and fractions (such as 1/4, 1/8 and 1⁄16 of an inch), while a laser measurer digitally calculates and displays precise distances using laser technology, ideal for longer ranges or inaccessible areas.
7. How Do I Measure Corners Accurately with a Tape Measure?
For precise corner measurements, place the hook tightly against the edge or corner of your object and extend the blade straight across, ensuring the tape remains level. Check alignment carefully at eye level, noting both the inches and fractional markings clearly for accurate measurement.