

Tools and Materials
Product costs, availability and item numbers may vary online or by market.
Before Work Begins
Choose the tile for your project. Types of floor tile include porcelain, ceramic, glass, and stone. Porcelain and ceramic work well for bathroom floors because they are dense materials and help resist water.
Tile comes in a variety of sizes. Large tiles take the least amount of time to install. However, if you like the look of smaller tiles, check for products pre-mounted to mesh backing to make the installation easier.
Tile is available in many colors, so you’re sure to find the right match for your bathroom. You can even use tile that looks like wood flooring. Determine how much tile you’ll need by multiplying the length times the width of the room. Then add 10% for extra, just in case.
When buying tile, try to find boxes with the same dye lot number. If you can’t find matching numbers, mix tiles from different boxes when you’re installing so any color difference won’t be as noticeable.
If you special order your tile, you can schedule the prep steps of the project to be completed when your order is ready. Taking on a tile installation is a big project, so it’s best to have a plan before you start. This project will take a few days to complete. It takes time for the thinset mortar to set so you won’t be able to immediately walk on the floor.
Before you start, remember that using the correct trowel and mortar is critical to a successful tile project. Floor or wall, indoors or out, tile type and size all are a factor. Find the right trowel and mortar here.
Also, it’s a good idea to check any local building codes and follow the specific instructions for your tile. Wondering if you can lay tile over tile floors? Yes, you can install your new tiles over existing vinyl flooring or tile, but the subfloor and underlayment must be in good condition. It’s typically best to remove the old flooring so you can check the subfloor and underlayment. Plus, by removing the old flooring you won’t raise the height of the floor when you install the new tile.
These instructions will show you the steps to prep your bathroom for floor tile. You’ll learn how to install a waterproof tile membrane over the subfloor. After you’ve completed the prep, check out our Install a Tile Floor video that covers everything you need to know to DIY this project, including how to cut floor tiles, how to set tiles and more.
These instructions are not the same for prepping or tiling a shower. For helpful information on laying tiles in a shower, check out our guide on Installing Bathroom Shower Tiles. This how-to article includes everything from removing old tiles to steps on how to set new tiles in the shower.
Remove the Old Tile
The first phase of the work is to get rid of the existing tile.
Instructions


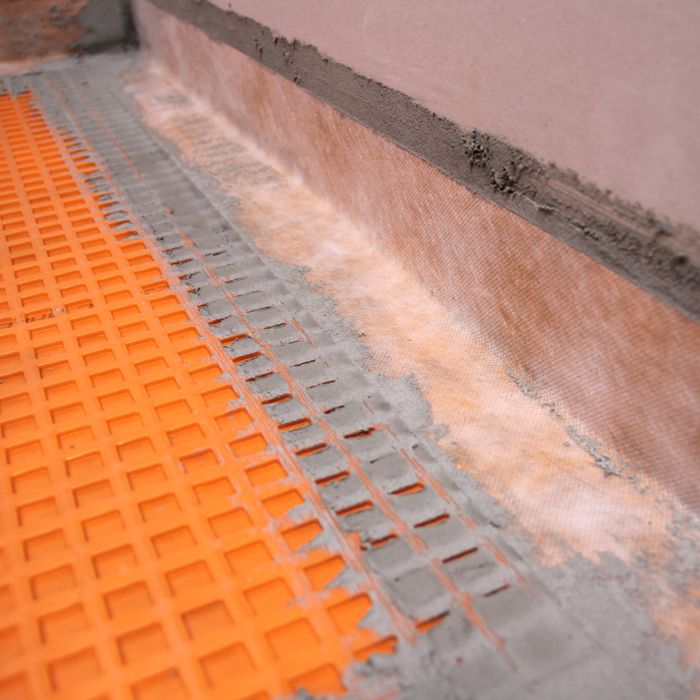
Install the Tile Membrane
This installation includes steps for putting down a flexible membrane that allows for expansion underneath the tile. The membrane also provides a strong foundation and protects the subfloor.
Instructions


Mark the Layout
Create a layout for your tile on the membrane.

