
Tools and Materials
Tools
Items may be Special Order in some stores. Product costs, availability and item numbers may vary online or by market. Paint colors may vary slightly from those shown. Availability varies by market for lumber species and sizes.
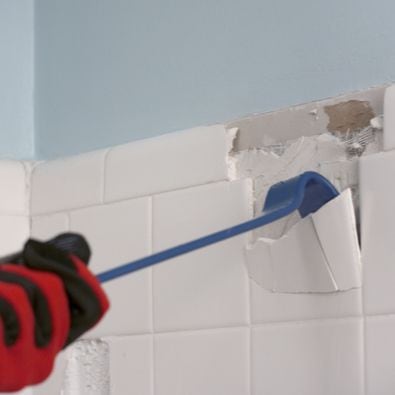
How to Prep Before You Tile the Shower Wall
Creating a clean and waterproof base starts with removing the old tile or the fiberglass shower wall. This is a dusty job so use plastic to cover your doorways, wear a respirator that's rated for dust, cover the floor with a drop cloth and make sure there's plenty of ventilation. Also, shower tile is heavy so put down moving blankets to protect the floors and tub from damage.


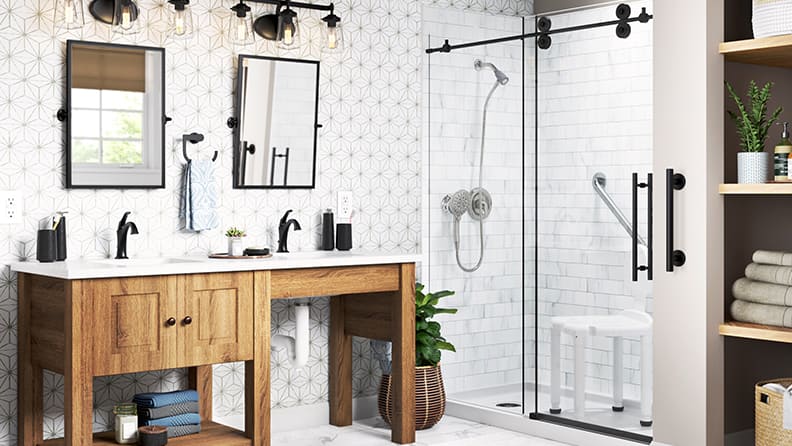
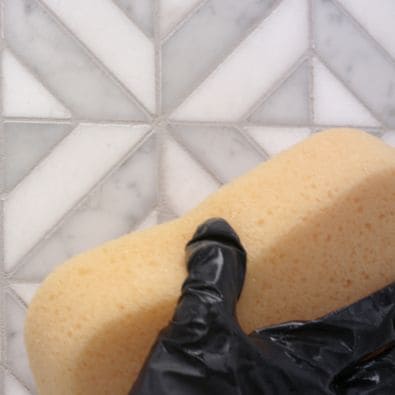
How to Tile a Shower
Here’s how to install shower tile after you’ve prepped the base. If you’re looking for shower tile ideas to inspire you, shop the links below for the best selection of shower tile from Lowe’s.


Installing Large Format Tile
Installing large format tile is comparable to installing standard tile, with a few important differences to keep in mind. Because of their size, large format tiles are heavier than standard tiles, requiring extra time and care to install them correctly. As with standard tile, prepping the surface is essential. Below are the key differences to take into consideration when working with large-format tile:
- Substrate must be flat. Minor surface fluctuations are fine for installing standard tile; however, large-format tile requires a completely flat surface.
- Medium-bed mortar, or mortar specifically designed for large-format tile, is recommended. Instead of a thin-set mortar, you should use a medium-bed mortar that’s strong enough to support the weight of larger tiles. It’s also recommended to apply mortar to the back of the tile in addition to the shower surface itself. This helps ensure full coverage.
- Use the right tools. With large format tiles, a larger notched trowel is recommended.
- Requires a tile leveling system. To ensure proper installation and eliminate lippage, a tile leveling system is essential.
- May require more drying time. Be patient when allowing large format tiles to cure, as they may take longer to dry compared to standard tiles.
Shower Tile DIY FAQs
Can I replace my shower tile myself?
It depends. One of the most difficult aspects of retiling a bathroom shower wall is cutting your tile. If you have access and feel comfortable using these tools that’s one of the biggest components of retiling a shower wall yourself.
How much does it cost to tile a shower?
The average cost to retile an average-size shower could be anywhere from a few hundred dollars to $1,500. But every shower tile DIY is unique, that’s why it’s important to consider these variables before you start a project: the cost of tools, materials and labor (if you’re not DIYing). The size of your shower, the cost and type of tile and the condition of the existing drywall or backer board all contribute to costs too. Keeping these expenses in mind from the beginning of your project helps you manage expenses throughout the remodel.
How long does it take to retile a shower?
Since you need to consider the time it takes shower grout to dry completely, this project can take anywhere from three to five days. Consider this time frame if the work you’re doing is in your main bathroom—you won’t have access to a shower.
How do I choose the best style shower tile for my bathroom?
To figure out the best shower tile ideas for your home, read our shower tile buying guide. With so many stylish options at a variety of prices, you’ll find the perfect shower tile for your bathroom. Consider the existing style of your bathroom vanity and fixtures and choose a tile that will complement them.
Don’t have time to do this project yourself? Check out our professional tile installation service.