

Key Takeaways
- Installing butcher block countertops can be a do-it-yourself project if you have advanced DIY experience and follow the countertop manufacturer’s instructions for acclimation, installation and sealing.
- A butcher block countertop installation starts with measuring cabinets and walls and planning an expansion gap between the wall and countertops.
- Measure, cut and test fit each piece of butcher block before cutting and fitting the next.
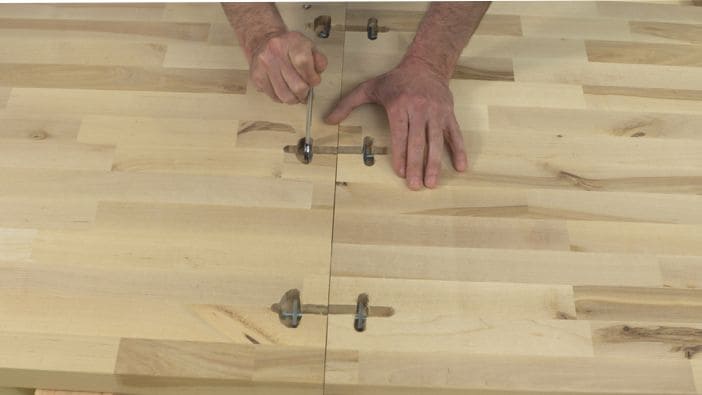
- You can use angled miter joints or simpler, straight butt joints to join butcher block countertops at corners, and common fastening methods include manufacturer-specific fasteners, miter bolts and pocket holes with screws.
- Create a cutout for a new sink using the sink manufacturer’s template or measure the cutout on your old countertop if you’re reinstalling your existing sink.
- Seal the butcher block before and after installation according to the manufacturer and sealer instructions, making sure the sealer is food safe if you plan to use the counters for food prep.
- Fasten butcher block to your cabinets with brackets or corner braces, but make sure the fastener holes allow the wood to expand and contract.
Tools and Materials
Tools
- Drill/Driver
- Drill Bits
- Driver Bits
- Hole Saw
- Circular Saw
- Straight Edge Saw Guide
- Jigsaw
- Belt Sander
- Orbital Sander
- Router
- Router Bits
- Clamps
- Caulk Gun
- Open End Wrenches
- Tape Measure
- Saw Horses
- Utility Knife
- Hot Glue Gun
- Paint Brushes
- Caulk Smoothing Tool
- Work Gloves
- Eye Protection
- Hearing Protection
- Respirator
- Oscillating Tool & Blades (Optional)
- Pocket Hole Jig (Optional)
- Pocket Hole Screws (Optional)
Materials
- Butcher Block Countertop
- Drop Cloths
- 2-in x 4-in Boards (Actual 1-1/2-in x 3-1/2 in)
- Miter Bolts
- #10 Stainless Steel Wood Screws
- #10 Stainless Steel Washers
- Painter’s Tape
- Lint-Free Cleaning Cloths
- Food-Grade Wood Oil
- 150-Grit Sandpaper
- Hot Glue Sticks
- Construction Adhesive
- Nitrile Gloves
- 1/18-in Paneling (Optional)
Product costs, availability and item numbers may vary online or by market.
Butcher Block Counter Pros and Considerations
Installing a new butcher block countertop can make a big impact on your kitchen but consider the benefits and considerations before you begin:
| Benefits of Butcher Block | Considerations of Butcher Block |
| Natural warmth and appeal | Expands and contracts with temperature changes |
| Contemporary feel | Vulnerable to damage from hot pots and pans |
| Easy to clean when properly sealed | Requires periodic sealing to prevent mold and bacteria |
| Many options for species, grain and color |
Types of Butcher Block Countertops


How to Install Butcher Block Counters
We have general instructions for installing butcher block countertops, but specific steps vary by kitchen layout and your butcher block. Follow all manufacturers’ instructions. If you don't have all the necessary tools on hand, check to see if you can rent them from Lowe's.
Installing a butcher block countertop can be an advanced project. If you don’t want to take it on yourself or don’t have the time, consider our professional countertop installation service.
Follow all use and safety instructions for the tools and materials you use. Wear specified safety gear such as eye protection, hearing protection and, when necessary, a respirator.
Installing Butcher Block Counters Step by Step




Add Natural Warmth and Beauty to Your Kitchen With Butcher Block
Installing butcher block countertops can be a big project, but the reward is a beautiful, unique addition to your kitchen. Shop Lowes.com for butcher block in different wood species, grain patterns, colors and more to find the perfect look for your home. Or visit your local Lowe’s and talk to a Red Vest associate. They can help you choose the perfect butcher block counters and make sure you have the tools and materials you need to do the project right.