
Tools and Materials
Tools
- Shop Vacuum
- Drill/Driver & Bits (Optional)
- Buckets
- Paint Roller Frames & Foam Covers
- Paint Sprayer (Optional)
- Painters Trays & Liners
- Dust Mask/Painting Safety Mask
- Putty Knife
- Paint Brushes
- Painters Tripods
- Rubber Gloves
- Eye Protection
- Work Gloves
- Screwdrivers
- Sponges
- Pencil or Marker
- Cleaning Cloths
- Ladder
- Respirator
Product costs, availability and item numbers may vary online or by market.
How Much Will Painting My Cabinets Cost?
It can be surprisingly affordable to paint your cabinets. And if you already have a well-stocked tool box, then it’ll set you back even less. Much of the ultimate cost will depend on the size of your cabinetry, how much primer you use and what type of paint you buy. But for most homes, the cost can range from about $400 to over $1,000.
The Tools You Need to Paint Cabinets
We made a list of every tool you need to do a professional job. Anyone who works with tools will tell you how important it is to have quality tools. It helps to pick up and handle the tools to find the ones that feel right in your hands. But if you can’t come into a store, then do some research on the best tools and, when in doubt, choose brands you trust.
What's the Best Paint for Cabinets?

There are a few things to consider when choosing paint for your cabinets.
- Choose high-quality paint. Special cabinet paints are available that provide a smooth finish, but any high-quality paint should work.
- Make sure your paint is acrylic, not vinyl. Acrylic latex-based paint is durable and easy to clean up.
- With latex paints, always follow the manufacturer’s instructions regarding cure time.
Next, think about the finish you want. A matte paint gives a flatter, low-gloss finish. A high-gloss finish, on the other hand, provides a high-sheen, highly reflective surface. A satin finish falls between the two.
Remember these tips, and you’re sure to do a professional-looking job:
- Purchase the appropriate supplies for your cabinet material: solid wood, laminate or metal.
- Check the paint label on the can for specific instructions.
- Wood cabinets are ideal for painting, but any surface that can be scuffed with sandpaper can be painted.
- Laminate cabinets require a special bonding primer. The laminate must be in good condition for best results.
- A gloss finish will give your cabinets a sheen, but it may show a lot of dings or mistakes. Semi-gloss or satin finishes are typically used for kitchens. Some flat-finish paints can be difficult to clean. Check the instructions for details.
Prepare to Paint Kitchen Cabinets
Painting cabinets will take several days to complete, so plan accordingly. Always wear the appropriate safety gear and open the windows for ventilation. Also, for best results, you should remove the doors and drawers and work on them in an area that’s out of the way, like a garage or basement. Make sure you’ll have proper ventilation there too.
Step 1: Assess the Cabinets’ Condition

Determine the condition of your cabinets. Surfaces that are already painted can be painted again if the existing paint is in good condition. If not, you’ll need to remove the old paint. Stripping products are available that make this process easy. Simply apply with a brush, wait for the stripper to react with the old paint and then use a plastic scraper to peel it away. Once the surface is dry, remove the last of the paint with sandpaper. For more details on how to properly strip your cabinets, including tips for determining their finish and the right products to use, see Refinishing and Cleaning Kitchen Cabinets.
Also, while assessing the condition of your cabinet doors, you may determine that one or more of them needs to be replaced. For instructions, see How to Make Replacement Cabinet Doors.
If your cabinets were previously painted and your house was built before 1978, the paint may be lead-based. Use a testing kit or call a professional for help. Always refer to the manufacturer’s instructions on all paint-stripping products.
Step 2: Empty the Cabinets and Remove the Doors

Empty the cabinets. You’ll be sanding later, which might get dusty. Remove the doors, drawers and hardware. As you’re removing the doors and drawers, label where they go with painters tape so you can reinstall them in the right spots. Place the hardware in a plastic bag or cup and label where it goes.
If you run into difficulties while removing your cabinet hardware, see How Do I Remove A Stripped Screw? for help.
Step 3: Clean Surfaces and Repair Damage

Clean all surfaces with a trisodium phosphate (TSP) cleaner to remove any grease and dirt. Repair damaged areas. Fill dents and holes with a wood filler and use a putty knife to press it in and smooth it out. Let it dry according to the directions.
Don’t fill the hardware holes if you’re planning on using the same hardware. If you’re replacing your hardware, you might have to use wood filler for holes that don’t line up with the new hardware.
Step 4: Prep the Area and Sand
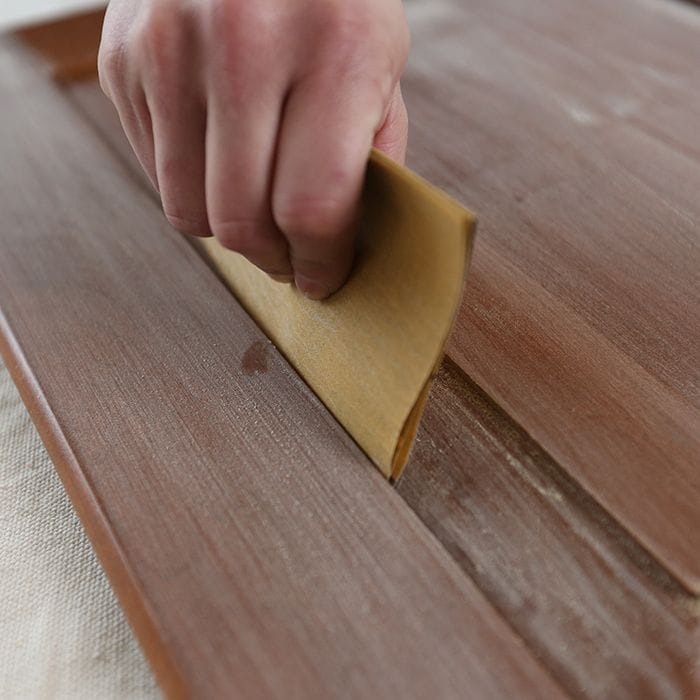
Cover your countertops, appliances and any other areas you want to protect. Placing painters tape on the wall along the cabinet edges is helpful. Sand everything with medium-grit sandpaper to help the paint stick to the surface. Fold the sandpaper to get into the detailed areas on doors and drawers and in the corners on the frames. For help, see How Do I Use Sandpaper?
Laminate paint requires a special bonding primer. Some primers require sanding the laminate. Be careful not to sand too deep and damage the laminate. Just a light once-over will do.
Step 5: Vacuum the Area

Clean all surfaces with a vacuum and a tack cloth. Everything should be dust-free before painting.
Prime Kitchen Cabinets
Wander enough paint aisles, and you're likely to see cans of primer. That may get you wondering if you need a primer for cabinets. The fact is, applying primer is an important step in the painting process. Primer provides a suitable surface for the paint to stick to, helping it to last longer and look better. It also covers old paint jobs and imperfections.
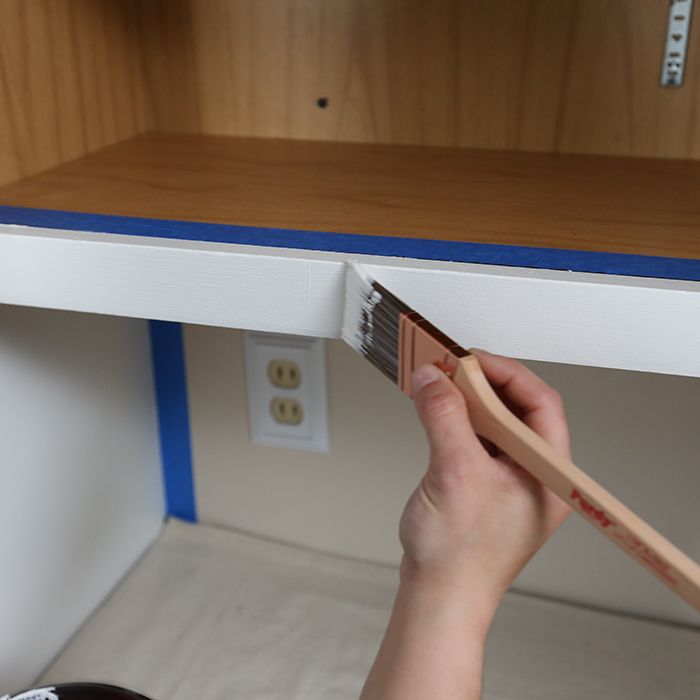
Step 1: Paint the Cabinet Frames

On the cabinet frames, work from the inside out. If you’re painting the inside of the cabinets, start at the back and work toward the front. Use a brush to get into corners and detailed areas. It’s important to use even strokes and finish back into the wet primer.
Step 2: Paint Large Areas
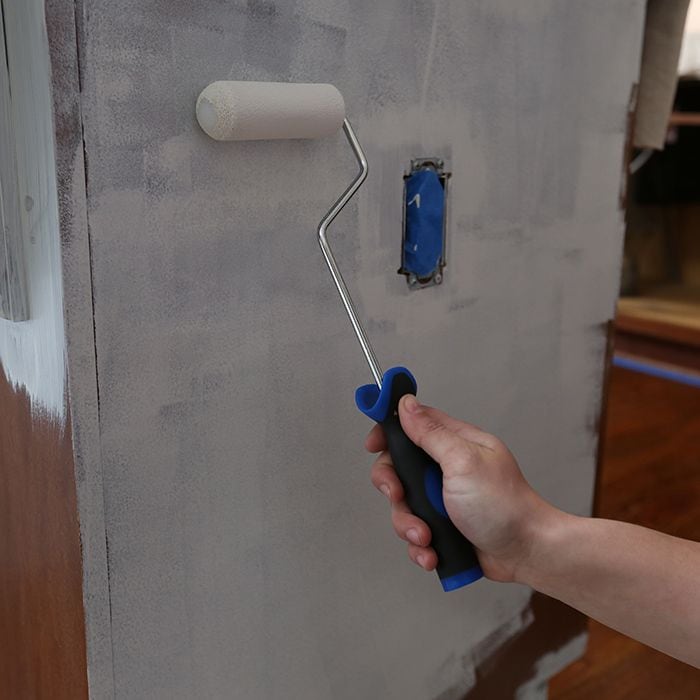
Use a mini roller on large, flat areas. Primer doesn’t have to look perfect. Its purpose is to cover the surface and provide a good base for the finish paint. Work on one area at a time.
Step 3: Lay Off
When you’ve covered the surface, take your dry roller or brush (don’t reload it) and lightly go over the surface once again to remove any buildup. This is called “laying off.”
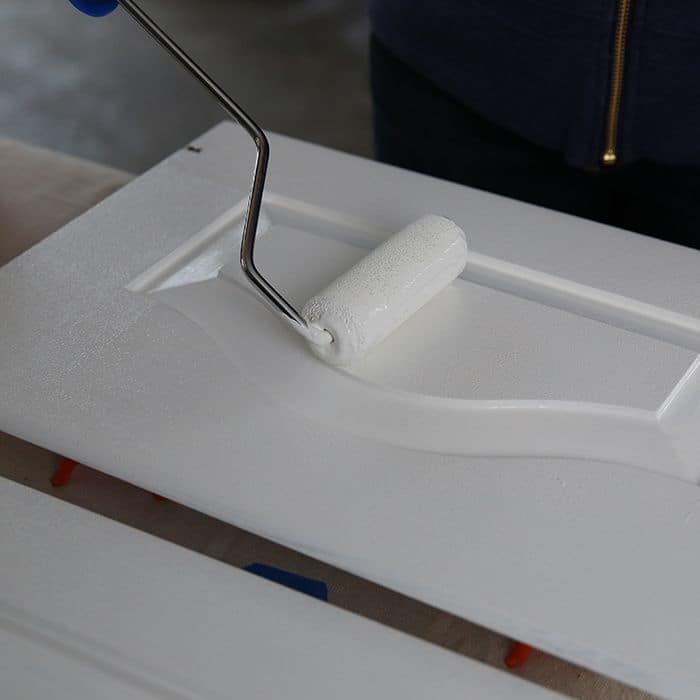
Step 4: Paint the Doors and Drawers

Paint the doors and drawers. Remove the tape labels but keep them nearby. Start with the backside and apply a smooth, even coat. When it’s dry, flip the door over and paint the front. Start with the detailed areas, making sure the primer doesn’t pool in the corners, and feather out the edges. Then work on the larger, flat surfaces with a foam roller. Use painters tripods to lift the doors and drawers up from your painting surface. This allows you to paint the edges more easily.
For drawers, it’s typically best to paint just the drawer front piece rather than the entire drawer. Sometimes painting the sides and bottom can cause the drawers to stick in the frames. Allow the primer to dry according to the directions. It usually takes a few hours.
Some primers recommend sanding before painting. Follow all directions.
Paint Kitchen Cabinets
You can apply paint with a brush and roller (DIY-friendly) or a sprayer (advanced). Learn about using a paint sprayer to achieve the perfect finish. The following directions are for using a brush and roller.
Step 1: Paint the Cabinet Frames
Start with the cabinet frames, using a high-quality brush for smaller areas and a foam roller for larger surfaces. The technique is the same as for the primer — use even strokes with the brush, finish the stroke back into the wet paint and feather out the edges. Also, remember to lay off after you’ve painted the surface.
Step 2: Paint the Cabinet Backs and Fronts
On the cabinet doors, paint the backs, let them dry and then paint the fronts. Follow the paint directions for the correct dry time. Do not rush — let the paint completely cure.
Step 3: Apply a Second Coat
Apply a second coat of paint. This should be your finish coat. Allow the paint to dry. Avoid putting everything back together before the paint has completely cured.
Some painters like to follow up with a coat of polyurethane for added protection. Others say it isn’t necessary. Allowing high-quality paint to fully cure will provide a hard, durable finish.
Refinish Cabinet Hardware

If you’re using your old hardware, you can clean it or refinish it with spray paint for a new look. If your hardware simply needs cleaning, see Refinishing and Cleaning Kitchen Cabinets for instructions. If you want to replace your hardware instead, see our Cabinet Hardware Buying Guide for options.
Work on the hardware between coats of paint to save time.
Step 1: Wash the Hardware
Scrub the hardware in warm water with dish soap. Pat dry.
Step 2: Scuff the Hardware
Lightly scuff the hardware with fine-grade steel wool.
Step 3: Attach the Hardware to Cardboard
Attach the handles or knobs to a piece of cardboard so they’re upright and easier to work on.
Step 4: Spray the Hardware With Primer
Lightly spray the hardware with an appropriate primer and let dry. Follow up with a coat of paint. The key is to apply light coats to prevent buildup.
Finish: Reassemble Kitchen Cabinets
Now that your cabinets are painted, consider adding shelf liners. Some liners are decorative and stick to the surface. Others are padded to help protect the surface.
Step 1: Reassemble the Cabinets
Reassemble the cabinets and hardware. Use the labels to make sure the doors and drawers go back in the right spots.
If you’re using new cabinet hardware that requires drilling new holes, use a special jig designed for cabinet or drawer hardware (sometimes referred to as a mounting template) to make sure everything lines up correctly.
Step 2: Install Under Cabinet Lighting and Other Accessories
After you’ve completed your cabinet refresh, this may also be a good time to install under cabinet lighting or even a new backsplash. Check out our buying guides and how-to videos for help: