
Before You Get a Tool Box
Consider all the various tool box uses before purchasing so you can get the best one for your needs. Here are a few things to think about:
- Make personal DIY goals before shopping for a tool set. If you'll only use a hammer to hang pictures, a small tool kit will do just fine. You don't need to spend extra on a professional-grade one. On the other hand, if you see yourself building a deck or framing a wall in the years ahead, consider purchasing a quality box.
- Basic tools often receive the most wear. Buy the best-quality hand tool set that you can afford for the jobs you'll do. That way you won’t have to put a project on hold because of a broken tool.
- Opt for a large tool box. You'll fill it up eventually.
- Look for household tool sets that contain a variety of the most commonly needed tools. One of these household tool kits can help you start building up your basic tool kit.
Screwdrivers


If storage is tight, buy a screwdriver with interchangeable tips. Otherwise, opt for a tool box set of separate screwdrivers in sizes you'll use most: three sizes of flathead screwdrivers and three Phillips head screwdrivers in #1, #2 and #3 sizes. Watch our DIY Basics video: Which Screwdriver Should I Use?
Hammer

A 16-ounce claw-style hammer will handle most jobs around the house. The more you use one, the more you'll appreciate a cushioned grip. Watch our DIY Basics video: Which Hammer Should I Use?
Tape Measure

Buy a 25-foot tape measure with a locking measuring blade. The blade should be at least 1 inch wide so it won’t collapse when extended beyond a few feet. Watch our DIY Basics video: How Do I Use a Tape Measure?
Pliers

The two must-have models: 8-inch needle-nose pliers and 10-inch groove-joint pliers. Groove-joint or tongue-and-groove pliers are particularly useful for plumbing projects because of their wide-opening jaws. Protect your hands and opt for pliers featuring padded grips.
Look for locking pliers that work almost like a portable vise, letting you focus more strength on turning jammed screws or pulling out bent nails.
Utility Knives and Extra Blades

A basic utility knife model with a retracting blade will work fine. Choose a knife including a nonslip handle and featuring tool-free blade changes. Be sure to get a supply of spare blades.
Adjustable Wrenches

You’ll find a use for adjustable wrenches even if you eventually add a set of combination wrenches or a socket set to your tool box. If you buy quality tools, the jaws are less likely to slip and damage your fasteners.
Level

A 9-inch torpedo level is useful for leveling everything from pictures to a new table. Before you get yours, check the bubble accuracy by centering it on a professional level. Watch our DIY Basics video: What Do Level and Plumb Mean?
Putty Knife

A putty knife with a 2-inch-wide blade can handle a variety of tasks, like applying wall patching compound or scraping away loose paint.
Straight Edge

Start with a 3-foot straight edge and add longer ones as your projects require them. The wider the body, the less it will flex during use.
Square

Whether you're setting up tools or marking lines to cut, you'll need an accurate square. Popular types include the combination square and the speed square (image to the right). Check the accuracy using the tips below. Watch our DIY Basics video: How Do I Use a Combination Square?
Inaccurate squares lead to inaccurate projects. Check whether your square is accurate by holding it against the straight edge of a notepad. Place the square along the long edge at its center and mark a pencil line dividing the surface in half. Then flip the square over, place the blade as close as possible to the first line and draw another line. If the two lines aren't parallel, try another square.
Flashlight

Any sturdy flashlight will do for starters, but you'll soon wish you had one you don't have to hold while you work. Options include flashlights that can be tilted and aimed where you need light and a headband for hands-free aiming.
File

Eventually, you'll come across some dangerously sharp metal edges that need to be smoothed or dull edges that need to be sharpened. Check out How to Sharpen Gardening Tools to learn how to file metal. A 6-inch mill file offers two flat faces. To keep them in good shape, clean them with a stiff bristle or brass bristle brush.
Safety Equipment: Glasses, Gloves, Hearing Protection and Breathing Protection
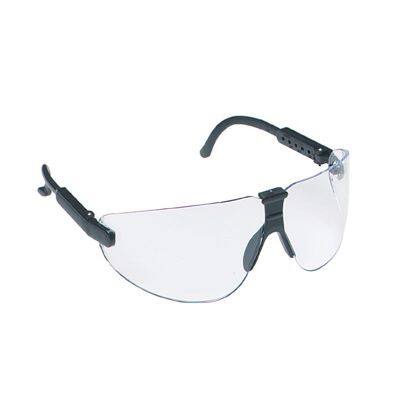
It’s best to make a habit of wearing safety gear. Even if you’re wearing eyeglasses with impact-resistant lenses, flying debris could damage them and even find its way into your eyes. If you don't wear glasses, today's safety glasses are available in stylish options. If you do wear glasses, consider a pair of goggles large enough to slip around them.
As you add power tools, such as circular saws, you'll want either in- or over-ear hearing protection. When working in dusty conditions, a respirator provides a more comfortable way to protect your lungs than paper masks.
Power Tools: Power Drill, Circular Saw and Power Sander

While you can accomplish a lot with hand tools, power tools speed up the work and make your projects easier. Here are some key power tools to add to your basic tool list:
A cordless drill gives you mobility and power to tackle most DIY drilling and driving tasks, while a corded drill and a heavy-duty extension cord give you constant power for tough drilling tasks. Take a look at our drill guide to find the right power drill for your projects and check out our drilling how-to guide for use and safety tips.
A circular saw and a good variety of circular saw blades offer versatility for cutting materials for projects ranging from doing rough carpentry to building a deck. As with power drills, you’ll find corded and cordless circular saws. Our circular saw and blade guide will help you decide which type is best for you.
A random orbital sander makes quick work of sanding and smoothing tasks while reducing the risk of creating scratches and swirls on the work piece. Our power sander guide and sanding how-to guide will show you how to choose and use a random orbital sander. To learn how to get the best finish, see our article on choosing the right sandpaper.
These are just a few of the power tools that are useful for DIY work. More tools let you take on more projects. For more information on power tools and what you’d need them for, see our power tool guide.
Saw Horses

After a few projects, you'll get tired of working on the ground or on a tipsy table. A simple pair of saw horses can provide a steady surface at a comfortable level for sawing and hammering.
Combination Wrenches

Sets of combination wrenches come in two types: Society of Automotive Engineers (SAE), or standard, wrenches are sized in inches (1/4 inch and 1/2 inch, for example), and metric wrenches are sized in millimeters. Choose SAE wrenches if you’ll be working on fasteners around the house. For automotive repairs, you may also need a metric set. These are called combination wrenches because one end is enclosed and studded with points that grip the corners of a bolt or nut. The other end is open and useful when you can’t slip the closed end in place. Check out our Wrench Buying Guide: Types of Wrenches, Uses and Features for more tips on which wrench set is right for you.
Clamps

Start your clamp collection with ones sized for the types of repairs you'll do the most. A couple of 24-inch bar clamps will let you tighten with one hand and handle many medium-size projects. If most of your repairs are minor, pick up some smaller versions. Watch our DIY Basics video: Do I Use a Clamp or Vise?
Shop Vacuum

The more tools you own, the more dust you tend to make. Choose a heavy-duty shop vacuum model that can be fitted with a collection bag that traps fine dust particles. It’s a handy feature for cleaning up after drywall repairs.
Grease Gun

A grease gun is a nice addition to your tool set. If you have a riding mower you need to maintain, regularly handle your own auto maintenance or have farm equipment to take care of, a grease gun is a necessity. This tool lets you apply lubricant precisely through fittings built into a vehicle or piece of equipment. Be sure you have a selection of tips and extension pieces so you can apply the grease to any tight spots or hard-to-reach fittings.
Tools Beyond the Basics

Eventually, you'll need tools that do more specialized tasks.
- Pry Bar: Before something new can be installed, something old usually has to go. If it’s a large item, opt for a 15-inch or larger pry bar. A 7-inch bar handles smaller jobs including removing nails.
- Wire Cutters: Many types of pliers have these built in, but they’re seldom as durable as a set of wire cutters.
- Stud Finder: Hang a heavy mirror from fasteners driven into plain drywall, and you’ll soon be shopping for a new mirror. Instead, use an electronic stud finder to locate a solid spot for your hanger hardware. Some units also help you locate hidden water pipes and electrical lines so you can avoid hitting them. Learn How to Find Wall Studs with this helpful article.
Tool Storage
You’ll need a place to store your additional tools that don’t fit in a tool box. Tool cabinets and chests are an efficient way to organize your tools and accessories. Tool bags let you take your tools around your space as projects pop up.
Still need more information on what tools to get? Watch our DIY Basics video: What Power Tools Do I Really Need? We also have a collection of tool buying guides to help you find the right tools for your project.