
Tools and Materials
Tools
- Pneumatic Flooring Nailer/Stapler
- Pneumatic Finish Nailer
- Air Compressor & Hoses
- Drill/Driver & Bits
- Hammer
- Rubber Mallet
- Nail Set/Nail Punch
- Circular Saw, Miter Saw or Table Saw
- Pry Bar
- Spacers, Tapping Block & Pull Bar
- Tape Measure
- Utility Knife
- Wood Glue
- Safety Glasses
- Work Gloves
- Dust Mask
- Knee Pads
- Cleaning Gloves
- Notched Flooring Trowel
- Bucket
Product costs, availability and item numbers may vary online or by market.
What Is Engineered Hardwood Flooring?


Made from layers of real wood compressed together, engineered hardwood floors are better able to handle changes in moisture and humidity than solid hardwood.
If you’ve decided to install engineered hardwoods, there are four possible installation methods depending on the subfloor: glue, nail, staple and float.
Whichever method you choose, you’ll need to prep the subfloor by cleaning, leveling, and checking and adjusting door clearance. Read and defer to the manufacturer’s instructions for acclimation times.
Before You Begin
- Allow at least two days to complete this project.
- You can’t walk on new flooring for 24 hours, so plan your work accordingly. You may have to leave a walking strip bare and complete the flooring the following day.
- Check all boards for warping and defects.
- If you’re using the glue-down method, you’ll need a notched trowel for applying glue, and you’ll need to wear cleaning gloves.
- Mix planks from different containers to avoid patches of color. Stains and finishes can vary from batch to batch, and mixing pieces from different boxes creates a more unified look.
- Wear eye protection during the installation.
Prepare the Subfloor
- Remove any existing flooring, then clean the subfloor. Sweep and vacuum thoroughly to remove dirt, dust, paint, and any other debris.
- Identify and fix loose areas, squeaky spots, low or high spots. Fix squeaky spots by securing the subfloor to the floor joists with nails. Ensure the subfloor is level within 3/16 inch over a 10-foot span. Fill low spots with a self-leveling compound, feathering the edges to create a smooth transition, and use a concrete grinder to grind down high spots.
- To ensure that the subfloor is within the acceptable moisture range for your engineered hardwood, check the moisture level with a moisture meter. If the moisture is too high, apply a moisture barrier.
- Ensure the surface is free from flaking or crumbling. Fill in cracks with concrete patch or epoxy.
- Vacuum again to ensure the surface is clean and debris- and dust-free.
Acclimate the Flooring

Prior to installing the engineered hardwood flooring, the boards need to be acclimated. Like real hardwood, engineered hardwood flooring also needs to adjust, or acclimate, to the temperature and humidity level of the environment where it will be installed. These are general steps to acclimate engineered hardwood (however, if you ever have any uncertainty about how to acclimate your engineered hardwood, always refer back to the manufacturer's recommendation on your product):
- Store the unopened boxes flat in the room where the flooring will be installed.
- Open the ends of the boxes so that air can circulate. Alternatively, remove the plastic wrapping, if any, to allow for circulation.
- If you must stack the boxes, ensure that you stagger them, but don’t stack them too high. This impedes circulation.
- Maintain normal temperature and humidity level in the room. Also check on the flooring’s moisture content with a moisture meter; it should be within two percent to four percent of the subfloor’s moisture content.
- Leave the boxes on the floor to acclimate for the amount of time recommended by the manufacturer.
Installing Floating Engineered Hardwood Flooring
Before installing a floating engineered hardwood floor, follow the same preparation steps mentioned above, including underlayment and laying out spacers to maintain the expansion gap specified by the manufacturer.
Step 1: Install the First Row

Install the first row using wood glue on all plank ends, arranged with the tongue facing the center of the room.
Step 2: Install Additional Rows

When installing additional rows, work from left to right. Apply wood glue to the tongue-and-groove seams. Then connect the pieces, carefully folding and tapping the new piece to rest on the subfloor. Immediately wipe up any glue that squeezes through the boards.
Note that some engineered hardwood flooring products have a click-lock design. These don't require glue for a floating installation, unlike tongue-and-groove products.
Use small pieces of painter’s tape randomly over each new seam to secure your work as you move. This provides additional stability to the floor as the glue dries.
Step 3: Fit and Install the Final Row

Measure from board (not tongue) to wall and subtract the expansion gap to know the correct cut for the last row of boards. Then, insert the last row of flooring, taking care to leave the proper extension gap between the last piece and the wall.
Step 4: Remove the Tape

Remove the painter’s tape after 8-10 hours, but avoid heavy foot traffic and furniture placement for 24 hours.
Step 5: Install Transitions and Moulding

Once your new floor is complete, install transition pieces and remove the spacers. Then nail the baseboards and shoe moulding to the wall, not the floor.
Glue-Down Installation Over a Concrete Subfloor
Follow these steps to install glue-down engineered hardwood over a concrete floor.
Step 1: Set the Expansion Gap
Lay spacers along the walls to create the expansion gap specified in the manufacturer’s instructions.
Step 2: Apply the Glue to a Small Area

Pour a small amount of glue on the concrete – about the width of two or three boards – and use the trowel to scrape the glue and drips clean away from the bucket.
Step 3: Spread the Glue
Hold the trowel at a 45-degree angle and spread the glue – make sure the teeth of the trowel touch the concrete. Continue to spread glue in small sections; you only want to work on two or three rows at a time.
Step 4: Place the First Row

Using the straightest boards, lay the first row along the guideline you created when prepping the subfloor with the tongue side of the board facing toward the room.
Step 5: Tap the Second Row Into Place

Fit the second row’s groove on the first row’s tongue and tap the board into place using a rubber mallet and block.
Step 6: Stagger the Joints

Stagger the boards at least 6 inches from each end to add strength to the floor. You may have to cut the first board using a circular or miter saw with a blade designed for engineered wood flooring.
When you run into columns or doorways, cut the planks to fit on both sides, taking care to maintain the expansion gap.
Use a cleaner or special floor wipes designed for engineered wood flooring to immediately remove any glue that may have squeezed through the boards.
Step 7: Continue Installing the Floor
When you reach the end of the floor, stop and leave enough space to comfortably exit the room without stepping on the new floor. Wait 24 hours for the glue to dry. If you need to finish installing the flooring, follow the same process until you reach the last row.
Step 8: Cut the Final Boards to Fit

Measure the distance between the wall and the board — not the tongue — and subtract the expansion gap. Cut (or rip) the last row. If the boards are less than 1 inch wide, apply glue to the tongue of the installed boards and slide the last row into place using a pry bar and a piece of scrap wood to protect your wall.
Once your new floor is complete, install transition pieces and remove the spacers. Then nail the baseboards and shoe moulding to the wall.
Staple-Down Installation Over a Plywood Subfloor
If you’re working with a staple-down engineered hardwood floor, you’ll follow the same preparation steps as above, including laying spacers around the room’s perimeter to maintain the manufacturer’s recommended expansion gap.
Step 1: Secure the First Row
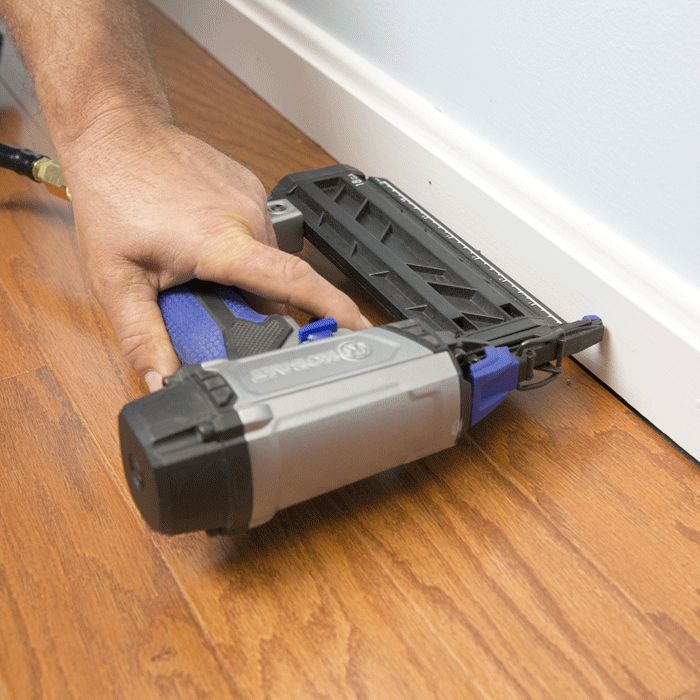
For the first row, pre-drill and nail with finishing nails about 1 inch from the wall at 3- to 4-inch intervals. Use a nail punch and fill the holes with wood filler.
Step 2: Staple Down the Next Rows
For the second and third rows, drive staples every 3 to 4 inches at a 45-degree angle just above the tongue using a pneumatic staple gun. Staples must not interfere with the tongue-and-groove fit of additional boards. Continue installing the flooring.
Step 3: Secure the Final Boards
Your last one or two rows will be face-nailed, as your pneumatic stapler will be difficult to operate in a small space. Pre-drill the holes and use a nail punch to countersink the nails. Fill the holes with matching wood filler to camouflage the marks.
Step 4: Reinstall Moulding and Add Transitions
Once your new floor is complete, install transition pieces and remove the spacers. Then nail the baseboards and shoe moulding to the wall.
Nail-Down Installation Over a Plywood Subfloor
With a nail-down engineered hardwood floor, follow the same subfloor preparation steps as above, including underlayment and laying spacers around the room’s perimeter to maintain the manufacturer's recommended expansion gap. This installation method is identical to staple-down, only the fastener and fastening tool differ. Reference the imagery for staple-down installation for guided assistance.
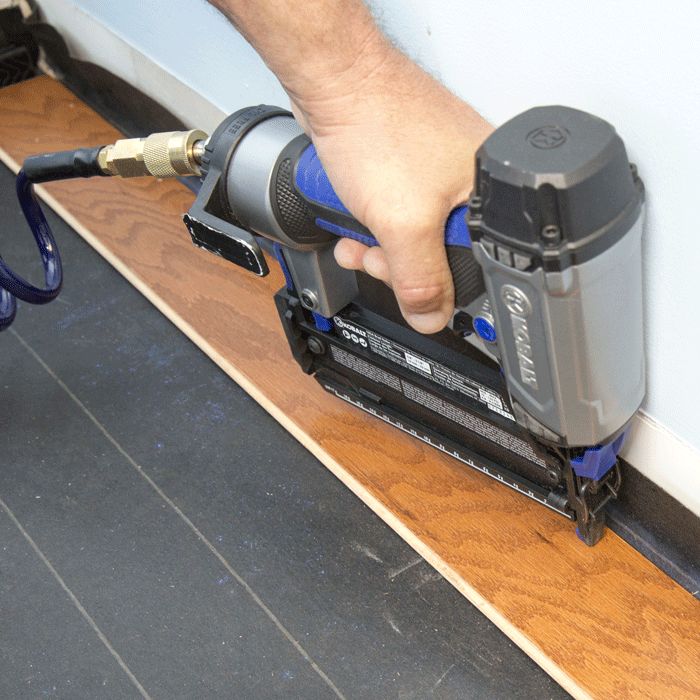
Step 1: Nail Down the First Row

For your first row, face the tongue toward the center of the room, pre-drilling and nailing with finishing nails about 1 inch in from the wall. Pre-drilling saves the wood from cracking and makes for an easier job. Then, use a nail punch to countersink the nails and fill the hole with matching wood filler. Work at a 3- to 4-inch interval along the length of the board.
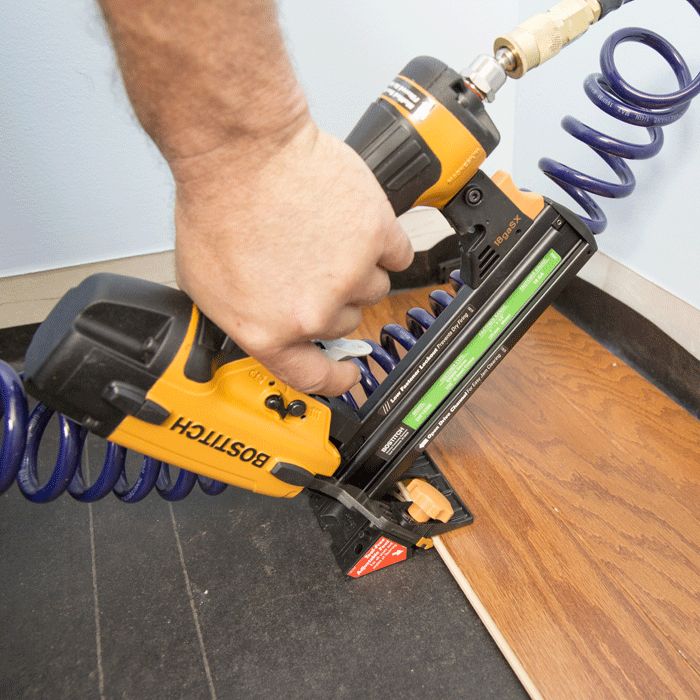
Step 2: Continue With the Next Boards

For the second and third rows, drive the nails at an angle just above the tongue using a pneumatic nail gun. Countersink the nails to avoid interrupting the tongue-and-groove engagement in the following rows. Continue installing the flooring.
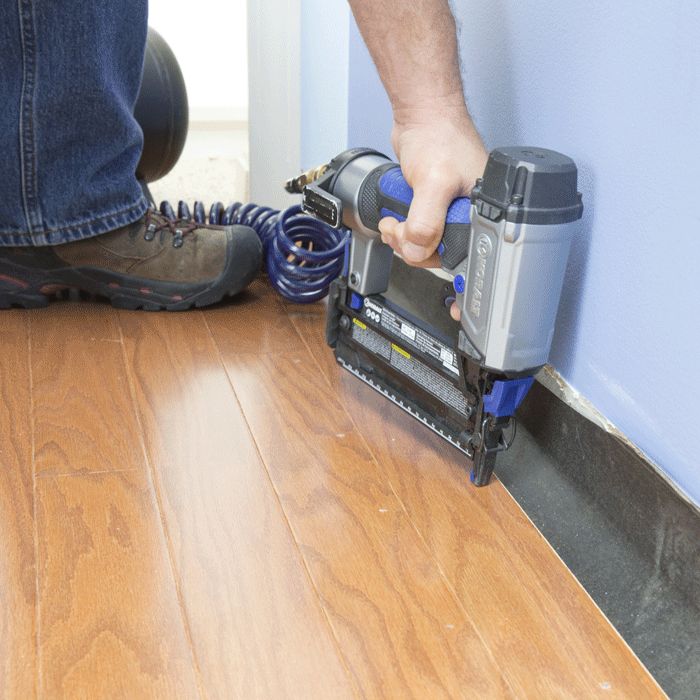
Step 3: Face-Nail the Final Rows

Because it's difficult to use the nailer in small spaces, face-nail the last one or two rows.
Step 4: Complete the Installation

Once your new floor is complete, install transition pieces and remove the spacers. Then nail the baseboards and shoe moulding to the wall, not the floor.
The Choice is Yours With Engineered Hardwood

Knowing the various installation methods of engineered hardwood is beneficial because they allow you to choose the best approach for your specific needs. Whether you choose an installation method that’s DIY-friendly or one that’s better suited for a professional, your informed decision plays a large part in having flooring that’s beautiful, cost-effective and more stable than natural hardwood.
Ready to install? Stop by your local Lowe's and a Red Vest Associate can help you gather everything you need for a DIY installation. If you’re not ready to take on the project yourself or you don't have time, Lowe’s can help. Sit back, relax and let our professionals handle the installation for you.
Frequently Asked Questions
Customers frequently have questions about installing engineered hardwood flooring. Below are just a few.
Does Engineered Wood Need to Acclimate?
Yes, it does. The top layer of engineered hardwood is actually a thin layer of wood veneer and if the planks aren’t acclimated, they could expand or contract after installation which could cause them to warp or gap.
How Long Does Engineered Hardwood Need to Acclimate?
Engineered hardwood typically needs to acclimates for 48 to 72 hours, however, you should always check with the manufacturer’s for specific product acclimation times.
Is Engineered Hardwood Flooring the Same as Laminate?
Engineered hardwood and laminate are two different things. Engineered hardwood contains a real wood veneer as its top layer, while laminate’s real wood look comes from a photographic layer on top.
Can Engineered Hardwood Be Installed Directly on Concrete Without Underlayment?
Engineered hardwood can be installed on concrete directly, however, it can’t be installed without underlayment. Concrete emits moisture which could cause the hardwood to warp or it could lead to mold or mildew.
What’s the Best Installation Method for Engineered Flooring Over Concrete?
The best method depends on the user’s needs; however, one of the most popular installation methods is the floating floor method with a moisture barrier underlayment.