
Benefits of Light Timers
Light timers or lighting timers can help you make better use of your lights, allowing you to set up a lighting schedule without the complexity or expense of a full smart home system. With lighting timers, you can:
- Set lights throughout your home to turn on in the evening and off at bedtime
- Reduce the likelihood of wasting energy by making sure lights turn off when you don’t need them
- Program lights to turn on and off while you’re away to make it appear someone is at home
- Control your lighted holiday decorations automatically
The key to getting the most out of lighting timers is knowing how to use them properly. We’ll walk you through common steps for setting a lighting timer but always follow the instructions for your specific device.
Types of Lighting Timers


There are two main types of lighting timers:
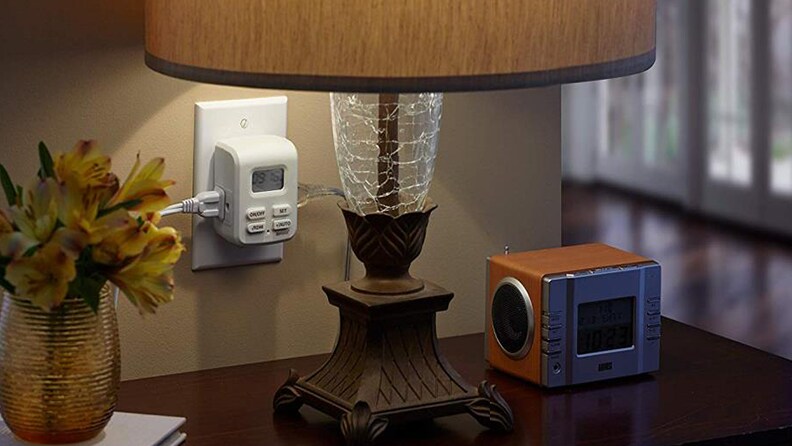
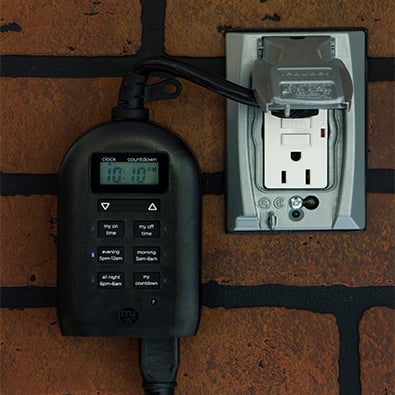
- Plug-in lighting timers are the most common and the easiest to use since you don’t need to wire them — simply plug these timers into standard electrical outlets.
- In-wall lighting timers are more permanent devices. They’re designed to be hardwired into your home’s electrical system, typically replacing standard wall switches and may require an electrician to install.
Both of these are available as digital or mechanical models and you can choose from basic countdown and preset timers and models that let you set specific on and off times.
Lighting timers have ratings for specific amperages and may not be suitable for operating all electrical devices. Check your product instructions and cautions to know the timer capabilities and don’t exceed the device capacity.
Setting Lighting Timers

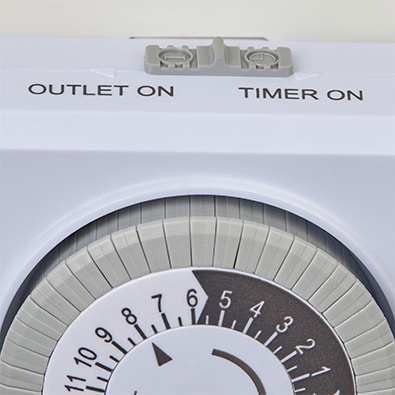
Basic preset timers are the easiest to set. They typically have a dial or set of buttons that let you set the lights to turn on for a designated period of time.
For example, you may be able to set a light to be on for two, four, six or eight hours. Simply select your desired time period and the lights turn on. Once the time period is up, the timer turns the lights off. Many timers use light sensors to reset themselves so the lights turn on and off each day.

Other timers allow you to set specific on and off times. For example, you can program the timer to turn on lights at 5:00 p.m. and turn them off at 11:30 p.m. These timers are the most versatile but require more setup. We’ll walk through general steps below.
Since plug-in timers are very common for a do-it-yourselfer to use, we’ll focus on those, but the actual programming steps for in-wall timers are very similar. Specific procedures and controls vary by timer model, so always follow the instructions for your timer.
Light Timer Setup Instructions
Tips for Setting Light Timers
- Don’t use indoor-only timers outdoors. Make sure your exterior timers are rated for outdoor use and plug them into outdoor-rated GFCI (ground fault circuit interrupter) outlets.
- Many timers have a switch that lets you bypass the timed function. If you activate the bypass switch, the timer simply acts as a power outlet and you’ll need to turn the lights on and off manually at the fixture.
- Some digital timers have a battery backup that maintains the current time as well as the on and off settings in the event of a power outage.
- When setting a mechanical timer, it’s useful to have a small screwdriver to push the tabs in and pull them back up if you need to reset the on and off times.
- If you’re resetting a digital timer to a new time, you may need to clear the device memory before entering new settings. If you’re resetting a mechanical timer, you’ll need to reset the tabs first.
- If your mechanical timer isn’t turning the lights on and off exactly when you want, you may be able to fine tune the settings by turning the timer dial. For example, if you want a light to come on at 5 p.m., set it as close as possible using the tabs. At 5 p.m. twist the dial until the lights come on. Keep in mind, this will change the internal clock and the time the lights turn off.