
Tools and Materials
Tools
Materials
- See Project Diagram for Required Lumber
- 1-5/8-in Deck Screws
- 2-in Deck Screws
- 2-1/2-in Deck Screws
- 3-in Deck Screws
- 80-lb Bags of Concrete Mix (1 Per Post Hole)
- 3/4-in Crushed Stone (Half Bag per Post Hole)
- Exterior Wood Glue
- Clear Wood Preservative
- Transparent or Semi-Transparent Exterior Wood Stain
- Painters Tape (Optional)
- 1-in x 4-in Furring Strip for Bracing Posts (Optional)
- Wood Stakes for Bracing Posts (Optional)
Items may be Special Order in some stores. Product costs, availability, and item numbers may vary online or by market. Paint colors may vary slightly from those shown. Availability varies by market for lumber species and sizes.
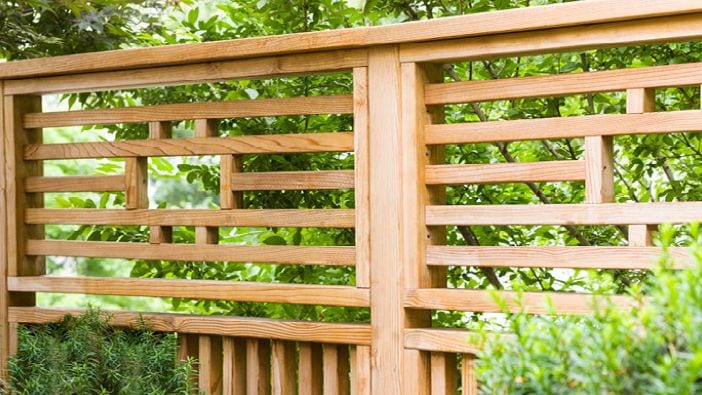
Building Privacy Panels
Build this project as a stand-alone feature; place them in a series along an outdoor space as patio or deck privacy panels or to act as a fence.
Before installing the outdoor privacy screen panels, verify your property lines. Check with your local building code enforcement office to see if a building permit is needed, about hole depth requirements and fence height rules. Also determine if any homeowners association requirements could affect your work. After you choose a location for the panels, call 811 to have the underground utilities marked around them before you dig.
Build the Upper Panel


Build the Lower Panel


Install the Privacy Panel

Try Another Privacy Panel

Monica Mangin has another take on a simple privacy panel: an L-shaped privacy panel that hides a pool filter area of a backyard and attaches to an existing deck. Customize the project to fit your landscape and need for privacy.
As with the project above, find out how building codes, property lines and homeowners association rules could affect the work. Call 811 to have the area checked for underground utilities before you begin digging.


Since this is a similar project, it shares many tools and materials with the project above. Here are key additional items Monica used with her privacy screen build:
- Saw Horses
- Hammer
- Plywood
- Pressure-Treated Boards
- Plastic Drop Cloth
- 6-in Lag Screws
- 2-1/2-in Ring-Shank Deck Nails
- Fast-Setting Concrete
Here are the key steps for the privacy panel build. Watch the video above for the complete project.
Dig the Footers
- Measure and mark the location for the post holes.
- Dig 12-inch-diameter holes deep enough to set the poles 6 inches below the frost line.
- Add gravel to the hole and tamp it down.
- Determine the necessary height of the posts.
Build the Panel
- Measure and mark the posts to the correct lengths.
- Cut the posts to length and assemble the pieces with lag screws rated for pressure-treated lumber.
- Cut the panel slats and attach them with ring-shank deck nails rated for pressure-treated lumber.
Install the Panel
- Brace the panel in place and ensure that it's level and plumb.
- Pour fast-setting concrete into the post holes and add water.
- Attach a spacer and a slat support for the adjoining panel to the deck post.
- Cut the slats for the panel and install them to align with the existing slats.
- Remove the braces and backfill the post holes with soil.
- After the lumber has dried for a couple of months, stain or paint the privacy panel to fit your home and landscape.