
Tools and Materials
Tools
- Flux-Cored Wire Welding Machine
- Welder Contact Tips
- Welding Clamps
- Chipping Hammer
- Wire Brush
- Grinder & Wire Brush Wheel (Optional)
- Wire Cutters/Linesman Pliers
- Pliers
- Welding Helmet
- Welding Cap or Welding Bandana
- Safety Glasses
- Welding Shirt or Jacket
- Welding Gloves
- Welding Apron
- Steel-Toe Boots
- Respirator/Safety Mask
- Hearing Protection
- Fire Extinguisher
Materials
Product costs, availability and item numbers may vary online or by market.
What Is Flux Core Welding?


- Stainless steel
- Low-carbon steel (mild steel)
- Cast iron
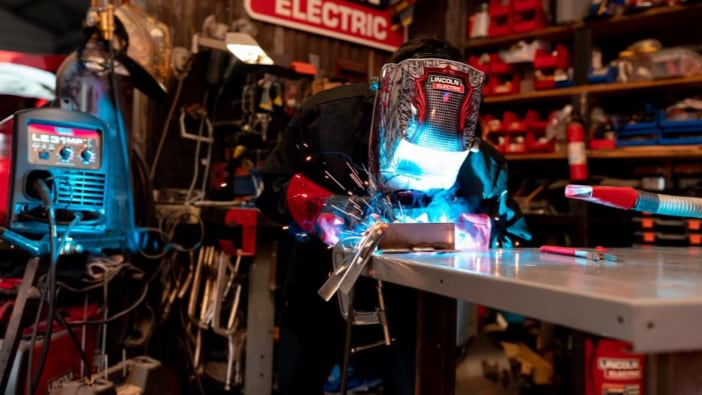
In flux-core or flux-cored wire welding, the welding machine feeds a wire electrode through a welding gun. When the electrode contacts a metal work piece connected to the machine’s work clamp, it completes an electrical circuit, creating an arc. The arc melts the electrode and forms the weld to join the connected work piece to another piece of metal. Many metal inert gas (MIG) welding machines are capable of flux-core welding, but unlike the MIG or gas metal arc welding (GMAW) process, an external shielding gas is usually not required to protect the weld from contaminates when welding with flux-cored wire. In self-shielded flux-core welding, the welding wire has a core containing flux, a compound that creates its own shielding gas as the wire is consumed by the heat of the arc. This gas protects the weld from elements in the atmosphere that can cause poor welds. Flux-core welding also produces slag, a material that covers the weld to protect it, purify it and help hold it in place until it solidifies. Once the weld is complete, you chip or brush away the slag.
In addition to not requiring external shielding gas (and a canister or tank to contain it) for most projects, the flux-core welding process has other benefits:
- It’s relatively simple to learn.
- It allows welding of dirty or rusted materials.
- It allows welding outdoors since there’s no external shielding gas the wind could disrupt.
Don’t weld galvanized metal or metal that’s painted.
Some advanced flux-core welding applications may require shielding gas in addition to the flux-core wire, but this type of welding is typically only found in industrial or manufacturing processes.
Welding Safety Equipment

Before you begin welding, make sure you have the right safety equipment. Check your welding machine documentation to see what you need. Here’s some typical safety equipment:
- Welding Helmet: Make sure the helmet lens has the right shade and color for the type of welding you’re doing.
- Welding Cap or Welding Bandana: A flame-retardant cap or bandana will help protect your head from sparks and make wearing the helmet more comfortable.
- Safety Glasses: In addition to a welding helmet, you’ll need a pair of safety glasses to protect your eyes from debris.
- Welding Shirt or Jacket: Make sure the shirt or jacket allows good range of motion, but there shouldn’t be loose material that could contact the work.
- Welding Apron: A flame-retardant apron helps protect your legs and torso.
- Welding Gloves: Standard work gloves don’t offer enough protection from heat and sparks.
- Work Boots: Look for steel toes and nonslip treads.
- In some situations, you may need a respirator.
You’ll also need long pants, such as jeans, that aren’t cuffed or tucked into your boots.
If you use a grinder to clean your work pieces or the welds, you’ll also need:
Pay attention to your work area as well. The space needs to be dry, clear of flammable materials and have good ventilation. Keep a fire extinguisher nearby.
Turn off and unplug the welding machine when you’re not using it.
How to Use a Fluxed-Core Wire Welder
The steps below outline the basics of welding with flux-cored wire, but the instructions for your welding machine may have different procedures. Always follow your welder manufacturer’s instructions for use and safety precautions.
It’s a good idea do some test welds. Use the techniques described below on scrap metal, and make adjustments to the welder settings, your speed and the angle of the welding gun, as needed, for quality welds.
Insulate yourself from the electrode, clamp, work surface or work piece when the welder is on. See your welder manual for details on protecting yourself from electric shock.
Instructions
What Causes Poor Welds?
Problems with settings and technique result in poor weld quality or weak welds. For example:
- Cracks that weaken the weld can result if the welding wire isn’t matched to the thickness of the work piece or if you make more than a single weld along the joint.
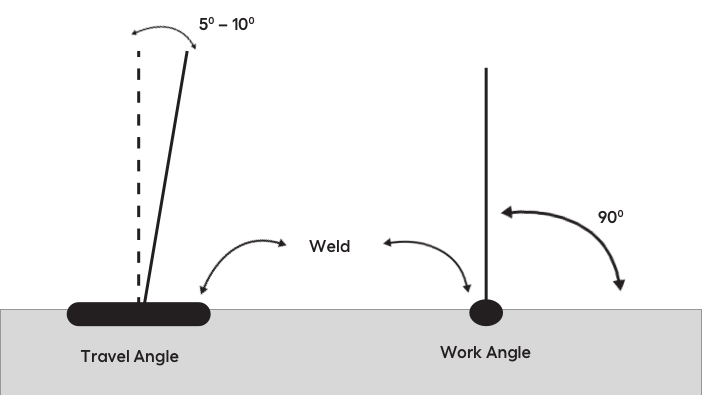
- Slag inclusion, where slag gets caught in the weld rather than forming on top of it, can result if the travel speed (movement of the gun along the joint) or travel angle is wrong, if there’s not enough heat, or if the work piece is excessively dirty or rusty. Slag inclusion can weaken the weld.
- Porosity is evident by small holes in the finished weld and results when gases become trapped in the weld. Trying to weld a work piece that’s too dirty can cause this. Excessive stick-out — when the electrode extends too far from the contact tip — can also cause porosity. Porosity creates a weak weld.
- Excessive weld penetration occurs if you have the voltage too high and the weld material melts through to the bottom of the work piece.
- Lack of weld penetration can occur if the voltage setting is too low, causing the weld not to hold the joint together well.
- Burnback occurs when the wire-feed speed or your travel speed is too slow. In burnback, the electrode fuses to the contact tip.
- Bird nesting is a tangle in the welding wire in the wire-feed path. It can occur if you use the wrong type of drive roll, causing the welding wire to deform and not feed properly. It can also result from setting up the wire-feed system with the wrong tension.