
Tools and Materials
Product costs, availability and item numbers may vary online or by market.
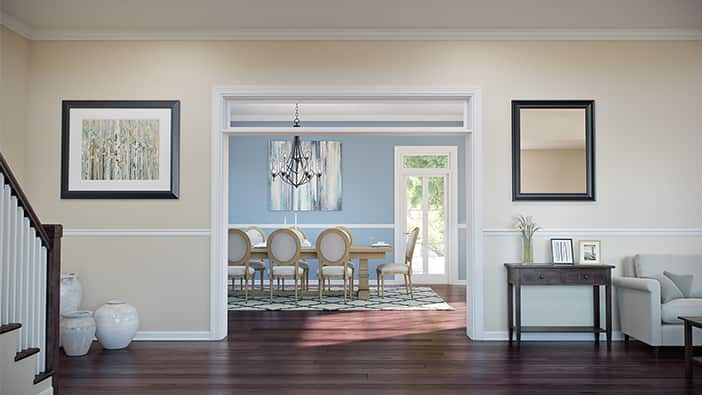
The Beauty of Crown and Cove Decorative Moulding


Crown moulding is a wonderful way to transform any room. It adds instant character and a finishing touch to plain spaces, softening wall-to-ceiling transitions. As a decorative element, you can use it on walls and mantels, as chair rail, on top of cabinets, and over entryways and archways.
Cove moulding is also used to smooth the transition between wall and ceiling as well as add a decorative touch to a space. Cove trim moulding features a concave profile, meaning it curves inward toward the wall. If you’re looking for something that’s less intricate in design, cove moulding is a great alternative to crown moulding — which is generally more ornate. Cove trim can be used on cabinets, shelves, mantels and more.
Preparing to Install Your Moulding
General Tips
- Start by cutting your décor moulding pieces a little long. You can always trim a little off, but once a piece is too short it can’t be fixed.
- Predrill holes for nails to avoid splitting the moulding.
- Use at least a 60-tooth blade if you plan to use a power miter saw.
- Establish a level line for a chair rail by measuring up from the floor to where the bottom of the chair rail will be and making a mark. Then use a level as a straight edge and lightly draw a line around the room. As you install the chair rail, make sure it’s even with this line.
-
Wear the appropriate safety gear, including eye and hand protection.
-
If this is your first time installing moulding, take the time to practice on scrap pieces of moulding before you begin the project.
Determining How Much Moulding You Need

Measure the room at the height where the moulding will be placed to determine the number and length of the pieces you’ll need. Measure in feet and write these measurements down.
Architectural, prefinished, medium-density fiberboard (MDF) and décor moulding usually come in 8-foot lengths. Divide your measurement by 8 and multiply that number by 1.1. The result is the total amount of moulding you need plus 10% waste. Complete this step separately for each type of moulding: base, chair rail, crown and cove.
Standard unfinished wood moulding usually comes in 8-, 10- and 12-foot lengths. Depending on where you’ll install moulding, you can calculate what lengths of moulding will cover the area with the least waste. For example, if you have one wall that’s 6 feet wide and another that’s 5 feet wide, using a 12-foot piece of moulding yields both the 6-foot and 5-foot pieces, leaving only 1 foot of scrap moulding. However, if you use an 8-foot piece for the 6-foot wall and another 8-foot piece for the 5-foot wall, you’ll be left with 5 feet of scrap moulding.
Cutting and Fitting Decorative Moulding
Base and Chair Rail Corners

Lay the moulding with its back flat against the bottom of the miter box or the bed of the power miter saw. For inside corners, cut through the face at 45 degrees so the edge of the cut is visible from the front. For outside corners, cut through the face at 45 degrees so the edge of the cut is hidden from the front. Cut the pieces as mirrors to each other.
Crown and Cove Corners
For outside corners, cut crown moulding with a power miter saw and set it as indicated in our crown moulding table below. For cove trim moulding, use a power miter saw and set it at 45 degrees. For inside corners, you can either miter-cut the pieces or cope them. Note, coping is a technique used more for crown moulding than cove trim because it can sometimes be tricky to miter crown moulding.
To miter-cut the pieces, place the moulding so its top — the part that’ll go against the ceiling — is flat against the bottom of the miter box or bed of the power miter saw. The bottom — the part that’ll go against the wall — should be flat against the side of the miter box or the power miter saw’s fence. Cut the pieces as mirrors to each other at 45-degree angles.
To cope the pieces, butt one piece tight against the wall and nail it in place. Place the second piece in your miter box or power miter saw as described above and cut the piece at 45 degrees so the edge of the cut is visible from the front. Use a coping saw to cut a slight back angle following the contour of the exposed moulding profile. Test-fit the coped cut and trim as necessary.
Splicing All Types of Moulding
When you’re covering a span that’s longer than your moulding, splice two pieces together with a scarf joint. Lay the moulding with its back flat against the bottom of the miter box or the bed of the power miter saw. On one piece, cut through the face at 45 degrees so the edge of the cut is visible from the front. On the second piece, cut through the face at 45 degrees so the edge of the cut is hidden from the front. The joint should meet over a wall stud or another point where it can be nailed.
Decorative hardwood moulding can be installed in two ways. You can use the traditional installation method requiring miter, cope and scarf cuts. Or you can use the corner block installation method, which allows you to install the moulding using only straight cuts.
Polyvinyl chloride or PVC moulding can be used in place of wood moulding. This material can be cut, trimmed and modified just like wood moulding. However, it lasts longer and is waterproof, making it a top choice for bathroom wall moulding.
Applying Finish to Moulding

Apply the finish to decorative hardwood moulding before installing it. You’ll save time because you can work faster than if you waited until after installation. Find a dry, well-ventilated and dust-free area to apply the finish to your moulding.
Put down a drop cloth and apply the finish according to the manufacturer’s instructions. Apply it to the moulding pieces in the same order in which you’ll install them. Then you won’t have to spend as much time waiting for pieces to dry.
Set aside a small amount of the finish to touch up any raw edges.
Installing the Moulding
Follow these steps to install moulding.
Instructions

Installing Moulding With Corner Blocks

To make installing moulding even easier, there are corner blocks and divider blocks. These blocks eliminate the need to cope, miter or splice when installing your moulding. Installing MDF moulding using corner blocks is very similar to installing decorative hardwood moulding using corner blocks.
Instructions
Building Up Moulding
Built-up moulding is usually associated with intricate crown moulding on vaulted ceilings or the ornate mantels of colonial mansions. Although those patterns may overpower today’s average home, you can use the same techniques to design your own personalized moulding. Gather several sample profiles. Experiment with them until you find a profile you like.
Once you decide on the profile for your built-up moulding, determine which piece should go up first. Select the most rigid piece or a piece that butts against a rigid surface like the floor or ceiling. Starting with the most rigid piece ensures straight lines and eliminates the flex that smaller moulding pieces can have. Next, determine the order for installing the rest of the pieces.
Install the first piece as you would a single profile. Install each subsequent profile in its entirety before going on to the next.
How to Cut Crown Moulding
