Tools and Materials
Tools
- Saw horses (1 pair)
- Tape measure
- Angle square or combination square
- Portable circular saw with straightedge guide
- Power miter saw
- Table saw
- Router
- Router bits (3/4-in straight bit; 1/2-in flush-trim bit)
- Electric drill
- Drill bits: 3/16-in. with countersink; 3/8-in twist drill; 3/4-in and 1-in spade or Forstner bits
- #2 and #3 Phillips screwdriver or driver bit
- Assorted clamps
- Putty knife
- Sanding block with medium-grit abrasive
- Paint roller handle with short-nap cover
- Paint tray
- Paint brushes
- Pneumatic 1/4-in crown stapler (Optional)
Materials
- 5 sheets (3/4-in x 48-inch x 96-in) plywood
- 3 sheets (1/2-in x 48-in x 96-in) plywood
- 11 (8-ft) 1-in x 2-in (Actual: 0.75-in x 1.5-in) clear pine or poplar boards
- 1 (1-in-diameter) hardwood dowel rod
- 2 (3/4-in-diameter) hardwood dowel rods
- 1 box exterior screws, 1-1/4-in
- 1 box exterior screws, 1-5/8-in
- 1 lb. box 4d galvanized nails
- 1 screw eye, #6 1-15/16-in
- Wood glue
- Wood filler
- 1 quart latex semi-gloss enamel
- 1 gallon semigloss polyurethane
- #10 x 3-in Phillips flathead screws for wall mounting
- 3/4-in flat Phillips steel wood screws
- 1 (1-1/4-in) PVC pipe
- 1 (13-in) under cabinet shelf
- 5 (24-in) flat strap bungee cords
- 1 double clothes hook
- 1 (24-pocket) hanging shoe bag
Items may be Special Order in some stores. Product costs, availability, and item numbers may vary online or by market. Paint colors may vary slightly from those shown. Availability varies by market for lumber species and sizes.
Instructions


Before You Start:
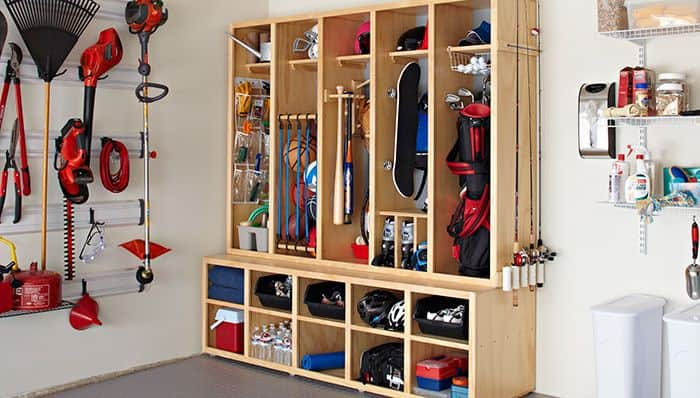
When it comes to building a large-scale project with a modular design, such as this garage storage unit, there are a few tricks of the woodworking trade worth knowing and using. First, to reduce the number of times you have to set up machines for cutting and to get more consistent results, plan your work sequence so you can cut all like-size parts in one batch rather than working piecemeal.
For example, the top and bottom panels (A) and the uprights (B) for the locker unit are different lengths but the same 15-1/2-inch width. First, use a portable circular saw and straightedge guide to cut the full plywood sheets down to the required lengths. This still leaves some unwieldy 48-inch-wide panels to cut on the table saw, so set your rip fence 1/4-inch wider than your final size (15-3/4 inches in this case). This extra width helps in two ways. First, it allows a margin for trimming if the plywood shifts away from the fence and leaves an irregular kerf during the first cut; this is a common problem when trying to maneuver large sheets of plywood on a table saw. Second, it gives you room to trim the factory edges off the plywood, which sometimes get dinged or damaged during handling or transport. Run the parts through once at this setting, then flip them over and run the clean new edge against the rip fence set to the finish width of 15-1/2 inches. You'll have better results to show for your effort, with less time spent setting up your cuts.
Another useful trick is to build a jig for any repetitive work you have to do -- in this case for routing the 3/4-inch dadoes for the uprights to nest in (see illustration). These dadoes are all spaced at 16 inches (center-to-center) and consistency is important, but it's time-consuming to do laborious measuring and marking to ensure accuracy. Instead, you can make a simple plywood jig that uses each dado to guide the router for cutting the next one.
Start with a 3/4-inch-thick plywood rectangle measuring 12-5/8 inches by 24 inches and attach a 7/8-inch-wide plywood strip to one of the long edges, so there is a 1/8-inch "tongue" offset toward the underside of the jig. (NOTE: The width of the plywood jig is based on the setup we used -- a 6-inch diameter router base and a 3/4-inch straight bit; if your router is different, subtract the radius of both the base and the bit from your desired center-to-center spacing to get the correct jig offset. For example, 16 inches minus 3-3/8 inches = 12-5/8 inches.) The jig tongue will nest in one dado as you position the jig to rout the next one; simply clamp it in place and then guide the router base along the opposite edge of the jig.