
Tools and Materials
Product costs, availability and item numbers may vary online or by market.
How Long Does It Take to Change a Tire?
As long as you have the right tools and are familiar with the instructions specific to your car, it should take only about 15 to 30 minutes to change a tire in most cases.
In addition to ensuring you’re not stranded on the side of the road with a tire puncture or blowout, learning how to replace a tire can give you confidence to take on other vehicle maintenance projects.
The Tools You Need to Change a Tire
Everything you need to change a flat should come with your car. In addition to the obvious, a spare tire, you need:
- A car jack
- A lug wrench
Check your manual for specifics as well as the storage locations of the tools and how to remove the jack and spare tire. Practice assembling the jack if necessary. If your car doesn’t include these tools, you should purchase them. It’s also a good idea to have a set of wheel chocks and a reflective roadside triangle kit.
If your car has wheel locks — lug nuts that require a specific tool or key to remove — make sure you have the key as well. Typically, it’s a socket specially designed to fit the individual pattern on the lock nuts. Without the key, it’s very difficult to remove the wheel locks.
How to Change a Tire
We’ll take you step-by-step through the general process of changing a tire, but your vehicle manual will give you instructions specific to your car. Always follow the vehicle manufacturer’s steps and safety procedures.
Familiarize yourself with the steps for changing a tire and the tools you’ll need before you actually have to deal with a flat tire.
Step 1: Park the Car Safely
Park in a safe, level location. Ideally, you need a firm, sturdy surface such as pavement or concrete for the jack. A parking lot or side street might be a good option, but always be aware of your surroundings.
If you’re in an area that doesn’t feel safe or you can’t park along a straight section of road well away from traffic, you may need to turn on your hazard lights and drive slowly to a better location. While this can damage the wheel and further damage the tire, it might be necessary for safety.
Once you’re in a safe location, stop the car and turn off the engine. If your car has an automatic transmission, put the car in Park. For a manual transmission, put the car in first gear. If you have to park on a slope with the car pointing down the slope, leave the shifter in Reverse.
Engage the parking brake and make sure your hazard lights are on. If you have a reflective roadside triangle kit, set it up. If you have wheel chocks, place them against the front and back of the tire diagonal to the damaged tire. If you don’t have chocks, you can use large rocks or pieces of wood.
Step 2: Collect Your Tools and Spare Tire


Take out your spare tire and tools and put them within easy reach. Many auto manufacturers secure the spare tire and tools in or under the trunk so you’ll need to remove the hardware holding them in place. The tools may require a bit of assembly. If you have trouble finding them, removing them or setting them up, check your manual.
Be careful moving the spare tire. Even if you have a temporary spare with a small tire and small wheel, it’ll still have some weight and it may be in a location that makes moving it awkward.
Keep a pair of work gloves in your trunk with your tools to give you a better grip on your tools and protect your hands.
Step 3: Begin Loosening the Lug Nuts
Each of your car’s wheels have lug nuts that secure it to a wheel base. If your car has hub caps or wheel covers, you may need to remove the one on the wheel with the damaged tire to reach the lug nuts. Your car’s lug wrench will probably have a flat blade on one end for this purpose. Pry the cap or cover away from the wheel.
Before you lift the car with the jack, begin loosening the lug nuts. Don’t loosen them too much or remove them, just give them a half-turn to break them loose from the resistance holding them against the wheel. This will likely take some effort and it’s easiest to do it when the wheel is on the ground and can’t rotate. Your manual may have a recommendation for loosening the lug nuts in a particular order to minimize stress on them.
Some older-model vehicles use reverse-thread lug nuts on the left-side wheels. Unlike standard lug nuts, you turn these to the right to loosen them. If you have a car from the mid-20th century, check your manual to see if the left-side lug nuts are reverse threaded.
Step 4: Raise the Car

Find the jack point closest to the damaged tire. Jack points are designated areas on a car that will accept a jack. Your manual will indicate their locations. Using a jack at any other location may damage the car.
Place the jack under the appropriate point and use the jack to lift the car until the tire is several inches clear of the pavement or concrete. Make sure the jack stays steady and straight.
It might be helpful to have a small piece of wood that fits under your jack. The weight of the car can force the jack into soft ground or in some cases, asphalt, making it unstable. The wood will give the jack more stability in some situations.
Don’t work in a position that puts any part of your body underneath the car. If the jack begins to shift or the car feels unsteady, lower it immediately, tighten the lug nuts and reposition the car as needed. If you can't keep the jack stable, call for roadside assistance.
Step 5: Finish Removing the Lug Nuts

Once you’ve raised the car, finish removing the lug nuts. Place them in a safe location where you won’t accidentally kick or knock them away. The tire should now be resting loosely on the wheel studs.
Tires can generate a lot of heat when you’re driving, so the lug nuts may be hot.
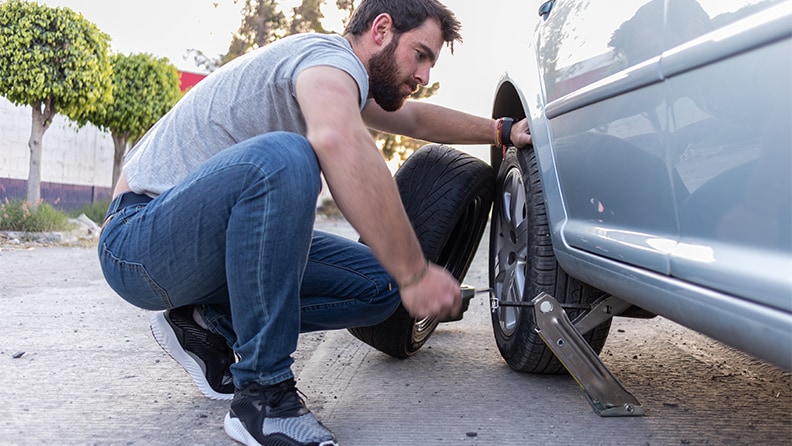
Step 6: Remove the Damaged Tire
Pull the tire and wheel assembly toward you and place it out of the way. Be careful; it can be heavy and sharp metal cording may be exposed on the tire.
Step 7: Place the Spare on the Wheel Studs
Pick up the spare tire and align the stud holes in the wheel to the studs on the wheel base. Place the wheel assembly onto the studs, sliding it back along the studs as far as possible.
Step 8: Replace the Lug Nuts
Begin twisting the lug nuts onto the wheel studs. At this point you just need to hand-tighten them enough to hold the tire in place so it doesn’t shift. Don’t use the lug wrench to secure them yet.
Step 9: Partially Lower the Car and Tighten the Lug Nuts
Lower the car until the spare tire touches the asphalt or concrete. Don’t lower the car completely, you just need to keep the wheel stationary.
Now use the lug wrench to tighten the nuts. You need to tighten them in a particular pattern to help keep the tire straight. In addition, you typically need to tighten the lug nuts in increments. Your manual should indicate the pattern and details. Tighten the first one a bit, then the others according to the pattern. Then tighten the first more, and so on until the lug nuts hold the wheel firmly against the wheel base.
Step 10: Finish Securing the Lug Nuts
Finish lowering the car so its full weight is on the tires. Give each lug nut one final turn with the lug wrench according to the pattern you used above.
Use a tire gauge to check the pressure of the spare. Your manual should indicate the correct pressure and the information should also be on a decal on the driver’s door frame. If necessary, you can use a portable inflator to bring the spare to the correct tire pressure. If you’ve got a temporary spare, check it for a label indicating the maximum safe driving speed.
Collect the damaged tire, your tools, caution triangles, etc. and place them back in your trunk. Secure them if possible. If you removed a hub cap or wheel cover, replace it or put it in the trunk as well. Make one final check of the area to ensure you haven’t missed anything.
Your manual should specify a torque or tightness for the lug nuts. If you’re working in a home garage and have a torque wrench, tighten them accordingly. See our tips for using a torque wrench.
Step 11: Take the Flat Tire to a Mechanic
Replace the damaged tire or have a mechanic repair it as soon as possible. Most spare tires are for temporary use only and aren’t safe for driving long distances. An emergency spare is typically good for a total of 50 miles over the lifetime of the tire.
Drive carefully and don’t exceed the maximum safe speed for the spare. Depending on your speed and the speed of traffic around you, it may be a good idea to keep your hazard flashers on.
Even if you have a full-size spare that you can drive on normally, you need to take care of the damaged tire so you have a functional spare. You also need to have the lug nuts checked as soon as possible. Lug nuts that are too tight or too loose can lead to a damaged tire, wheel or studs.
Tips for Changing a Tire
- Check the condition of your spare regularly and keep it inflated properly.
- Replace a damaged or worn spare.
- Always keep tire change tools in your car and make sure you know how to find and use them.
- Read your manual to learn the steps for changing a tire on your vehicle.


Key Points on How to Change a Tire
Knowing how to change a tire helps keep you from being stranded on the side of the road and can give you confidence for other maintenance and repair projects. Your manual has specific steps for how to change a flat tire, but here are general tips to remember:
- Park in a safe, level location; drive slowly and carefully to a safe area with your hazard lights on if necessary.
- Put the car in Park (automatic transmission) or first gear (manual transmission), turn off the engine and set the parking brake.
- Use the lug wrench to loosen the lug nuts on the damaged tire.
- Use the jack to raise the vehicle and then finish removing the tire.
- Install the spare and hand-tighten the lug nuts.
- Lower the vehicle enough to keep the tire from turning and tighten the lug nuts enough to keep the tire in place on the wheel.
- Lower the vehicle fully and finish tightening the lug nuts.
- Drive slowly and get the tire repaired or replaced.
If you don’t have tools to change a tire, find them on Lowes.com. From a compact jack and lug wrench to keep in your vehicle to a full-size floor jack and a mechanics tool set for your garage, we’ve got what you need. Or talk to a Red Vest associate at your local Lowe’s. They’ll help you find the right tools to keep your car or truck in top shape and running smoothly.
FAQ on Changing a Tire
These quick answers help you know what to expect if you even need to change a tire.
What Tools Do I Need to Change a Flat Tire?
You need a car jack and a lug wrench to change a tire. Most vehicles come with compact versions of these tools. If yours doesn’t have them, purchase them and keep them in your vehicle so you’re ready to change a flat tire.
Where Do I Put the Jack When Changing a Tire?
Your manual should have a diagram showing you exactly where to place the jack for each tire. There might be notches on the underside of the frame to receive the jack. Using the jack anywhere other than indicated by the manual can damage the car.
How Long Can I Drive on a Spare Tire?
Check the labels on your spare, but if you have a small emergency tire or donut, the typical limit is 50 miles. This limit is for the life of the tire, so if you use the tire multiple times, once the total mileage on it passes 50, it’s time to buy a new spare.
What Do I Need to Do After Changing a Tire?
Double-check the air pressure in your spare and add air if necessary and if you have an inflator. Collect the flat and all your tools. Drive to a nearby repair shop, but don’t exceed the maximum speed indicated on the spare. Turn on your hazard flashers if necessary. Have the flat repaired or replaced. If you replaced the tire with a full-size spare and plan to keep it on the vehicle, have the lug nuts checked to ensure they’re tightened correctly.