
When to Protect Pressure Treated Wood
Painting or staining pressure treated wood and sealing it protects the wood from ultraviolet (UV) light and water but knowing when to care for treated wood is key to getting a good, long-lasting finish. In most cases you won’t be able to stain a pressure treated wood deck or fence as soon as you finish your building project. New pressure treated wood usually has a high moisture content — a result of the process that gives the lumber its resistance to rot and insects. The moisture content varies, meaning you may need to wait a few weeks or even as long as 6 months before applying protection. Lumber that’s too wet won’t absorb paint, stain or sealer and the finish won’t adhere properly to the wood surface. In addition, covering the wood too soon can interfere with the pressure treatment protection.
So, when can you protect pressure treated wood? There’s no definite answer that works for all wood, but there’s a simple test you can perform to see if the wood is ready to stain. Just sprinkle some water onto the lumber. If the water beads on the surface, the wood is too wet — you’ll need to give it more time to dry. If the wood absorbs the water quickly, it’s ready for coverage.
You also need to pay attention to the weather to determine timing. If it’s too hot or if the wood will be in direct sunlight, the paint or stain may dry on the surface before it soaks into the wood properly. High humidity levels can increase drying times. Check the product instructions for the optimal weather conditions and plan your project accordingly.
Cleaning the Wood


Before you stain pressure treated wood, it needs to be clean. As you’ve been waiting for it to dry, chances are good that dirt and debris have accumulated on the wood surface.
If the lumber is new, you may be able to simply sweep it or brush dirt and debris away with a deck brush. However, if there’s mildew or stains, you’ll need to use a deck cleaner or TSP (trisodium phosphate) and a scrub brush. You may also be able to use a pressure washer, but make sure you’re using the right setting and tip to avoid damaging the wood. Many pressure washers come with a tip designed of use on decks and fences.
If you’re using a cleaning solution or a pressure washer, you need to cover nearby plants and shrubs with sheeting or a tarp and protect light fixtures, electrical outlets, heating and cooling units, etc. from the water and chemicals.
Once you finish cleaning the wood, you need to let it dry. It’s a good idea to uncover the plants and lawn at this point, especially on warm days. In addition, be sure to uncover your heating and cooling equipment until you’re ready to stain.
Treatment Preparation
Before beginning your project, you need to protect nearby plants, grass, fixtures and outlets as well as heating and cooling equipment. Remove any accessories, such as fence or rail-mounted bird feeders and planters. Fix any nails that have popped out of the wood. If you’re painting or staining a deck, remove your grill and any furniture.
Tools and Materials for Covering Pressure Treated Wood
You will need to make sure you have everything needed for the work. Depending on your project and the size of the area you can use a brush, a roller, a staining pad or even a paint sprayer or tank sprayer to apply coverage to pressure treated wood.
- Brushes let you apply paint and stain in tight spaces and areas where you need a lot of accuracy. They’re also perfect for detail work but require a lot of time and effort.
- Exterior paint sprayers can make quick work of adding coverage to decks and fences.
- Tank sprayers let you apply a lot of stain quickly, but they won’t work for thick stains. You’ll need to use care to get an even finish and avoid overspray.
- Rollers and staining pads can offer a good balance of speed and accuracy.
- Extension poles make rollers and pads easier to use.
And, in addition to your preferred treatment, you’ll also need a few more supplies.
- Drop cloths and plastic sheeting to protect the surrounding area
- Painters tape
- A supply of cleaning cloths
- Stirring sticks
You’ll need appropriate safety gear such as splash-proof goggles and cleaning gloves. Finally, it’s a good idea to wear long pants, a long sleeve shirt and boots or closed-toe shoes. Depending on the conditions, a cap or wide-brim hat can make the work more comfortable.
If you apply stain with a tank sprayer, make sure it's not one you've used previously for spraying pesticides or herbicides.
Painting Pressure Treated Lumber

You can paint pressure treated lumber much like staining or coating the wood. But there are several extra things to consider.
- Unless the paint is specifically designed for foot traffic, don’t apply it to a deck floor or any other structure that will have foot traffic. Standard paint will be dangerously slippery when wet and will wear quickly with foot traffic.
- You’ll typically use latex paint, but some types of treated wood may require a particular type of paint that will work with the chemicals in the wood. Oil-based paints are not recommended due to their inelasticity vs. latex paint which will cause the paint to chip and peel quicker.
- You may need to wait longer for wood to dry for painting than for staining. If the wood isn’t fully dry, moisture may cause paint to bubble and peel. Kiln-dried lumber is available to paint right away, but you should check the moisture density.
- Before painting, you’ll need to apply an exterior latex primer designed for pressure treated wood. The primer will allow the paint to adhere to the wood properly.
Instructions
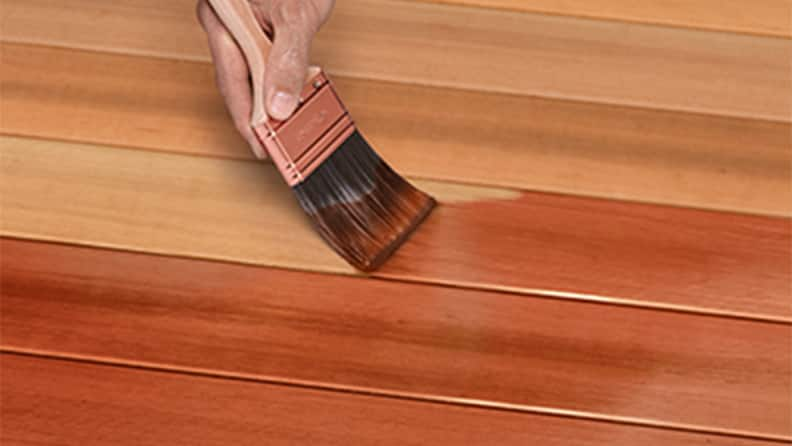
Steps for Staining Treated Wood

Your stain may have specific instructions for whatever you’re staining — a fence, a deck, etc. You should always follow those instructions, but we’ve got some general steps.
Instructions
Sealing Pressure Treated Wood

Since most exterior stains include sealant, sealing treated wood is not typically a separate step. However, if you want to maximize the natural look and warmth of the wood, you can skip the stain and apply a clear or lightly tinted sealer to add waterproofing and, depending on the sealer, UV protection to help prevent fading.
As with stain, the treated boards will need to be clean and dry before you seal them. In addition, if you’re re-sealing treated lumber that you sealed previously, you’ll need to sand the wood or use a wood stripper product to remove the existing sealant before you can apply a new coat. The water test can help here. If the wood absorbs drops of water quickly, it’s ready for sealing. If the water beads, you’ll need to remove the existing sealant.
Once the wood is ready, you’ll apply the sealant using the same steps we’ve outlined above for applying stain:
- Making sure weather conditions are suitable.
- Covering plants and other items
- Applying the sealer a few boards at a time while keeping a wet edge
- Allowing the sealer to dry fully.
Wear eye protection and a respirator when sanding pressure treated wood. If you’re using a wood stripper, follow the safety gear recommendations for your product, such as wearing goggles and chemical-proof gloves.
For more details on keeping a deck in top shape, see our guide on cleaning, staining and sealing a deck.