
Tools and Materials
Tools
Materials
1 x 8 x 8 Pine Board (1 Per Window Box )
- 5/4 x 6 x 8 Treated Deck Board Per Window Box
- 3 - 3/8 x 2 x 3 Pine Boards Per Window Box
- 3/4 x 36 Square Poplar Dowel (1 Per Window Box)
- 2 x 12 x 12 Pine Board (Enough for 3 Window Boxes)
- 2-in Deck Screws
- 2-1/2-in Deck Screws
- 9.8 oz. Silicone Caulk
- 1/4-in Fender Washers
- 1/4-in Hex Nuts
- 1/4-in x 4-in Eye Bolts
1/2-in x 4-in Zinc Screw Hooks
Exterior Semigloss Paint Color of Your Choice
Product costs, availability and item numbers may vary online or by market.
What are Window Boxes?
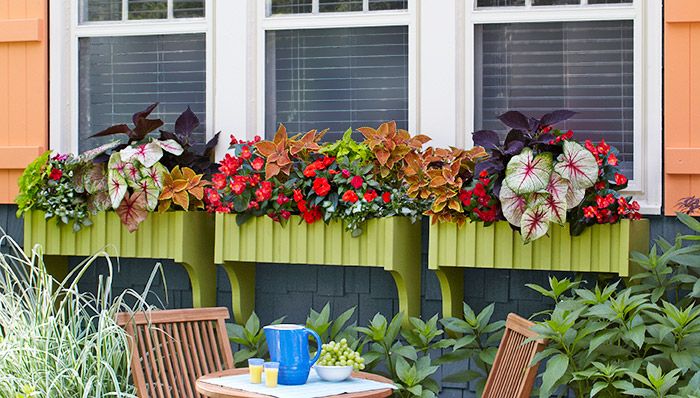
Window boxes are narrow planter boxes that attach to the outside of a building under a window. You won’t just find window boxes on houses, though. They’re a clever way to create gardening spots if you live in an apartment or home without garden space.
Making DIY window planter boxes is a rewarding project that yields beautiful results.
Outside window boxes hold potted plants and create a focal point for your home’s exterior. A DIY window planter box is easily adapted to your window. The boxes are centered on the window and can be slightly wider for a single window or slightly narrower for multiple windows. For a balanced look, a window box can be two to three inches wider than a single window on each side; however, you can extend it out up to six inches if the window has shutters. When you have multiple windows but want a continuous look, use one long window box that fits the entire length of the multiple windows. If, however, you prefer the look of separate window boxes, ensure they’re all the same width as each window and are mounted at the same height for a cohesive look. Avoid using a window planter box that’s too small under a large window because it will look disproportionate and unbalanced.
Making Outside Window Boxes
Outside window boxes hold potted plants and provide drainage so they can hang around for a long time. A DIY window planter box is easily adapted to your window. Add or subtract to the length in 3-inch increments up to 39 inches. The window boxes are centered on the window and can be slightly wider for a single window or slightly narrower for multiple windows.
Make the Window Box
Step 1: Cut the Sides of the Window Box


Cut 22-inch-long 2 x 12s to make a blank for each planter end (A). Mark out the circles using a compass on one. Then draw the connecting lines and make the cuts with a jigsaw (Project Diagram, Drawing 1).
Use the appropriate jigsaw blade to cut the material. Small teeth, like a hacksaw blade, cut metal, and larger teeth cut wood. The thicker the material, the wider the teeth are spaced on the blade.
Step 2: Sand the Cut Edges
If the ends are rough, a half-round file can be used to help shape and smooth the curves. Use the flat side for the outside curves and the round face for the inside curves. Sand the finished shape. Set the finished end on top of the remaining end blanks and align the edges. Trace the shape and cut the remaining ends along the traced lines.
Each side will be a little different because they’re traced and shaped individually. Using the original as a template will help keep all of the sides close to the same shape.
Step 3: Cut the Front, Back and Bottom Pieces, Then Sand
From a 1 x 8, cut the front and back (B). Cut the bottom slats (C) from a 5/4-inch deck board (Project Diagram, Cutting List). Sand all of the parts with 150-grit sandpaper.
Step 4: Join the Boards
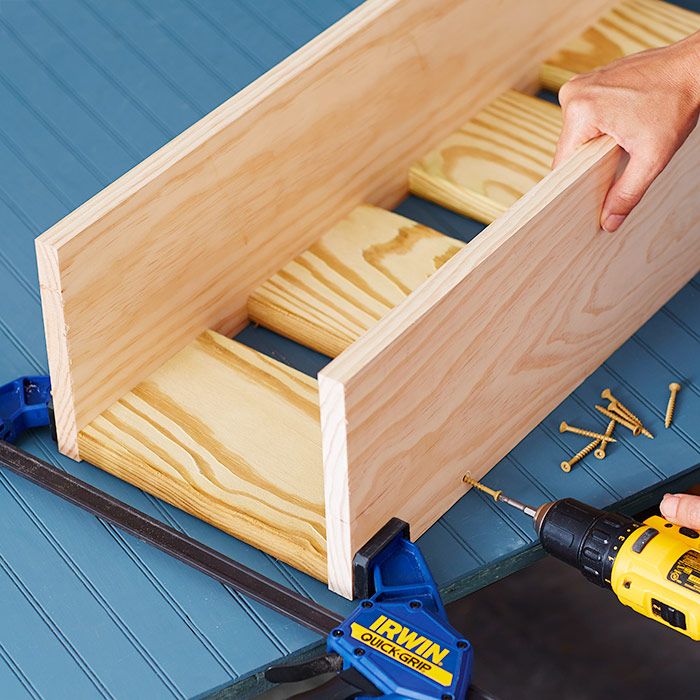
Attach the front and back to the ends of the slats (Project Diagram, Drawing 2) so that the end slats are even with the ends of the front and back and the remaining slats are evenly spaced. Drill a pilot hole and drive two screws through the front and two through the back for each slat.
For our window box, these slats provide drainage. In other window box styles, the designs might differ from evenly spaced holes along the bottom to no drainage holes at all. In that case rocks and gravel can be used to keep the plant’s roots from sitting in excess water.
Step 5: Drive Screws Into the Front, Back and Slats

Flip the box on its top and raise it off the work surface with 1/4-inch-thick spacers. Rest the ends against the box, mark out the screw locations, and drive screws through the ends into the front, back and slats (Project Diagram, Drawing 3).
Note the locations of screws securing the ends to the front, back and slats. Wood will expand and contract as the humidity changes. The screw positioning allows the sides to change through the season without splitting the ends.
Step 6: Cut and Sand the Front Trim
Cut the front trim parts (D) and sand them smoothly. Mark the locations of the trim boards spaced evenly across the front.
Step 7: Glue the Top of Each Trim Board in Place

Apply glue to the top half of each trim board and tape it in place. Remove the tape once the glue dries.
Step 8: Cut a Dowl for Reinforcement
Cut a 3/4-inch square dowel to the same length as the back for the back support (E). Glue and clamp it even with the top edge.
Next, we’ll show you how to install a window box.
Finish and Install
Step 1: Apply Primer and Paint
Apply an exterior primer and two coats of exterior paint to the window planter box. The window boxes can be attached to wall studs, the structural sheathing that makes up the outside of your home, or brick. Your installation may be slightly different from those shown in the illustrations (Project Diagram, Drawings 4 and 5).
When hanging something with a substantial amount of weight on the outside of your home, locate the studs underneath your siding or shingles. To find studs, use a stud finder on the interior of your home first and mark the measurement to apply to the exterior.
Step 2: Mark Holes and Thread Screws
Mark two 3/8-inch holes under your window. Apply silicone caulk in and around the hole and thread the screw hooks into the wall. The silicone helps prevent water from leaking into the stud and damaging the wall.
Step 3: Drill Holes into the Window Planter Box
When the paint dries on the window planter box, drill two 1/4-inch-diameter holes two inches from the top edge of the back, spaced the same distance apart as the screw hooks. Install two eye bolts in the back of the box using a washer and a nut on each face. Trim the remaining thread that extends into the box using a hacksaw.
Step 4: Hang the Window Planter Box
Hang the planters under the window and add potted flowers like salvia, petunias or geraniums, or herbs like thyme, basil or rosemary. Trailing plants that thrive in sunlight include snapdragons, sweet potato vine and trailing verbena, while impatiens, begonias and marigolds work best in the shade.
Dress Up Your Windows with Lowe's
Making window boxes is an easy way to improve your home’s exterior charm. Using this detailed diagram you can create sturdy, attractive boxes that add style and life to your windows.
However, window boxes are more versatile than you think. You can brighten up other areas of your home, as well. Secure window boxes to porch or deck railings for added planting space. They’re the perfect accent for balcony edges. Place them on top of retaining walls with trailing plants for a cascading effect. Mount them along fencing to soften hard lines. Look around your home and property to see the other ways you can use window boxes.
In need of tools and materials? From hacksaws to exterior paint, we’ve got you covered. Shop online at Lowes.com or head to your local Lowe’s where a Lowe’s Red Vest associate will help you find the supplies you need.
Window Boxes FAQ
Knowing the answers to some common questions may help you as you build your window boxes.
Is a DIY Window Planter Box Difficult for a Beginner to Build?
Some steps in building a DIY window planter box are beginner-friendly, while others are intermediate. When using simple plans, basic woodworking skills and materials like cedar or pine, anyone can build a custom planter box in a weekend, but there may be a few steps that are challenging.
What’s The Best Way to Install Outside Window Boxes?
To ensure the window boxes are securely installed, attach them directly to studs with heavy-duty brackets. Make sure you always use rust-resistant screws and brackets that can adequately support the box’s filled weight.
How Do I Choose the Right Size Window Box for My House?
When choosing the right size window box for your house, look for boxes that are the same width as the window frame. If you have shutters, the box can be slightly wider, about four to six inches. The window box depth should be at least six to eight inches to accommodate a healthy plant root system.
What Materials Are Best for DIY Window Planter Boxes?
For durability and weather resistance, choose cedar and composite lumber. These materials offer minimal maintenance. You can also try pressure-treated wood but be sure to line it with plastic to prevent chemical exposure to plants.
How Do I Properly Install a Window Box on Vinyl Siding?
If you’re going to install a window planter box on vinyl siding, make sure you’re using siding-compatible mounting brackets or blocks. Carefully drill through the siding into the studs, then securely attach the box using corrosion-resistant screws.
How Can I Make Sure I Have Good Drainage in My DIY Window Planter Box?
The best way to make sure there’s good drainage in your window planter box is to drill several evenly spaced holes along the bottom panel. Add a layer of gravel or small stones in the box before adding the potting soil. This will enhance the drainage and protect the plant from overwatering.