

Tools and Materials
Product costs, availability and item numbers may vary online or by market.
Preparing for Your Project


Before installing a wood wall organizer in your closet, it's important to create a closet plan. Watch the Design a Closet Organizer video to learn how to create one.
Now it's time to do some prep work. Remove your old closet system and repair the walls by using spackling compound, sanding and priming the surface. Lightly mark the studs where you'll hang the tower unit.
How to Install a Closet Organizer
Here are instructions for how to hang a closet organizer. To ensure the best result, make sure you measure carefully and that the organizer is leveled properly.
Step 1: Assemble the Tower

With the prep complete, assemble the tower. These kits are simple to put together, usually just a matter of locking the bolts and cams together.
With organizer kits you can either set the tower unit on the floor and cut the baseboards to fit, or you can mount it on the wall.
Step 2: Mount the Unit

To mount the unit on the wall, mark the mounting locations. Some kits include a template to help position mounting cleats. Hold the bottom cleat in place — bevel side up — and drill pilot holes into the stud. Then secure it with screws. If you're not in line with studs, use wall anchors. Attach the top cleat and then set the tower on the cleats.
Step 3: Attach the Shelves

Attach the top wooden shelves. Secure brackets near the top of the tower unit first. Then attach the other brackets on the wall at the same height. If you need to cut the shelves to length, wrap painters tape around the cutline to keep the wood from splintering and cut with a jigsaw. Then just attach the shelves.
To get the most from a corner space, attach an adjacent shelf with wall brackets and a special corner bracket.
Step 4: Attach the Hang Rods
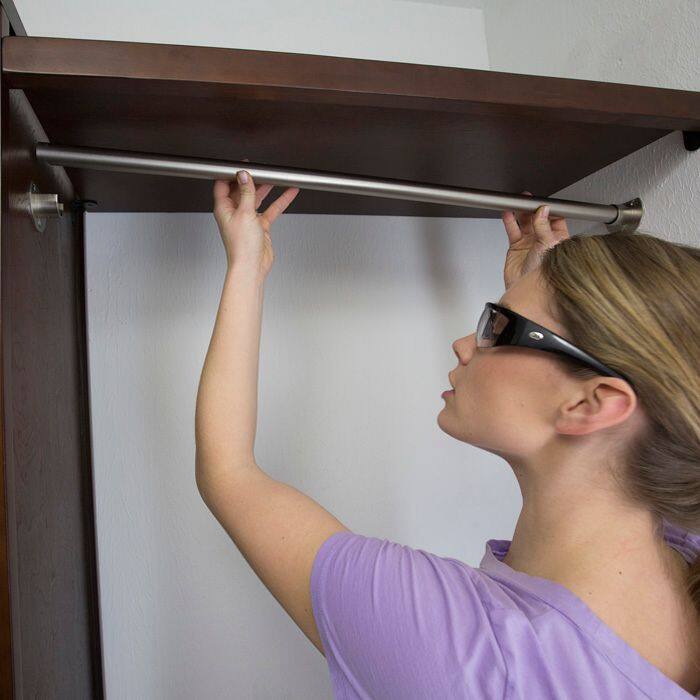
Measure and mark the height on the tower and attach the open bracket. Then attach the closed bracket to the wall. Cut the rod to length with a hack saw or pipe cutter. Set in place and lock in with the set screw.
Step 5: Add Organizer Accessories

For a complete look, finish with closet organizer accessories. Add drawers for socks and scarves, cubbies for shoes and extra wooden shelves for baskets.


