

Tools and Materials
Product costs, availability and item numbers may vary online or by market.
Know Before You Start
- Matching your broken tile may be difficult if it’s an unusual shade, size, or texture. If you don't have any extra tiles from the original installation, consider removing a chunk of the broken tile and taking it to the store to find a match.
- Having a sample of the existing tile also helps you match it for thickness. You can add mastic to raise a replacement tile that's too thin, but a tile that’s too thick calls attention to the repair.
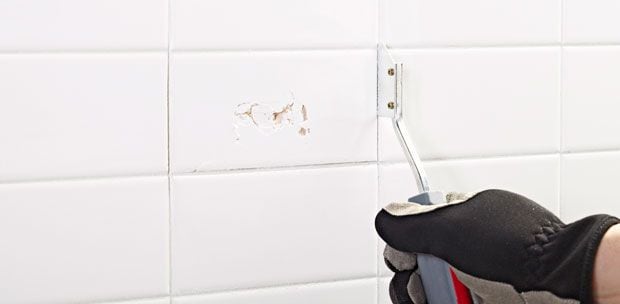
- Breaking the old tile can scatter jagged chunks and small, sharp slivers. That makes work gloves and eye protection critical.
- Debris from this project also can scratch acrylic tubs and showers. To protect them, place an old blanket or thick protective cloth beneath your work area and tape one edge to the wall beneath where you’re working. Then tape a paper or plastic sack beneath the broken tile to catch falling pieces as you work.
- If the tile was applied directly to drywall, removing it can easily damage the drywall. Work carefully to minimize gouges and tears and avoid damaging the subsurface by gouging the gypsum.
- Unless your tile broke from an accidental impact or settling of the house, investigate the cause of the damage. Broken floor tiles, for example, may be the result of problems with your subfloor that should be repaired before you replace the tile.
About the Grout
A quart container of premixed combination grout / adhesive makes these small patch jobs easy and inexpensive, but it’s not always the best product for the job. If the broken tile is in a shower, for example, check the label to make sure you can use it there. For areas that will regularly get soaked, you may need a separate tile adhesive and grout or a tile repair kit designed for damp areas.
The first thing you’ll notice while grout shopping are the terms “sanded” and “non-sanded.” The one to choose depends on the width of your grout:
- Either works for grout lines 1/8 of an inch wide.
- For wider grout lines, use a formula with sand to help bridge the gap.
- For tile spacing less than 1/8 of an inch, use grout without sand to fill those small gaps.
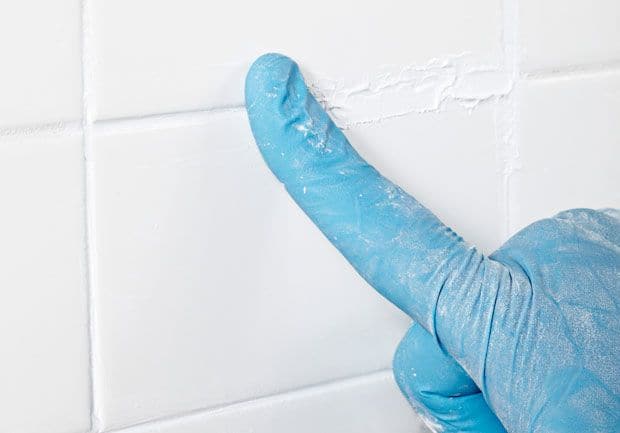
Match Old and New Grout
Place a small amount of replacement grout or adhesive/grout compound on a piece of cardboard and allow it to dry overnight. Compare the replacement grout color and texture to the original after it’s been cleaned. If the colors are too different, switch to a grout mix that’s closer to the original. For example, switching from a grout without sand to one with sand may reduce the brightness of the color.
Fix Cracked Tile
So how do you remove tile and fix it? Follow these steps to repair a broken ceramic tile.
Instructions


Watch our video: How Do I Drill Ceramic Tile?