
Tools and Materials
Tools
Materials
See Cutting Diagram for Lumber
- 3-in & 2-in Polymer-Coated Deck Screws
- 1-5/8-in Stainless Steel Trim Screws
- 1/4-in x 3-in Lag Screws
- 1/4-in Galvanized Washers
- 10-ft x 25-ft Black 4-mil Plastic Sheeting
- 3-ft x 25-ft Landscape Fabric
- 2 - 5.5-Gallon Galvanized Oval Tubs
- 4 - Decorative Strap Hinges
- 2 - 2-in Gate Hooks & Eyes
- Screw Eye Hooks
- Solid Exterior Stain
- Transparent Exterior Stain
Product costs, availability and item numbers may vary online or by market.
Instructions
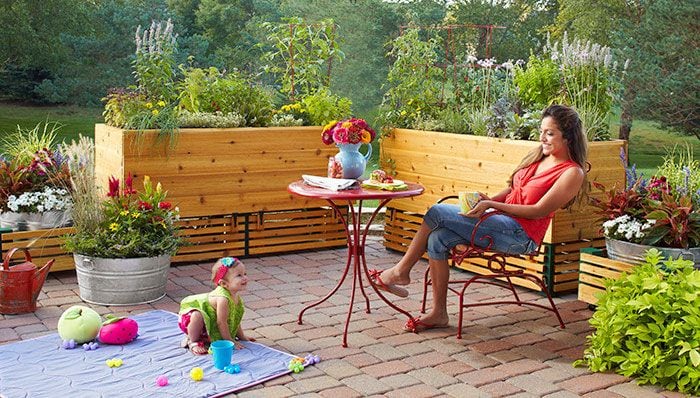
Building a raised planter box is like adding a flower bed to your patio. A raised planter makes it easier to care for plants and can act as a privacy screen for your outdoor space.
Build the Base
Cut pressure-treated 4 x 4s for the six legs (A) (Project Diagram, Cutting Diagram and Cutting List). Apply a solid-color deck stain to the lower 15 inches of the 4 x 4 legs and allow the stain to dry (Project Diagram, Drawing 1). Cut the cedar 1 x 2s for the lower slats (H), lower end slats (I), and the door parts (N, O, and P). Lightly sand the parts, focusing on the corners and edges, to remove any splinters. Preparing and applying stain to these parts now will make for a speedier assembly later. Set the parts aside and allow the finish to dry.
Why is pressure-treated lumber wet? Boards are cut to size and dried at the mill. The dry lumber is placed in a large vessel similar to a pressure cooker and the preservative is added. Under pressure, chemicals are forced inside the dry wood. When working with wet treated lumber, allow the treated boards to dry for a week before applying the stain. Stain doesn't trap the remaining moisture inside the lumber like paint, which would blister and peel. For painted finishes, allow the wood to dry for approximately one month.

Cut the rails (B) and the cross rails (C) to length. Lay out and cut the V-shape notch along the top of the rails (Project Diagram, Drawing 2). A circular saw makes quick work of the long straight cuts; finish the middle portion of the cutout using a jigsaw (Photo 1). By creating a drain point in the middle of the planter, water will not fill your storage tubs.

Secure the rails to the cross rails (Photo 2) using clamps and screws. Attach a cross rail at each end, and then evenly space the two remaining rails (Project Diagram, Drawing 2).

Temporarily clamp the legs to the base and measure for the actual length of the end panels (D) (Photo 3).

Cut the plywood ends (D) to the measured size and attach them to two of the legs (Project Diagram, Drawing 3). Repeat for the opposite end of the planter. Slip the base into the end assembly and secure with screws (Photo 4).
Cut the plywood front/back panels (E) to size, measuring for the actual length and set aside.
Construction materials have slight variations - that's always a dilemma when building a woodworking project. Once you start, always measure for the exact size of the parts that follow. Parts that were meant to be a specific dimension may come up short or long, and then you have to recut the part, make another one, or leave an unsightly gap.
Add the center legs to the assembly. If you stand the case up on four legs, you can rest the middle legs on the floor to ensure all six legs will touch the floor evenly. Cut the two hinge rails (F) to fit between the legs and secure them to the rails with 3-inch deck screws. The bottom of the hinge rail and the bottoms of the rails (C) are flush. The side of the planter with the hinge rails will become the back of the cabinet where the doors will be located.

Screw the front/back panels to the case (Photo 5).

Cut 12 slats (G) to length -- slightly shorter than the width of the planter for an easy fit. With a jigsaw, cut notches in the slats that fit around the legs (Project Diagram, Drawing 2). Starting at the end, place the slats tightly against each other and screw them to the rails (Photo 6).
Add the Trim
Retrieve the lower slats (H) and lower end slats (I). Secure the slats to the lower portion of the legs (Project Diagram, Drawing 4 and Drawing 5). There should be a 1-inch space from the end of the slats to the outside face of each leg. Start with the slat closest to the plywood panels (D) and (E). Space the slat 3/4 inch down from the plywood using a scrap of wood to create an even 3/4-inch gap. Then add the remaining slats using the spacer scrap to keep the parts aligned (Photo 7). Check the space at each end of the slats as you proceed to be sure the slats are even on each end. When the front slats are installed, repeat at each end for the lower end slats.
Wear a dust mask and eye protection when sanding or cutting wood. You may need hearing protection when using some power tools.

Cut 1 x 6 boards to length for the end slats (J) and secure to the plywood ends. With the end slats installed, cut the front/back slats (K) to length and secure using stainless-steel trim screws (Photo 8).
Cut the top end caps (M) and the top front/back caps L to length and temporarily screw the caps to the top of the planter. The cedar caps should be flush with the outside face of the planter slats. (You'll remove them later to install the liner.)
Make the Doors

Retrieve the door parts (N, O, and P). Attach the door slats (N) to the door cleats (O) with stainless-steel screws (Project Diagram, Drawing 6). Note that the doors have a different offset for the cleats. The smaller overhang goes toward the center leg, and the larger overhang is on the end closer to the outside legs. Use a square to help keep the doors aligned properly and a spacer to keep the gaps even (Photo 9).

Turn the planter on its top to install the strap hinges (Photo 10). Secure the hinges 1 inch from the legs with the barrel against the slats (K).

Place the door against the legs resting on a 3/4-inch spacer. Place the hinge cleat against the slats and secure (Project Diagram, Drawing 6). Rotate the hinge up to the cleat and secure the hinge to the door with the screws provided with the hinge (Photo 11).

Secure the gate catch to the end of the second slat, centering the screw eye on the end. Then fold the catch upward to locate where the screw eye is attached to the leg. These hook eyes will secure the door shut when the door is down (Photo 12). Turn the planter over, open the doors, and add a second hook eye to the slats to hold the doors open.
Remove the planter caps (L) and (M). Cut 4-mil poly sheathing to fit the inside of the planter and fasten it in place with 1/4-inch staples. Cover the bottom first and fold the plastic so it covers the lower portion of the sides. Next cover the insides of the plywood and legs and fold the plastic over the top of the plywood. Then reinstall the caps and trim the plastic.
After the plastic is secure, run a utility knife across the bottom between the two center slats -- this will give the water a place to escape. To keep the dirt from running out the opening you just cut, add two layers of landscape fabric to the bottom of the planter, folding it up the sides and secure with staples.
As wood decays over time, it can become toxic to plants, always add a plastic liner to wood planters.
