

Tools and Materials
Product costs, availability and item numbers may vary online or by market.
Prepare to Install Your Wall Panels
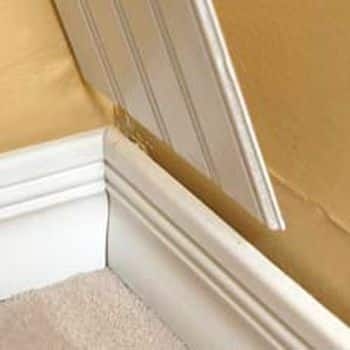
Beaded plank or beadboard paneling is a traditional style that has returned with easy-to-install kits and components. The following instructions illustrate installation in a dining room using special baseboard and chair rail mouldings.
If you're installing paneling and moulding without channels, you can use the following steps with one change: install the baseboard moulding after the paneling instead of before. Refer to the Materials and Tools list, making sure you have what you need before you begin your project.
Read the manufacturers' instructions for all paneling materials and hardware you plan to install. If you have additional questions, a Lowe's associate can help.
You can install beaded plank and other paneling on uneven, cracked or rough walls by first installing a framework of 1-inch-by-3-inch or 1-inch-by-4-inch kiln-dried furring strips. If the installation room is below ground level, first install a vapor barrier following the manufacturer's instructions.
Selecting Your Paneling
Before installation, make sure that all materials are acclimated to the temperature and humidity of the room in which you'll install them. Wood paneling typically requires at least 48 hours of acclimation, preferably with spacers in between panel layers to allow air to circulate.
If you're going to paint the paneling, it's easier to do so before installation. Calculate the amount of paint you'll need. Beaded paneling is available unfinished, primed and finished.
Measure and Prep


Install Beaded Plank Paneling
Follow the steps to install beaded plank paneling.
Install Baseboard


Install Paneling


Install Top Moulding

Finish Your Paneling Project
With the base moulding, wall panels and top moulding in place, take a few more steps to give the work a professional look.

