
Tools and Materials
Tools
Materials
- 3 Zinc-Plated, Slotted L Angles, 14 Gauge (1½ x 1½ x 6 ft)
- 23/32 x 2-ft x 2-ft Sanded Pine Plywood
- 16 Zinc-Plated Lock Washers (1/4 in)
- 16 Zinc-Plated Carriage Bolts (1/4-in x 3/4-in, Thread Pitch 20)
- 16 Zinc-Plated Hex Nuts (1/4-in, Thread Pitch 20)
- #6 5/8-in Phillips Pan Head Self-Tapping Sheet Metal Screws
- 1/2-Pint Satin Water-Based Polyurethane or Polyacrylic
- Painters Tape
Items may be Special Order in some stores. Product costs, availability, and item numbers may vary online or by market. Paint colors may vary slightly from those shown. Availability varies by market for lumber species and sizes.
Key Takeaways
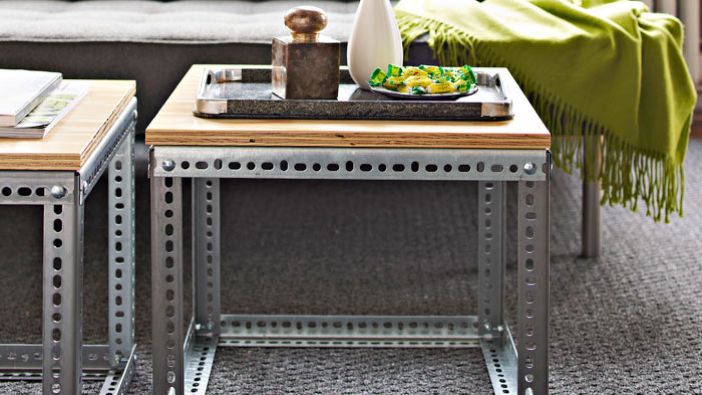
- Build stylish industrial side tables using simple materials for a modern, budget-friendly DIY project.
- This is an intermediate-level project that can typically be completed in one weekend.
- The table frame is made by cutting metal L angles into four legs and eight rails, then assembling them into a cube shape with bolts and nuts.
- Use painter’s tape to mark cuts and file rough edges smooth after cutting metal pieces.
- The tabletop is created from a plywood panel, which can be sanded and finished with polyurethane, polyacrylic or paint for durability and appearance.
- Attach the finished wood top to the metal frame using self-tapping screws through the bracket holes.
- Wait to fully tighten hardware until the entire frame is assembled to help keep everything aligned properly.
- Safety is important: wear gloves and eye protection when cutting and handling metal.
Building a Side Table
Follow these instructions for building a side table. Add materials to fit the number of tables you plan to build.
Step 1
Trim four 15-inch legs and eight 18-inch rails from the L angles. Use painters tape to mark where you'll cut. If cutting brackets with a hack saw, clamp them to a table to secure while cutting. After cutting, file the ends smooth.
When cutting L angles, be sure to make your cut through the ovals. Wear protective gloves and goggles for safety.
Step 2


Connect one 15-inch leg to two 18-inch rails with bolts, lock washers and nuts, creating one table corner. Don't tighten the nuts securely until all pieces are assembled. Continue connecting the legs and rails to create a cube.
Step 3

Cut an 18-1/2-inch-by-18-1/2-inch piece of plywood. Sand and finish with polyacrylic, polyurethane or paint. Place face down, then flip the metal cube on top of the plywood and attach it to the cube with a screw through one of the bracket holes.
Step 4

Repeat on all four sides.