
Tools and Materials
Tools
Product costs, availability and item numbers may vary online or by market.
Step 1: Stain and Paint Stock Cabinets


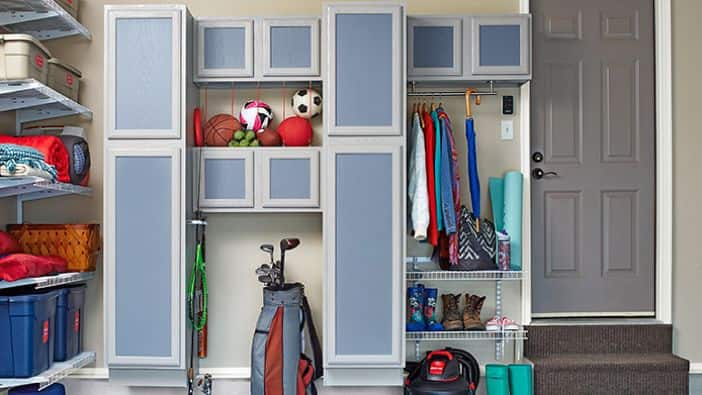
For the look shown above, remove the doors and stain them and the outsides of the boxes in Minwax® Classic Gray. Tape off the door frames and paint the doors in Valspar® Window Screen (# 4004-4A). Or substitute a chalkboard-finish paint to label the cabinet contents like the image to the right. This arrangement uses two 84-inch-tall unfinished pantry cabinets and three two-door cabinets.
Step 2: Organize Your Tools

Thinking outside of the box when it comes to garage organization can save you money. You can buy cabinets designed specifically for garage storage, or you can save a few dollars and get a custom look by using unfinished or used kitchen cabinets. Another alternative is using ready-to-assemble kitchen cabinets. Customization has never been so simple. This pantry cabinet is prepared to store power tools and includes bungee cords to hang instruction manuals.
Need more tool storage ideas? See our Garage Tool Storage Buying Guide for tips on keeping your hand tools and power tools organized, secure and in top shape. You can also look at our garage storage options, including garage storage systems, rail storage systems and overhead garage storage.
Step 3: Add Saw Blade Storage

Careless handling can chip the carbide teeth on saw blades. Protect blades by hanging them inside a cabinet on nails or screws. Use leftover space to hang sanding disks of different grits.
Step 4: Make a Memo Holder

Cork tile on the insides of the cabinet doors provides a place to tack up receipts, notes, shopping lists and photos. For an alternative, cut dry erase board to size and apply it to the panel with construction adhesive.
8 Clever Uses for Kitchen Cabinets has more inspiration and ideas on customizing cabinets for storage and organization around the home. If you need more ideas for keeping your garage in order, see our Garage Storage and Organization Ideas.