

What Are Cable Railings?
Cable railings are tensioned cables, typically stainless steel, attached to wood, vinyl or steel posts with a top guard rail for safety and support. They’re used on patios, decks, stairs, balconies and porches. Their sleek, modern look and minimalist design provide unobstructed views that you can’t get with traditional railing. This has led to their rise in popularity.


Parts of a Cable Railing System
A cable railing system consists of many parts that make up the finished product, each playing a vital role.
- Cable: Horizontal wires, usually stainless steel, that run between two posts in the railing system (also known as infill) and between the top and bottom rails.
- Posts: Vertical posts used to support the top rail. Post caps and post skirts may also be included in a cable railing kit for a finished look.
- Top/Bottom Rail: Rails that run across the top and bottom of the cable railing system that are necessary for structural integrity.
- Hardware: The hardware needed to connect the cables, rails and posts, tensioners and stabilizers for proper, safe installation of the cable railing system.

Stepping Up Your Game
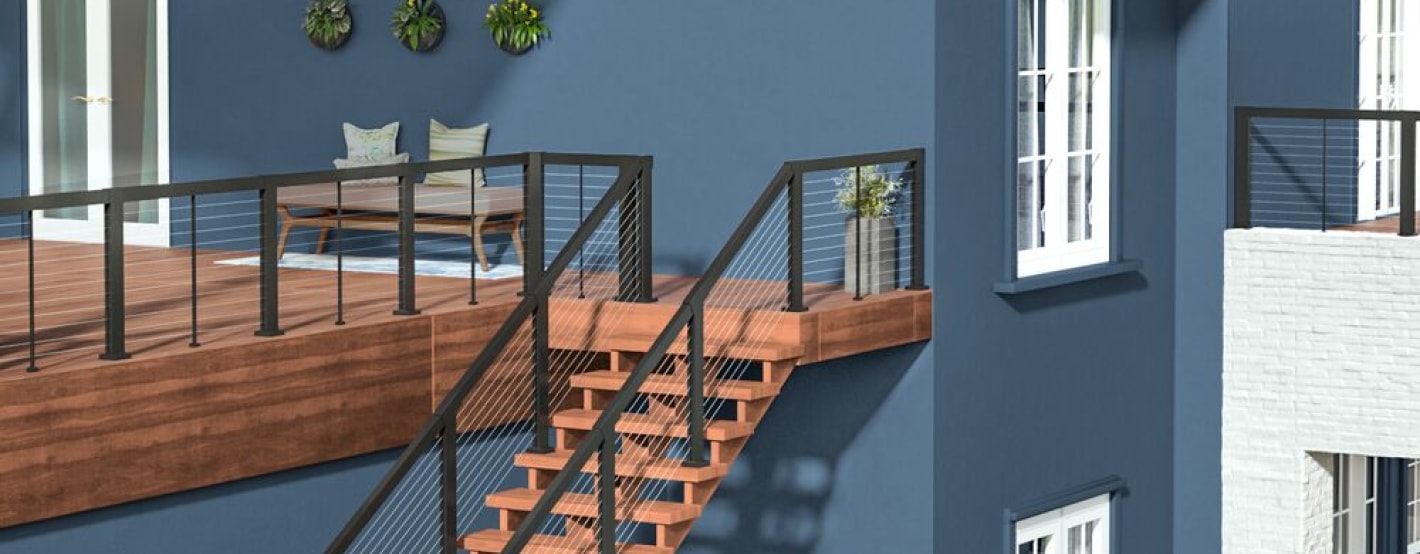
When you're stepping up your railing game from one level to the next, the cable railing system on the U-shaped stairs with a landing between levels is a study in contemporary living with clean, modern lines.
Straight Up Cozy
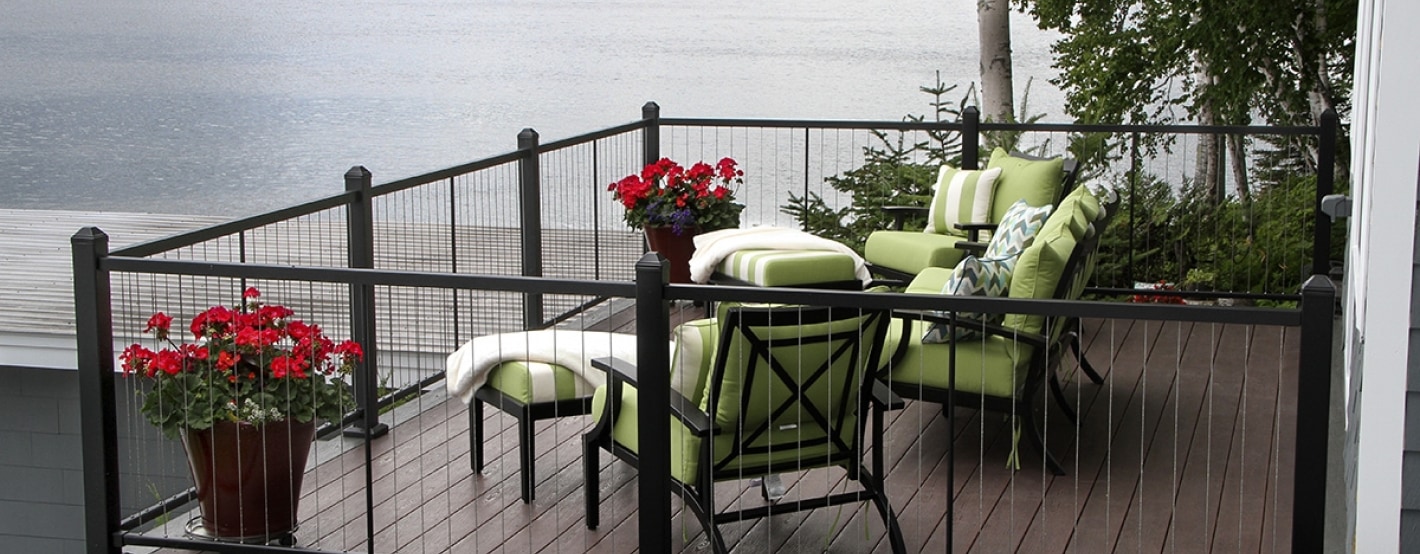
This attractive black stainless steel railing with black steel posts seamlessly enclose this deck and makes the space feel cozy yet comfortable. The vertical cables add a sense of visual height and, when compared to horizontal cable railing, vertical cable railing is less prone to sagging.
Welcome In Style
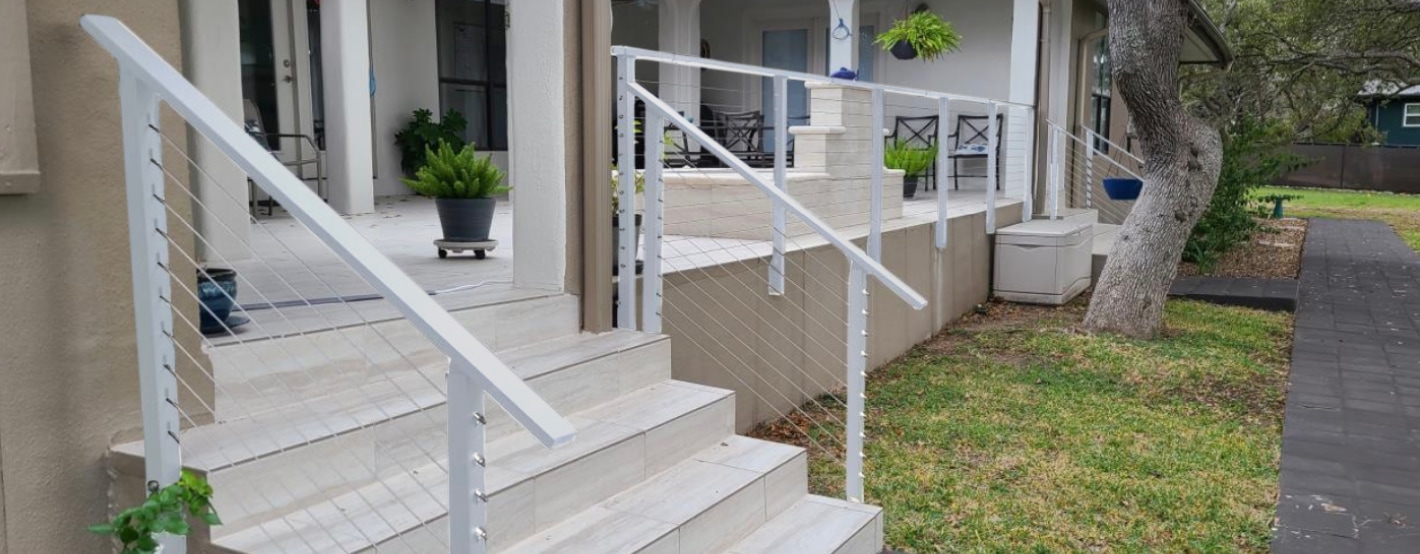
The clean, modern lines of this gray steel cable railing add to your home’s curb appeal and welcomes guests to your front door in style. Get a cohesive look when you match railing and its surroundings in similar colors, as shown here with the steps, porch floor and pillars all sharing similar hues.
Going Rustic
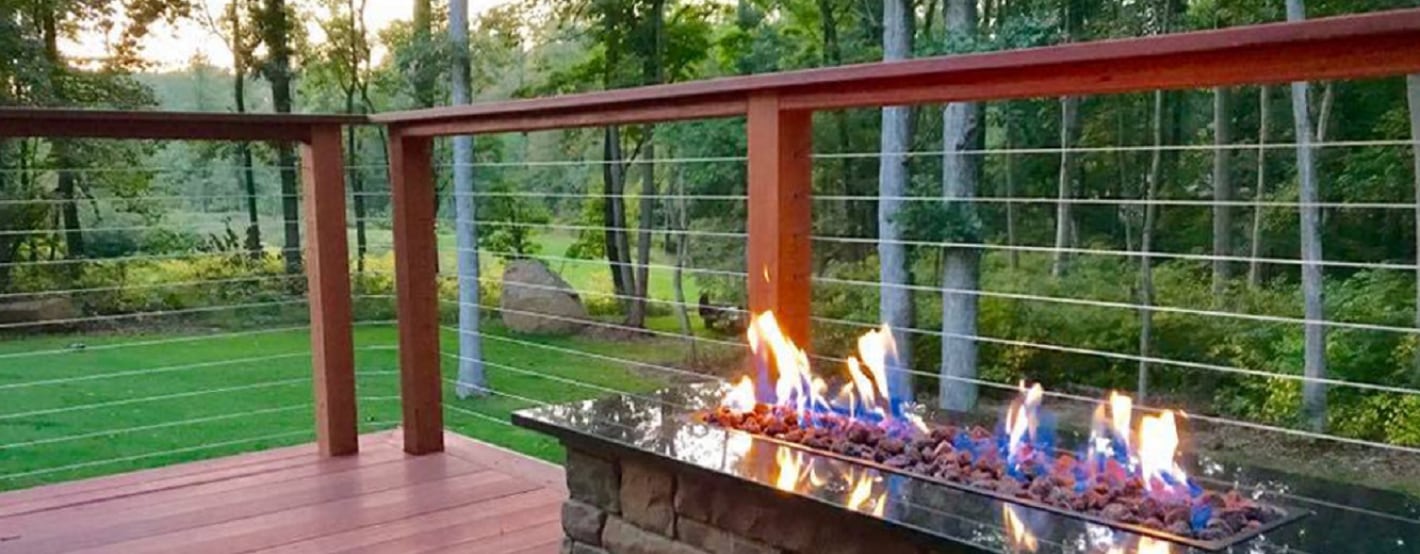
It’s all about getting cozy on this deck when you gather with friends on a chilly evening. Stainless steel cable railing with wood railing and posts has a rustic yet modern vibe and sets the right tone as it blends in with the wood deck and faux-concrete fire table.
Blending In Effortlessly
The wonderful thing about cable railing is that it can be the star of the show while fading into the background, because that’s what it does. This black stainless steel cable railing effortlessly blends in with the surroundings and looks as if it’s been a part of the design scheme from day one.
Cost of Cable Railing

As with any other type of railing system you use, the cost of a cable railing system — consisting of cable, posts, handrails and hardware — varies greatly and depends on various factors, including:
- The size of the project and the area you need to cover. For this, you’ll need to know the exact measurements of how many linear feet you’ll need to cover.
- The railing height. Start with your local code requirements, if any, for the railing height, and you can customize the height, if you prefer.
- The complexity of the cable railing design. The more corners and posts your system has, the more labor and time involved, adding to the cost.
- The cost of labor. Labor costs vary depending on whether the project is completed by a professional or whether you’re experienced and skilled to complete the job yourself (DIY – do-it-yourself). While there are significant cost savings if you go the DIY route, keep in mind that installing a cable railing system requires precision to ensure safety.
- The material choice. Stainless steel cable railings are the first choice for many homeowners; however, it isn’t the only choice. Aluminum offers an alternative to stainless steel that’s cost-effective and lightweight and strikes a balance between durability and affordability. You also have the choice of wood or metal posts.
A complete stainless steel cable railing system is estimated to be about $150-$285 per linear foot, including installation. That estimate is reduced if you opt for wood posts and framing. Compare that to the cost of other railings.
Cable Railing Safety
Studies by the National Ornamental and Miscellaneous Metals Association (NOMMA) and the National Association of Home Builders (NAHB) have shown the risk of children climbing and falling off cable railings is minimal.
However, the wider the gap between cables, the higher the risk of an accident. This can be mitigated by increasing the cable density; however, this may increase the cost as well as obstruct the view slightly.
To mitigate the risk of injury, always monitor small children and pets around cable railing.
Pros and Cons of Cable Railing

Cable railing works well in both residential and commercial spaces, making it a popular choice for many. However, as with any other type of railing, it has advantages and disadvantages.
Cable Railing Pros:
- Low maintenance but does require routine cleaning and adjustments to preserve tensile strength.
- Resists corrosion and won’t decay.
- Designed with durability in mind.
- A budget-friendly, affordable option.
Cable Railing Cons:
- The installation process is often complex and can be time-consuming.
- Lack of privacy.
- Galvanized steel cables can erode over time.
- Fluctuating temperatures may result in expansion and contraction of the cable which may cause the cable railing to loosen.
Some jurisdictions may have restrictions on the use of cable railings. Check with local building codes to ensure you’re in compliance before installing.
Notes on Installation
Not all deck railing systems are the same and not all installation processes are the same. There are, however, general steps that may apply for each installation. If you’re installing cable railing yourself, you likely purchased a cable railing kit which should walk you through the installation process. Below is a summary of DIY installation steps. Your installation process may vary so ensure that you read and follow your instruction manual.
- Before beginning installation, ensure you have all the parts needed for installation and read the manual thoroughly.
- Measure out and install vertical posts no more than four feet apart.
- Measure and mark the holes on the post for the cables.
- Pre-drill the holes, ensuring that the cable spacing is no more than 3-1/8-inches apart. For accuracy, make a template with the correct hole placement that you can use for each post to make the holes equal and guide the drill each time.
- Starting at the top of the post, run a cable through the first hole and fasten the end of the cable to the post with a washer and nut, then thread the cable to the end of the terminating post. Pull the cable tight and put a one-way clamp on the cable.
- Repeat Step 5 with the remaining rows of cables until all rows of cable have been run.
- Using a wrench, tighten each cable.
- At the end of each run, snip off excess cable and finish it off with end caps to hide the end of the cable.