

Tools and Materials
Product costs, availability and item numbers may vary online or by market.
Measuring For a New Toilet


Learning how to remove and install a new toilet starts with knowing how to size the fixture. The right dimensions for a toilet depend on the size of your bathroom and the location of the floor drain. You’ll see toilets listed by rough-in size. To determine the rough-in size you need, measure from your back wall to the center of one of the closet bolts that secure the existing toilet to the floor. Be sure to measure from the wall and not from the baseboard. A rough-in size of 12 inches is the most common, but you may see 8-inch or 14-inch rough-in measurements as well.
Next, measure to any nearby water supply lines on the floor. Some toilets have a wider base that might not fit next to a supply line. It’s also a good idea to measure from the bowl to a sidewall to be sure that the toilet will fit in your space.
If you have shelves or a cabinet above your toilet, you’ll also need to consider the tank height. To determine your existing toilet tank height, measure from the floor to the top of the tank lid.
Choose the shape of your toilet bowl. Usually, toilet bowls are elongated for comfort, but if you have a smaller space you might need a round bowl. The shape will determine the toilet seat size. While toilet seats are generally standard sizes, it’s a good idea to have measurements when shopping in case there are some variations by manufacturer. Here’s how to measure toilet seat fit by collecting measurements from the toilet bowl.
Step 1
Remove the seat and measure from the center space between the seat bolt holes to the front edge of the bowl. Round bowls should measure 16-1/2 inches, while elongated bowls should be about 18-1/2 inches.
Step 2
Measure the distance between the center points of the bolt holes. This distance should be 5-1/2 inches.
Step 3
Measure the distance between the outer edges of the bowl at the widest point. This will usually measure between 14 and 14-1/2 inches.


Removing the Old Toilet
Once you have the new toilet, you'll need to know how to remove and replace a toilet. Key steps include turning off the water, draining the tank, popping off the toilet bolt caps to unbolt the toilet and lifting the toilet up and away from the toilet seal or wax ring.
Step 1: Remove the Water
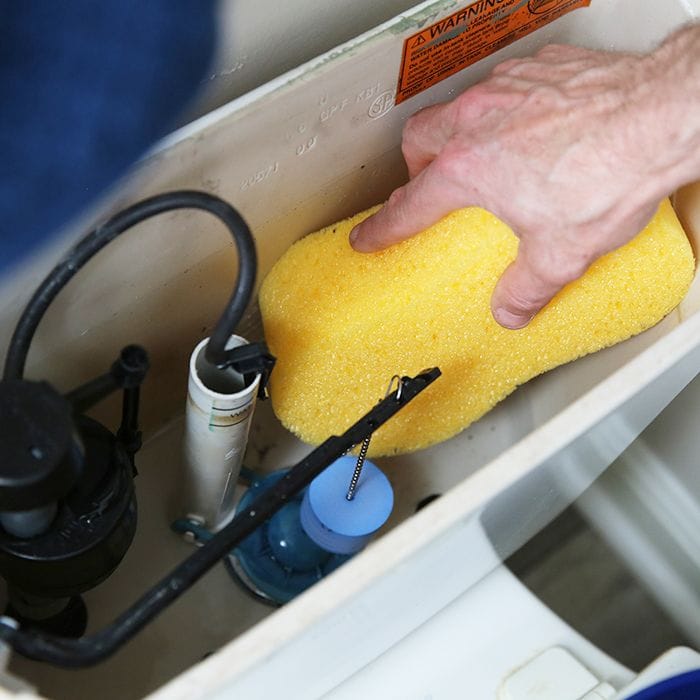
Turn off the water supply line and flush the water from the tank. Remove the rest of the water in the tank with a sponge.
Step 2: Disconnect the Water Lines
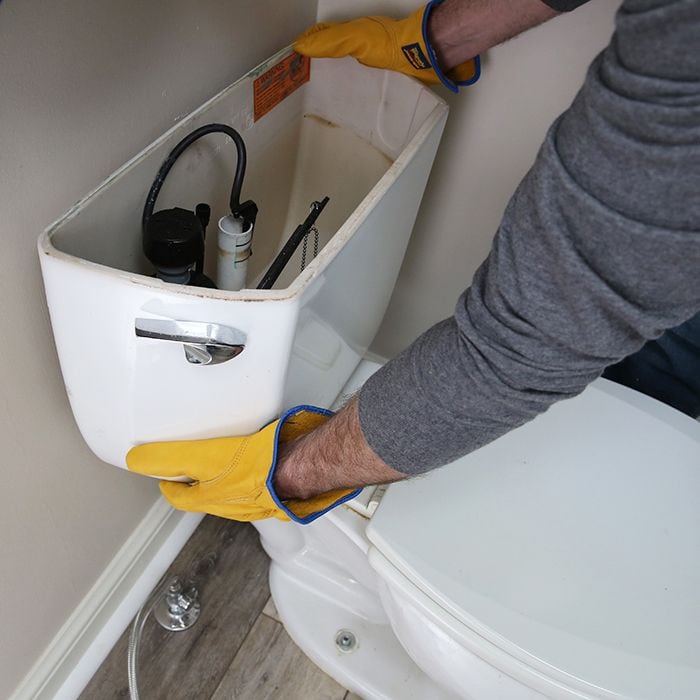
After disconnecting the water supply lines from the tank, position a bucket to catch any water remaining in the bowl or lines. Unscrew the nuts on the bottom of the tank and lift it off the bowl. Wear gloves in case it cracks.
Step 3: Uninstall the Bowl
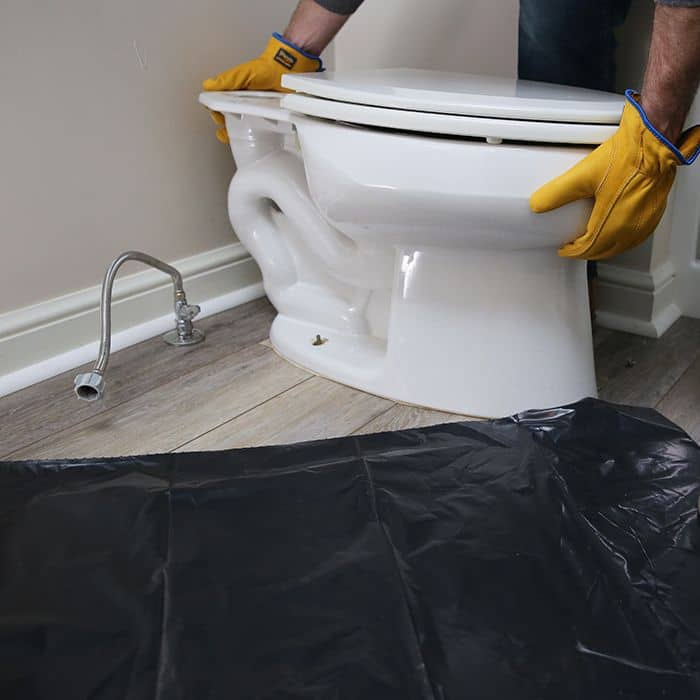
Use a water solidifier to keep any remaining water from sloshing out of the bowl. You could also use a sponge to get the water out. Remove the toilet bolt caps. Loosen and remove the nuts that hold the toilet bowl to the floor. Lift the bowl and set it out of the way on a garbage bag.
Toilets are heavy. You may find it easier to remove the tank from the bowl before uninstalling the bowl.
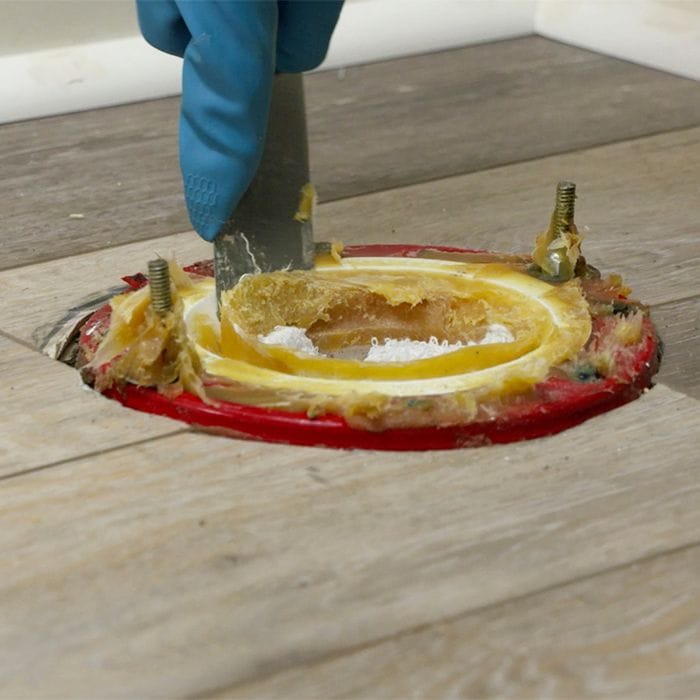
If you don’t like the thought of your putty knife being used on a sewer drain, use a plastic putty knife or shim to remove the old wax ring. They’re budget friendly and can be thrown away after you’ve finished the job.
For more on replacing a wax ring, our guide, How to Replace a Toilet Wax Ring, gives you step-by-step instructions.
Step 5: Repair the Flange

Remove the old closet bolts from the flange. Make any repairs to the flange as needed. Repair kits are available to fix a broken flange. Replacement flanges are also available to fit inside the pipe and create a tight seal.
The flange should be a little higher than your finished floor. However, if you’re adding new flooring, your flange could be too low. Products, such as taller wax rings and flange spacers, are available to create the proper seal when the toilet is in place. Install taller wax rings just as you would a typical wax ring. Some are wax free and use foam and rubber to create a seal.
Flange spacers sit on top of the existing flange. You must use silicone between the spacer and flange to create a seal and then secure the spacer to the subfloor.
Installing a New Toilet
How do you replace a toilet? The key steps are relatively simple and include placing new hardware and a new wax ring, securing the new bowl to the floor, attaching the tank and installing the seat. Here are the details for a typical project.
Step 1: Install the New Bolts
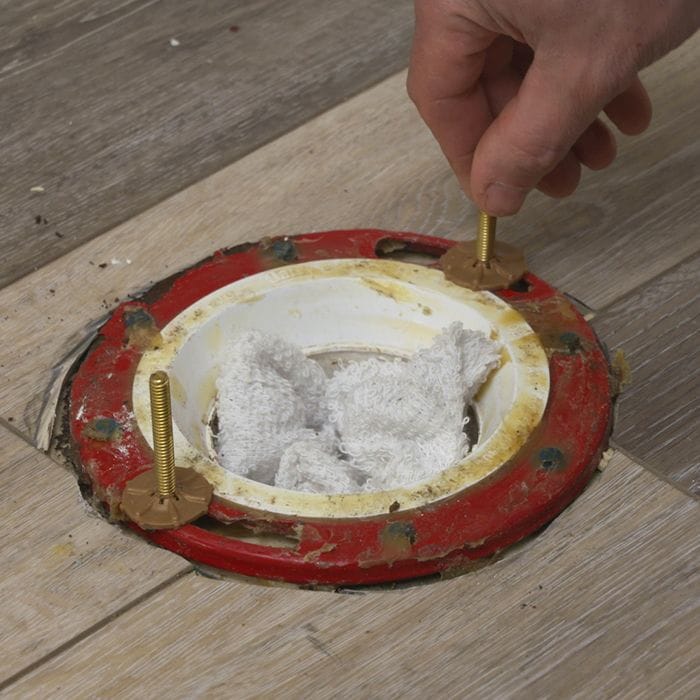
Install new closet bolts by sliding them into the slots on the flange. Some have washers or nuts to hold them in place on the flange. Tighten down these washers so it’s easier to align your toilet when setting it in place.
If your old toilet was rocking in place, you can help stabilize it with toilet shims. To install them, set the toilet in place without the wax ring. Use the shims to stabilize the toilet and tape in place. Remove the bowl and continue the installation with the wax ring. After the toilet is installed, cut the excess shims with a knife. Check out our DIY Basics video: How Do I Use Shims?
Step 2: Install the Wax Ring
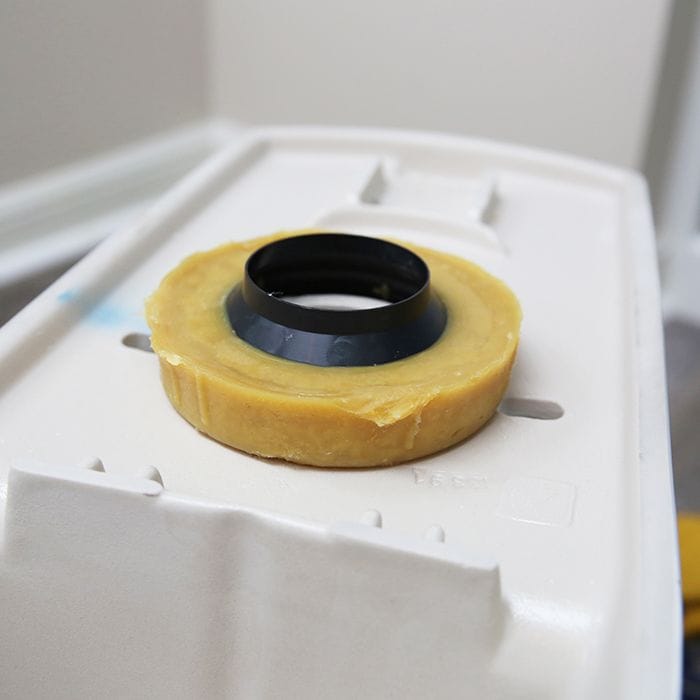
Run the wax ring under warm water to soften it. You can handle the toilet wax ring install step in one of two ways.
- Set the new toilet bowl upside down on a towel and either gently press the ring onto the outlet under the bowl, or
- Place the toilet seal or wax ring on the flange in the floor.
Toilets usually include a wax ring. However, it’s best to purchase a backup wax ring in case of damage during installation. You can also use a wax-free ring. These types of rings fix on the flange, rather than the toilet outlet. They're easier to install than a typical wax ring, with less potential for damage during installation.
Step 3: Install the Toilet Bowl
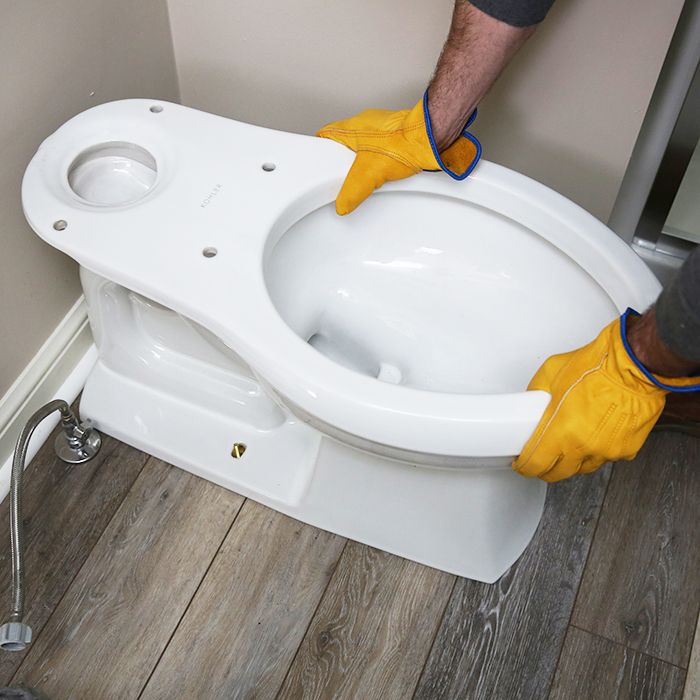
Next, learn how to replace the toilet bowl. After your wax ring is set, remove the rag from the drain. Carefully lower the toilet bowl over the new closet bolts. Try to lower it straight down over the flange rather than tilting and rocking it into place. This will help prevent damage to the wax ring. Firmly press down on the bowl and make sure it’s square with the wall.
Step 4: Secure the Toilet
Add the cap bases, washers and nuts to the closet bolts. Make sure the cap bases have the correct side facing up. Alternate tightening the nuts to keep the pressure even. Make sure the nuts are firm but don’t tighten them too much; the bowl could crack. Then use a hack saw to cut off the excess bolt. Snap on the caps.
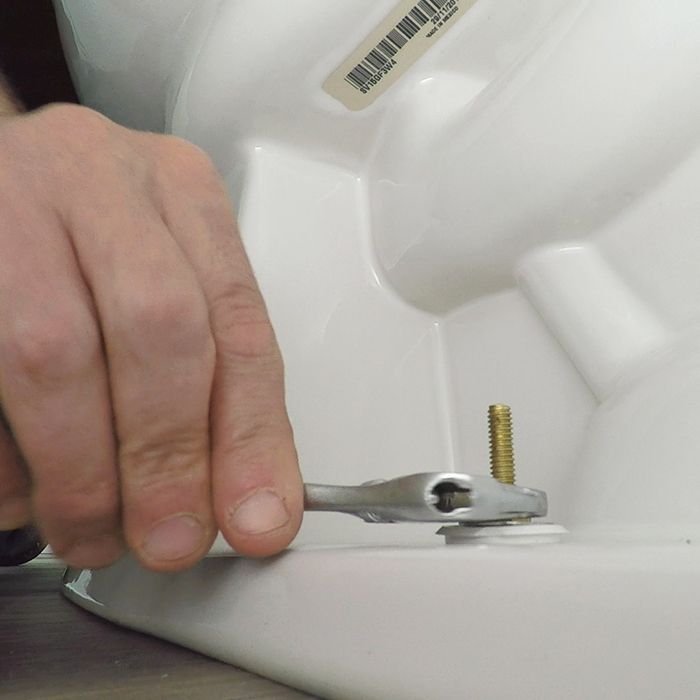
Step 5: Prep the Tank
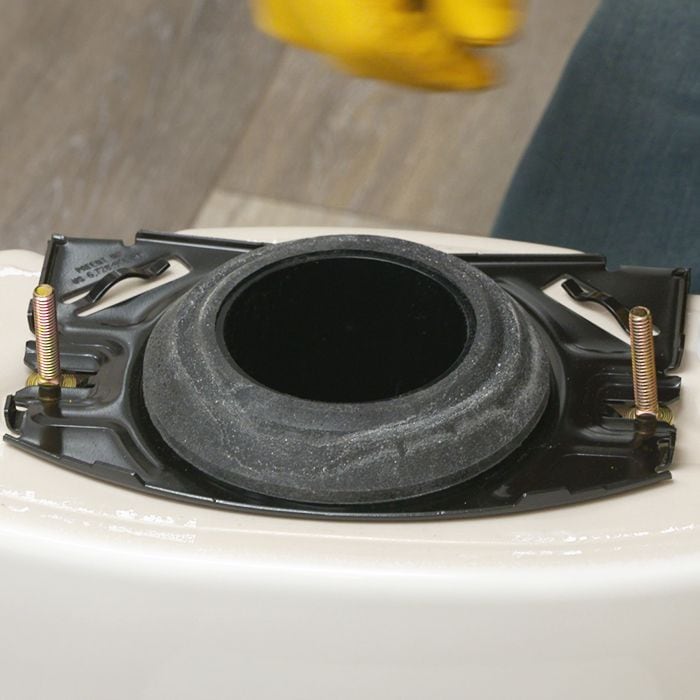
Typically, the valve assembly is already installed in the tank. Flip over the tank to install the bolts that'll hold it to the bowl. They should slip into slots on the tank. Then install the rubber gasket to the base.
Step 6: Secure the Tank

Set the tank in place on the bowl. Hand-tighten the nuts on the bolts. Then use a wrench to make them a little bit tighter, alternating as you go. Be careful not to overtighten the nuts to avoid cracking the toilet. Make sure the tank is level.
Step 7: Test for Leaks
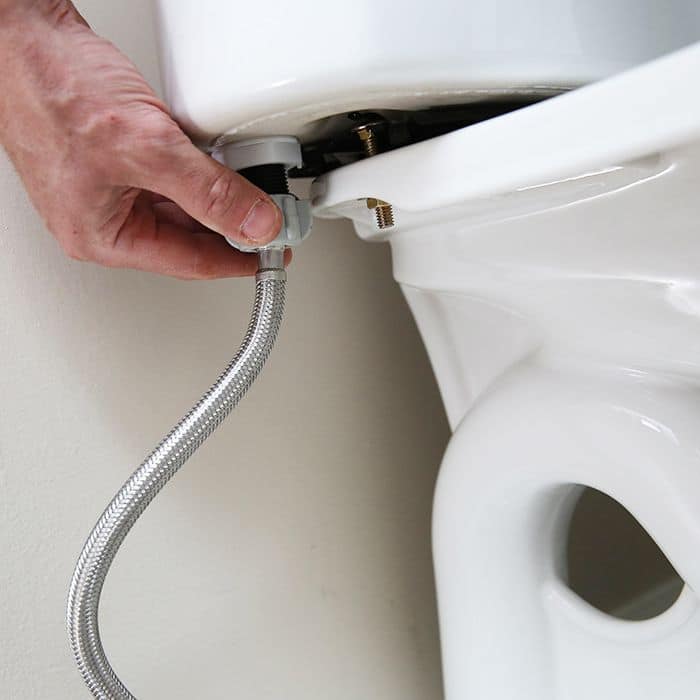
Hook up the water supply and slowly turn on the water. Check for leaks around the supply line and the gasket base. If it's leaking, tighten the bolts a little more. If it continues to leak, take the tank back off and be sure the gasket is seated correctly. Flush the toilet a few times and check around the base. If there's a leak around the base and the nuts are tight on the closet bolts, the wax ring isn’t creating a tight seal. You’ll need to remove the toilet and install a new wax ring. Be sure to evenly set the toilet in place without tilting it to avoid damaging the ring.
Step 8: Install the Seat
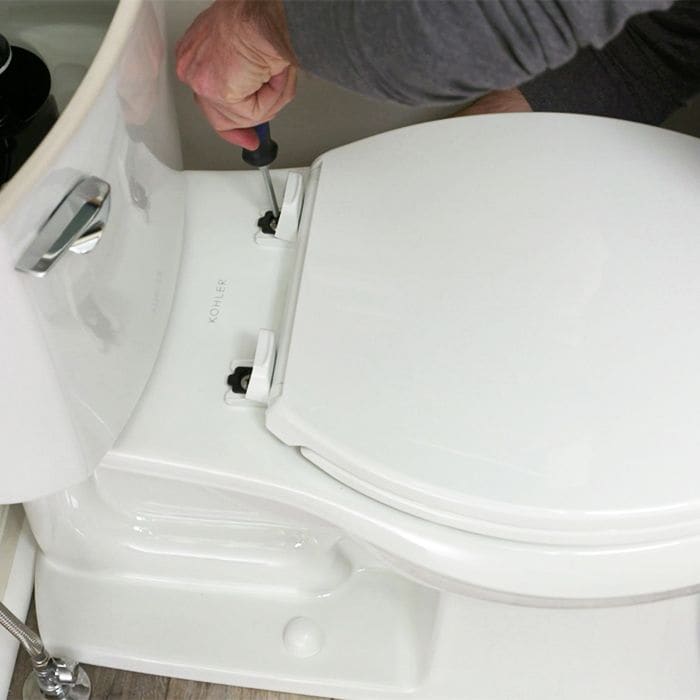
Install the toilet seat with a screwdriver and set the top on the tank.
If you don’t want to learn how to remove and reinstall a toilet, Lowe's has you covered with our toilet installation service.