Prices, promotions, styles, and availability may vary. Our local stores do not honor online pricing. Prices and availability of products and services are subject to change without notice. Errors will be corrected where discovered, and Lowe's reserves the right to revoke any stated offer and to correct any errors, inaccuracies or omissions including after an order has been submitted.
Carve out private space on your patio, and bring architectural dimension to your landscape with these versatile wood-and-aluminum screen panels.
Items may be Special Order in some stores. Product costs, availability, and item numbers may vary online or by market. Paint colors may vary slightly from those shown. Availability varies by market for lumber species and sizes.
Missing anything? Shop Online
Before building, you need to determine the overall length of the posts. This will be dictated by how deep you'll need to sink the posts -- possibly 5' in cold climates. A quick call to your building code official will give you guidance. Also, be sure to ask whether your project requires a building permit.
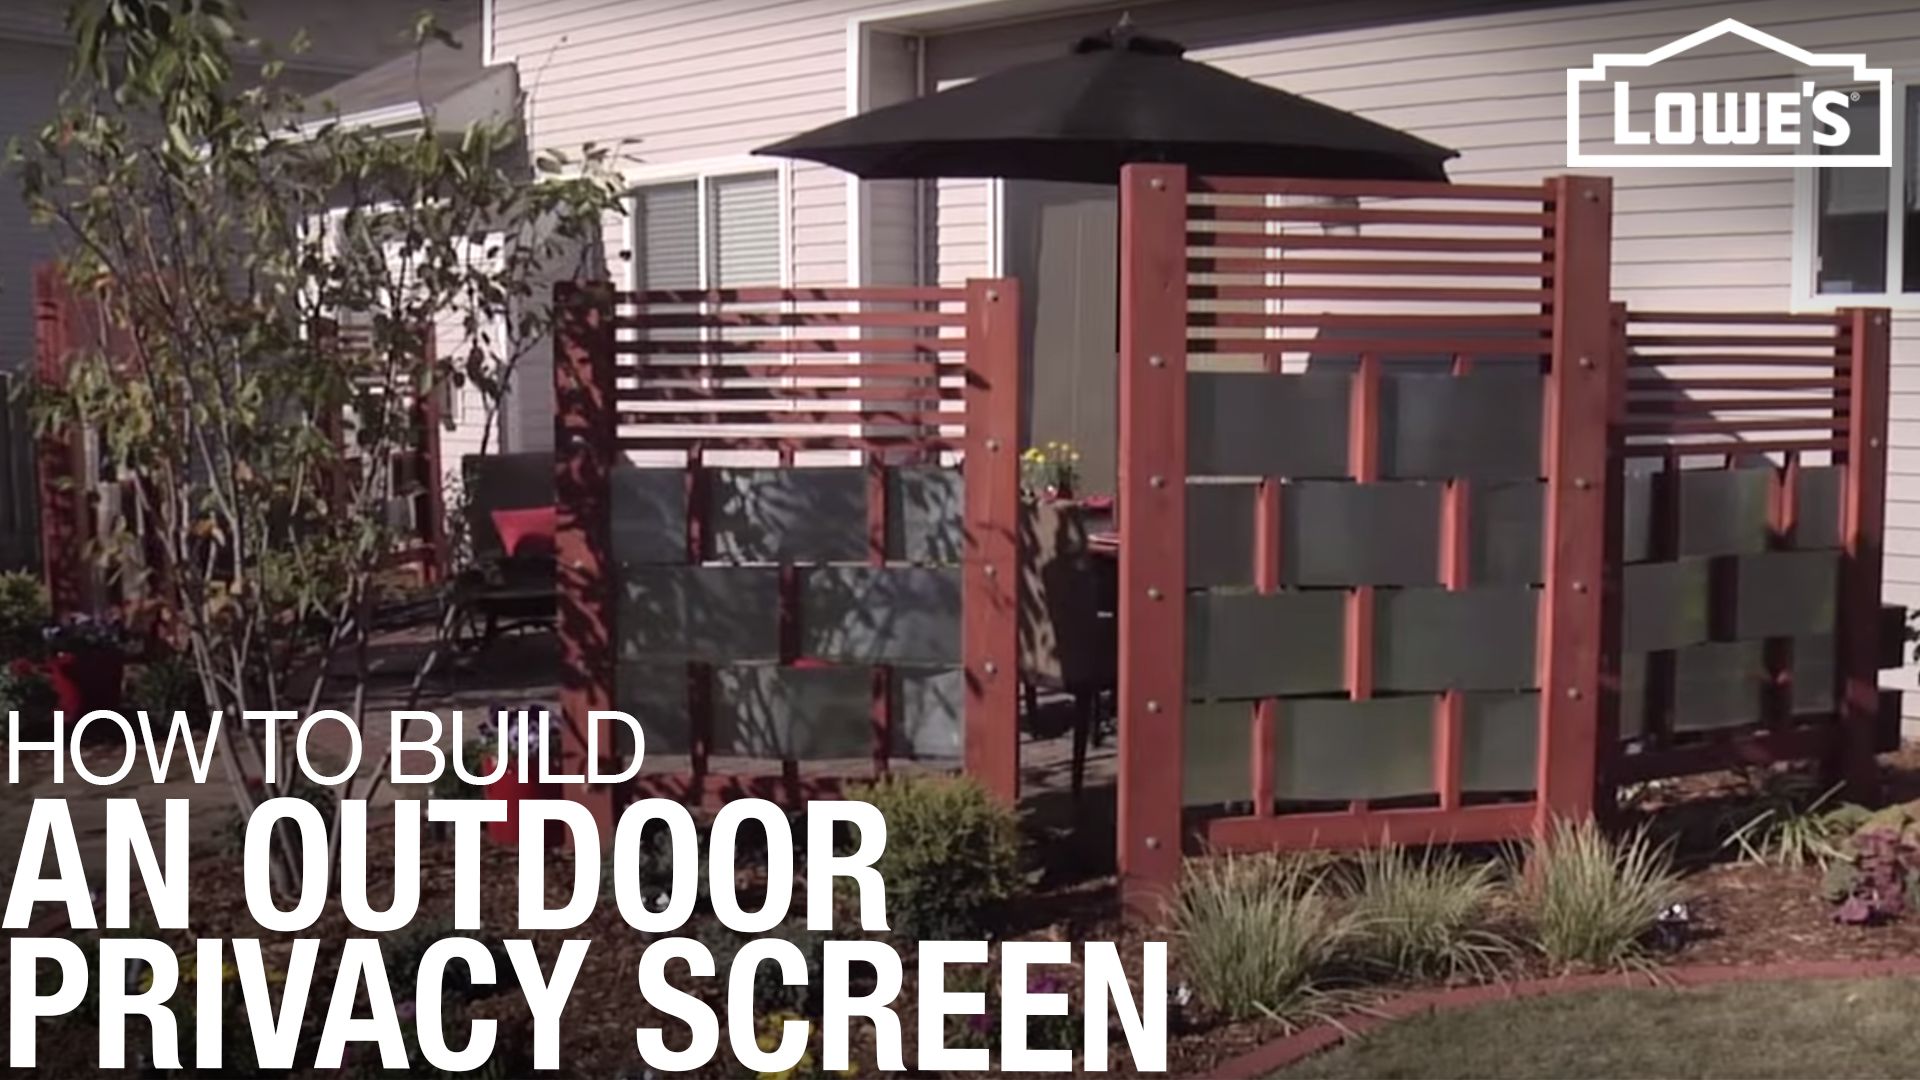
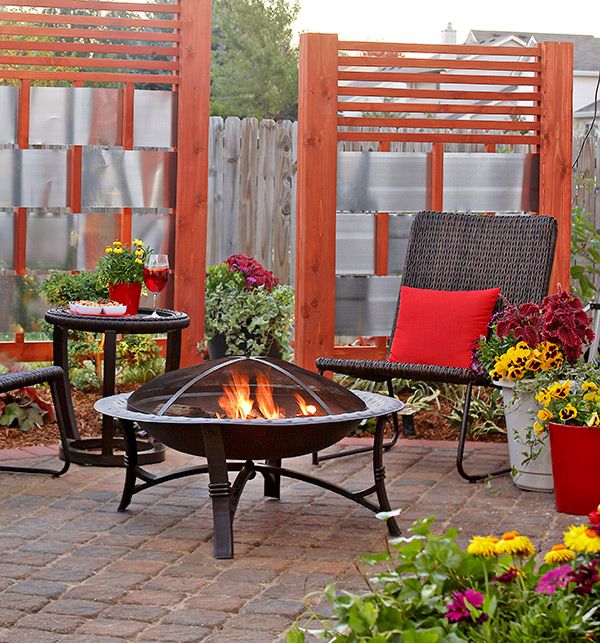
Privacy screens can be built in two heights. The example illustrated here stands 61" tall (plus depth below frost line). Add 11" to the overall length of the post components (D and R) and the vertical dividers (A) for the taller version.
Next, call your utility locating service to reveal buried utilities before you dig. It may take a few days for them to come to your property.
After determining how deep the holes will be, add that depth to the length of the post sticking out of the ground, as shown in the drawing.
A 12-volt combo kit with a drill driver and impact driver helps you assemble projects like this. Use the drill driver to bore the pilot holes and counterbores; use the impact driver for driving the fasteners. You won't need to change bits, and with two batteries going at one time, there's plenty of power to do the whole project without switching batteries.
Cut the upper rails, vertical dividers, and bottom rail to size for each screen. (See the Cutting List for dimensions.) Drill 2"-deep counterbores on one edge of the bottom rail where you'll attach the vertical dividers, as shown in the bottom rail detail.
To make a frame, screw the vertical dividers to the bottom rail and an upper rail with 3" screws, checking each joint with a framing square.
Drilling 3/8" counterbores requires a 90-degree drill bit angle. To make a simple bit guide, first cut a scrap 2x4 about 8 inches long and use your miter saw to remove 2" from one end. Glue the short scrap back on the end of the 6" scrap, only with a 2" offset that forms a notch. The corner of the notch gives you two 90-degree surfaces to hold your bit vertical while you start the hole. Then remove the guide and let the starter hole continue to guide the bit as you drill.
Lay out a pair of 2x6 posts 40" apart with the best face down (the front of the completed and installed screen). Glue and screw the post cores to the posts with the outside edges flush.
Place the assembled frame in the notches formed by the posts and post cores, 16" down from the top ends of the post; secure with screws.
Cut a couple of 1" spacers. Place the remaining upper rails in position using the spacers to create a 1" space between each rail. Drill 1/8" pilot holes and screw the upper rails in place.
Wearing gloves and goggles, cut strips of flashing long enough to thread between the dividers and screw to the post cores. Weave the flashing through the dividers in alternating patterns as shown. Then, use sheet metal screws to attach the flashing to the post cores. Leave a 1" gap between the rows.
Lay the remaining two posts on the post cores as shown. Drill 1/4" pilot holes and attach the posts with lag screws.
Mark the locations of two postholes 42-1/2" apart, making sure they are well away from buried utility lines. Using a post-hole digger, make your holes about 6" deeper than the length of the post you'll bury. Fill that extra with a 6" layer of gravel, adding it slowly as you test-fit your screen in the holes. Check the top for level, adding small amounts of gravel as needed.
Empty a bag of concrete mix into a wheelbarrow and add water until it reaches the consistency of creamy peanut butter. Shovel the concrete into the postholes and tap it down with a 2x2 scrap to force it into the gravel and eliminate any voids. As the concrete reaches the top of the holes, check that the posts are plum and the top remains level. To hold the screen in place while the concrete dries, first drive two scrap-wood stakes in the ground about 2' in front of the screen at both ends. Attach one end of a 2x4 stud to a stake with one nail and angle the other end until it touches the outside edge of the screen posts. Once the screen is plumb, clamp the 2x4 to the posts and repeat on the other end.
Finish. If you use cedar, seal it with stain to retain the color or leave it natural so it weathers to a rich silvery gray.
Weave. Wear gloves and use 10-inch-wide aluminum flashing strips to form the woven inserts for the panels.
Assemble. The 2×8-inch cedar uprights hide the screws connecting the lattice top pieces for a sleek look.